Quick burn-out of Liqcreate Wax Castable resin for jewelry applications
Professional caster Mr. Dombrun tested various quick burn-out cycles for their casting process and reported the best practices with Liqcreate Wax Castable resin. At Liqcreate we would like to express our gratitude to Mr. Dombrun for sharing the results of the quick burn-out tests.
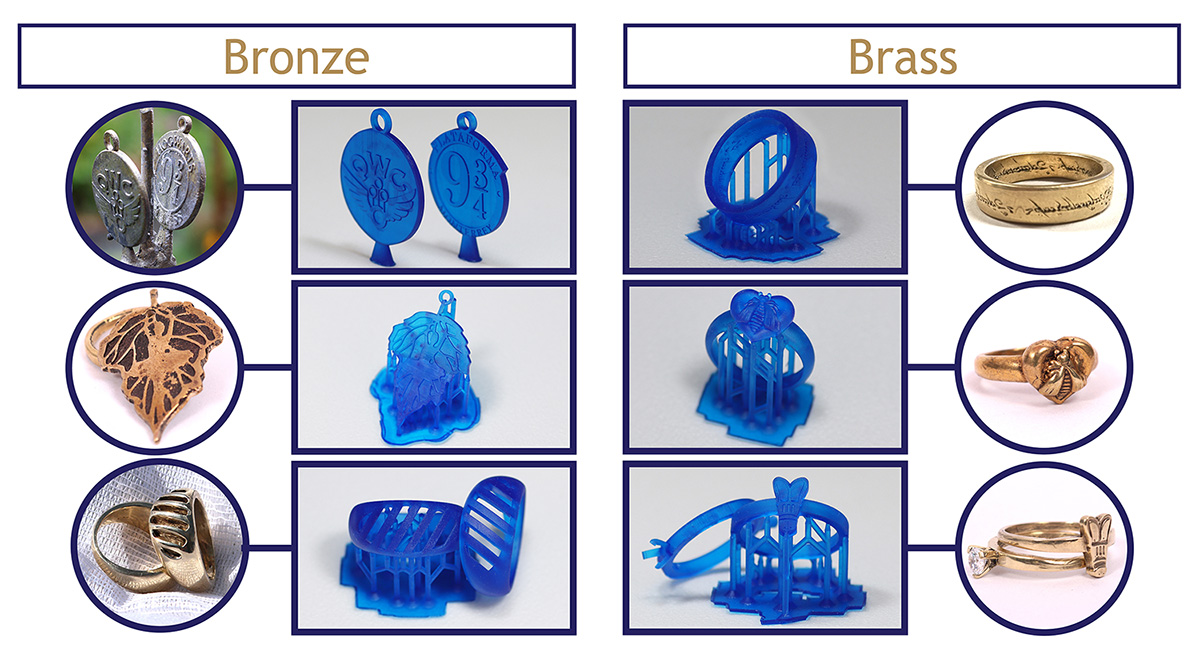
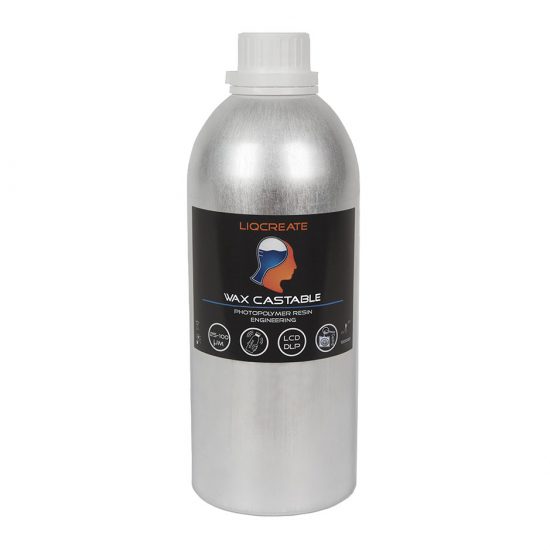
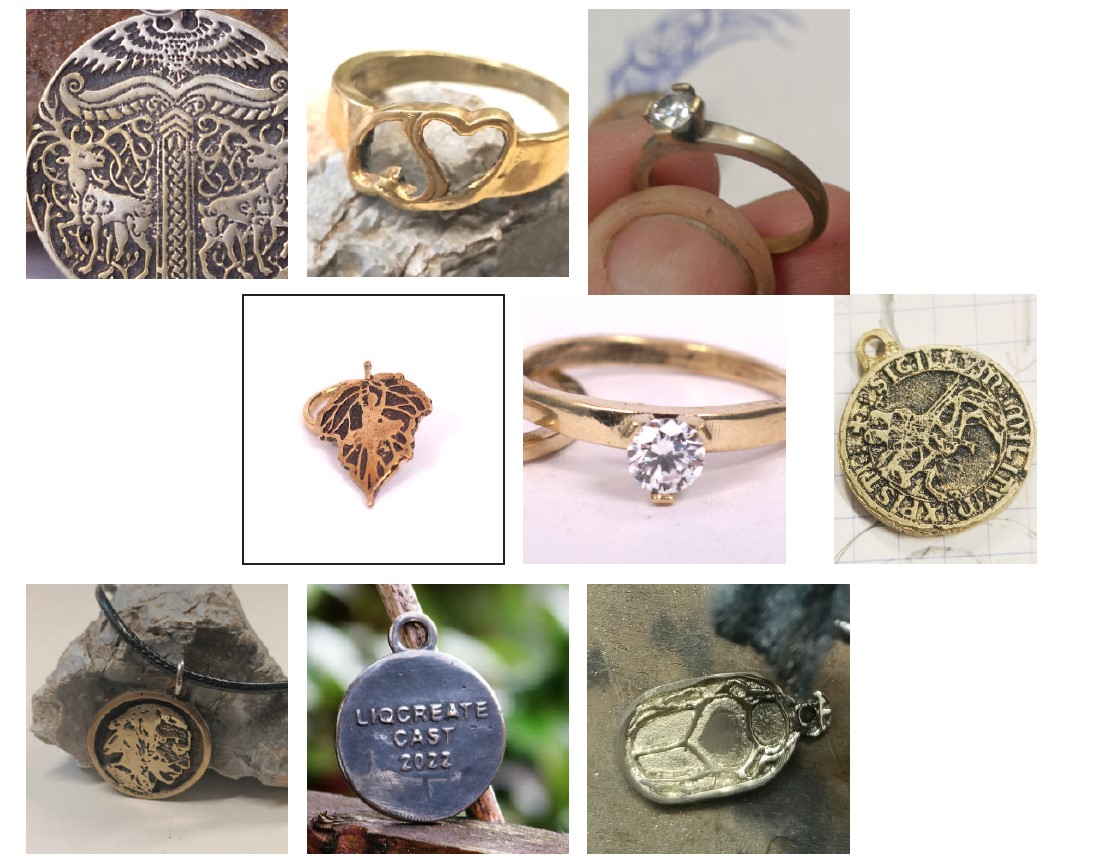
Image: different applications casted with Liqcreate Wax Castable resin, ideal for jewelry applications.
Quick casting process with plaster mixture for Wax Castable resin (without powder investment).
This process will allow you to achieve a good results after following all the steps. As an example: a Liqcreate key ring and a “RING for Madame” were printed. The models were created in 3D designing software and saved as an STL file for printing.
Left and right image: part with or without casting base. In the center rendering of the ring for Madame.
Preparation of Liqcreate Wax Castable resin for printing in Chitubox.
For small parts they achieved the best results when place them vertically on the build plate. This way you have a minimum of surface of the prints attached to supports, saving time in grinding the supports off later. The print time can be slightly higher this way as the print job is taller. For parts made without a casting path, provide a very thin raft (0.10 mm) in the support settings of Chitubox
and a move the part 5 mm in height to get long enough supports (software does this automatically). On the other hand, the parts printed with a casting path can be printed flat on the surface with the addition of a raft to increase print success. The supports are to be adjusted to the part to be printed. If choosing the standard medium support settings, all settings are right with exception of the raft.

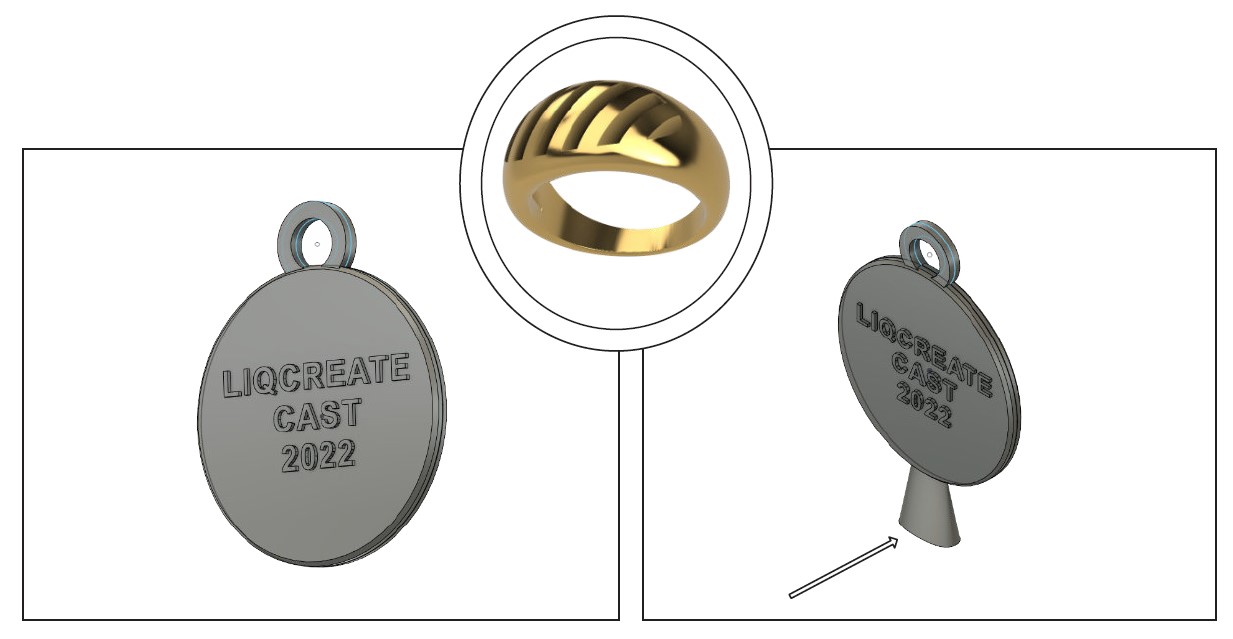
Finally, not all automatic supports are always positioned on the best spots. It is good to check visually if the part is supported enough. If that is not the case, then add some extra supports. You can do this by zooming in on each part in order to remove or add supports. Also check that it does not interfere with the critical detailed areas. If you avoid supports at corners and edges of the parts, these corners and edges are printed with more details as there is less interference from the supports.
Left image: the supports in red are too close to the edge and should to be eliminated to get less defects in this area. And right image after correction is made. (the thin plate causes the supports to stick more efficiency based on the printer).
3D-printing of Liqcreate Wax Castable resin on Phrozen Sonic Mini 4K
The final step before printing is to choose the right settings. For most printers there are pre-settings available on the Liqcreate website. The settings provided by Liqcreate for the Phrozen Sonic Mini 4K are used with success. Find here your Phrozen Sonic Mini 4K settings.
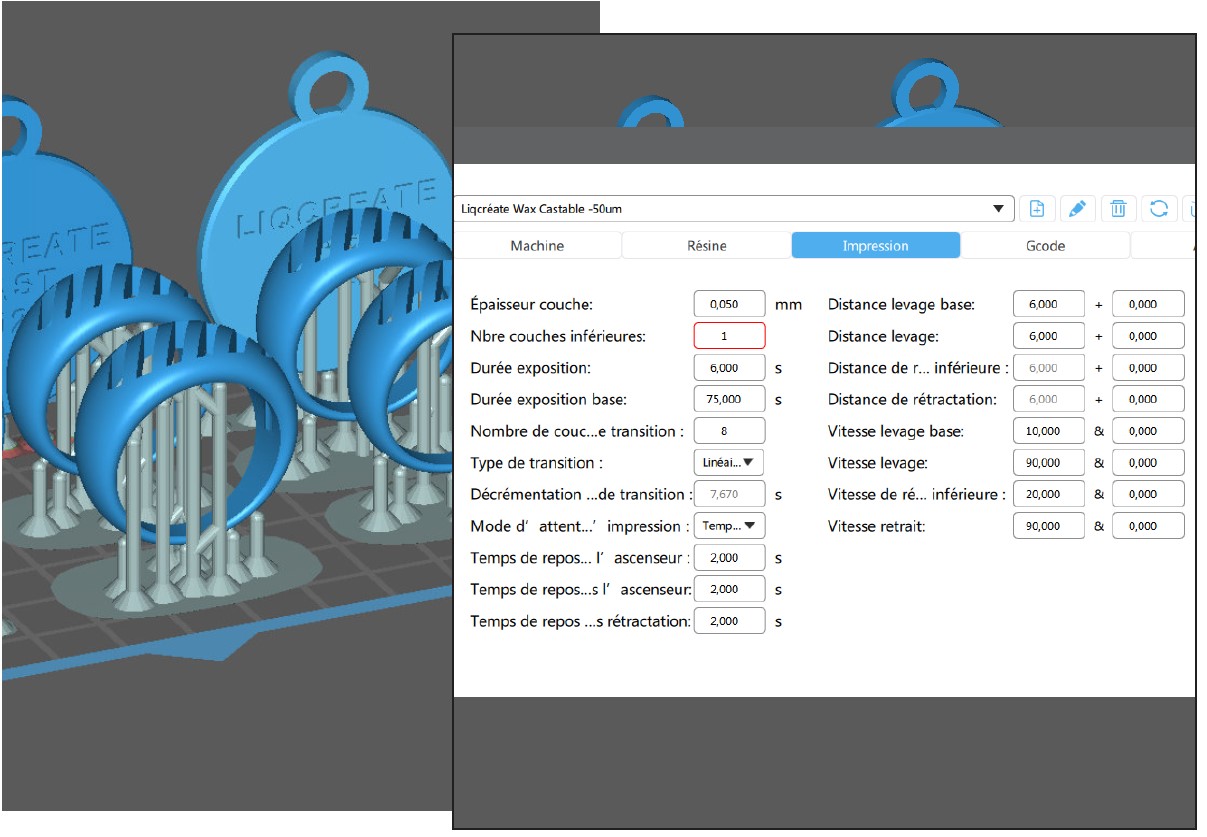
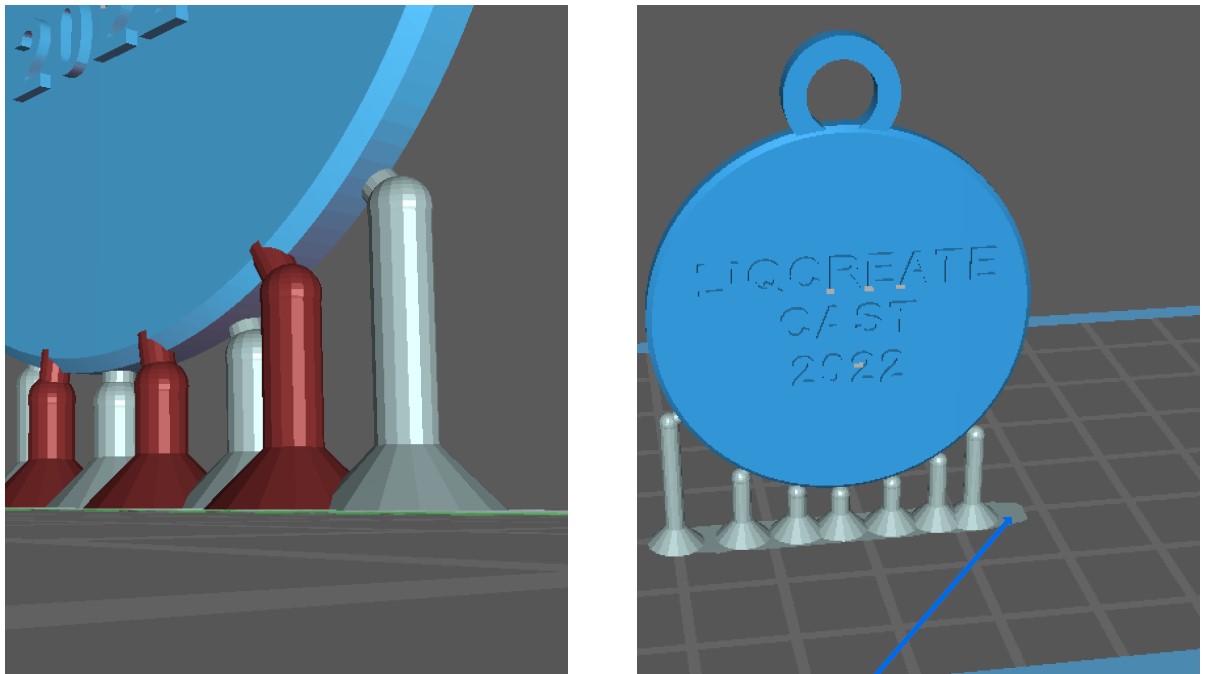
Left image preview prepared and supported files, and right print setting for Phrozen Sonic Mini 4K for Liqcreate Wax Castable resin.
3D-printing, washing and post-curing of Liqcreate Wax Castable resin
After printing, the parts should be washed and cured before preparing the casting process. A standard washing and curing protocol should be applied. This entails washing in IPA, ethanol or Liqcreate Resin Cleaner. For IPA/Ethanol 2 wash cycles should clean the parts nicely. The first wash can be 2 minutes under agitation or ultrasonic in used IPA/ethanol. The second wash is similar but a fresh ethanol/IPA should be used. Then place the parts on the bench to let the IPA/ethanol evaporate. Before post-curing, check if the parts are free of resin, dry and do not have any shiny spots. If that is not the case, repeat the second wash step again. Afterwards, UV post-cure the clean and dry Wax Castable part for 15 minutes at room temperature.

Image: Jewelry parts 3D-printed with wax-based resin Liqcreate Wax Castable on the Phrozen Sonic Mini 4K.
Preparation, plastering, burnout and casting.
Mr. Dombrun explains “Regarding the preparation in the casting cylinder, I do not opt for the specific products, expensive and burn-out time to burn for small productions. I simply use a basic molding plaster (Molda 3 bis). Additionally I add some ingredients (refractory cement or silica) to have a product that resists at least 750/800°C. My plaster being less porous, I plan at least a vent connected to the assembly. In the following pictures you can see how the parts are ‘pre-coated’ before placing in the casting cylinder.
The preparation of the plaster mixture was simple and used both for the coating as the bulk investment material. The ratio were 50/50 or 60/40% casting plaster/refractory cement mix. Or it could be improved further by using plaster/silica, in order to have a core resistant to casting. The base was mixed with water ratio 38/100, to be adjusted to have a consistency neither too thick or
too liquid. It should be mixed well and should be easy and smooth flow of material. After tapping the container with plaster lightly while pouring, it will remove the air bubbles. The hardening occurs very quickly. You can clean the cylinders after hardening and start de-waxing and casting the next day.
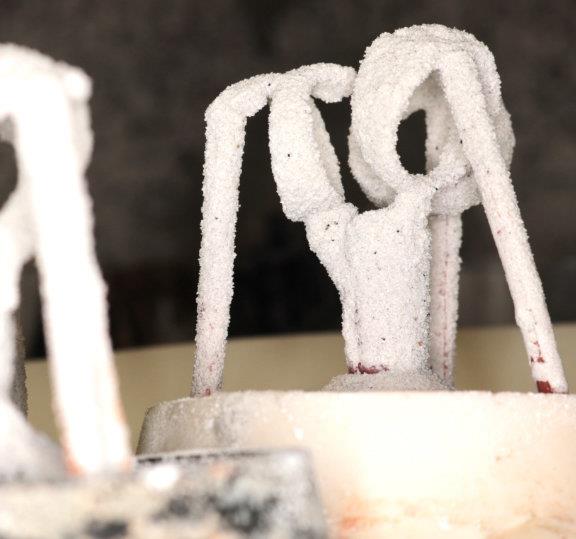
Image: The assembly of the elements on the casting axis with the vents and a coating made up of plaster and silica. Additional wetting of the solution or parts might be necessary to create a better adhesion of the plaster coating to the wax 3D-printed photopolymer part.
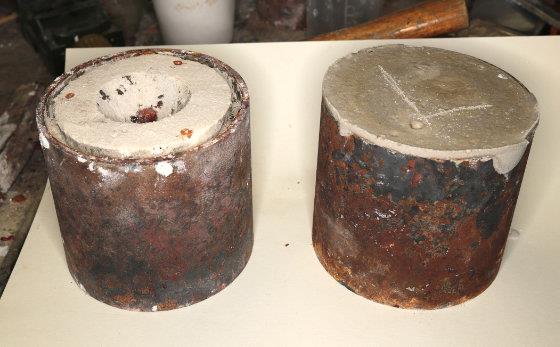
Image: photo of the casting of the cylinders without passing through a vacuum.
After opening the mold, the parts appear and need cleaning and polishing.
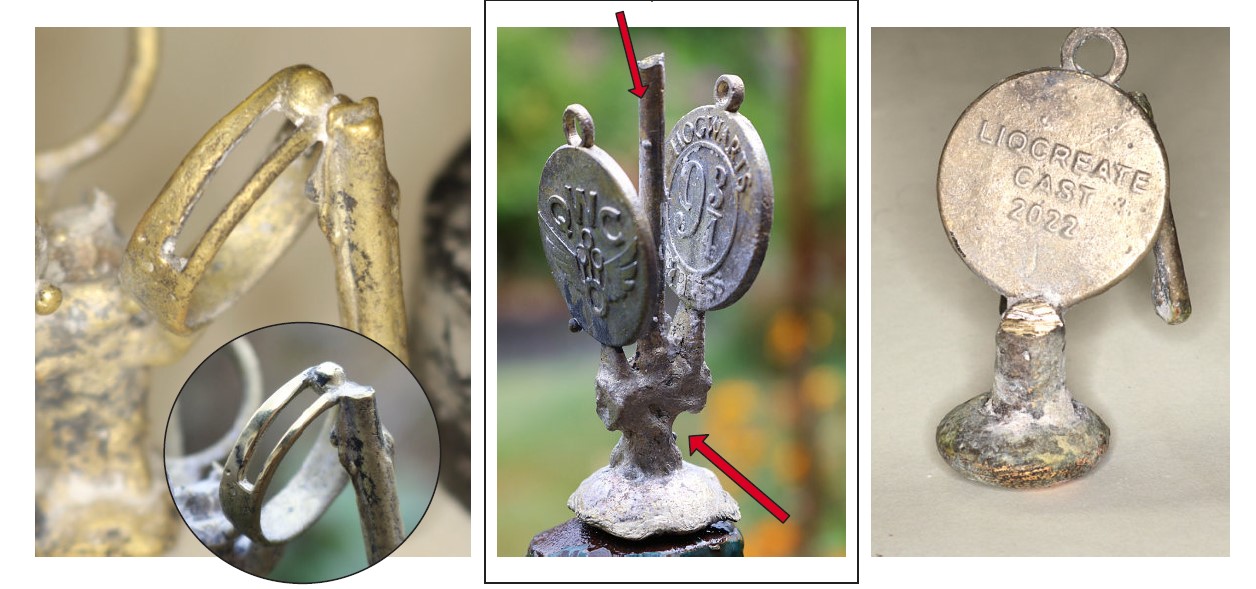
Images left and right are the raw result after quick casting. Photo in the center are the casting tip without vents for some parts.
The two-step casting process explained!
- Fill hole at the bottom and place the cylinder at 1 cm from the bottom of the oven. Heat up from room temperature to 350°C/380°C for one hour.
- You have time for the second temperature ramp (30 to 50 min), the way of wax casting has been evaluated and a little resin remains after the first temperature increase. This second ramp-up will complete the work. It will evaporate the water 100%, burn off the wax completely and bake the plaster enough for a casting of bronze, brass or silver. Caution for pewter or zamak, the cylinder must be cooled to 100 or 200°C otherwise the metal will react violently. Setting your oven for burn-out and don’t forget to flip the cylinder casting opening at the top. Hold at 732°C for 2 hours and then reduce in 30 minutes to 652° and hold for 1 hour, compensate for 10 minutes (serves only as a benchmark) and reduce to 650°C for 1 h and pour the metal. This is a process of 5 to 6 hours maximum with the first ramp-up. Arrived at the temperature of 500°C, there is no more water the plaster and the wax is burned completely.
Liqcreate Wax Castable resin, Metal casting stage
Melt the metal when the final temperature is reached and stabilized. When the metal is ready, take out the cylinder and cast directly. The plaster will last longer, so after 15 min of cooling, you can soak the cylinder with precaution and tap while turning the cylinder to make the mass fall in pieces. You will see your work appear, raw naturally. A simple and cost-effective process. Here are some examples of parts melted with this process:
Some final tips and tricks from the expert on Wax Castable resin and casting
After months of testing, these tips and tricks can help save other craftsmen save a lot of time. At first I did not understand why, with an oven, which could rise to 1050° in a short time, programmable, a good resin, a good investment powder and the appropriate burnout, I did not couldn’t get good results at first. Understand that I opt for small parts, the problem was the waiting time!
I left the casting temperature as usual and looked for a suitable firing mode and only then an “accessible” powder mixture for almost all types of metals that could withstand high temperatures and a burnout achieved in half a day. The trick of mixing silica and plaster allows quick ramp-up times and casting. In most ovens there is a temperature difference from the bottom to the top. I always decide to place the cylinder at the bottom, and then turn it over to equally warm-up the plaster. That is important as the combustion gases of your wax based resins must have the possibility to escape.
Wax Castable
Liqcreate Wax Castable is a wax-based resin, perfect for manufacturing jewelry, dental and industrial parts using the direct investment casting method. Liqcreate Wax Castable is easy to use on open LCD, MSLA and DLP based 3D-printers in the range of 385 – 420nm. 3D-printed parts from this material captures intricate features and show crisp details. This wax-based material offers smooth surfaces with clean burnout for a reliable casting process. Create custom made elegant organic geometries according to your preferences with excellent casting for positive and negative engravings.
Key benefits |
3D-Printer compatibility |
| · High precision | · Asiga Max and Pro 4K |
| · Wax based | · Phrozen3D series |
| · Clean & ash-free burnout | · Elegoo & Anycubic series |
| · Excellent casting of engravings | · And many more |