When printing parts on a LCD or DLP based printers, the STL file is converted into slices. These slices contain pixels which can be on or off. A white pixel will get UV-exposure and the resin cures there locally. While a black pixel does not get UV-exposure and will not cure. This way your STL file is converted to a pixelated image when using LCD and DLP technology. If your printed part is pixelated in all directions, it means your exposure time and other settings are spot-on. But in some applications this pixelated part is unwanted. For instance for jewelry applications. When successfully casting a part, it will copy all the surface details in the metal part, so also the pixels. In most printers nowadays there are options to use technology called Anti-Aliasing (AA) and image blur or pixel blur to manipulate the surface of a printed part and to smoothen these pixel lines. In this previous article we already tested it with Liqcreate Clear Impact on the Elegoo Mars 3. In this article you can find our experiments with Liqcreate Wax Castable on the Elegoo Mars 3 (405nm LCD printer) and the Anycubic Photon D2 (405nm DLP printer). As example we used the open source hardware ring you can find on thingiverse.
Why do I see pixels in my 3D-printed part?
As explained in the introduction, the (often smooth) STL file is converted in a printable format. For DLP and LCD-based printers this format is based on the pixels in the imaging unit. So the LCD display or DLP-module will expose in pixels. When your parameters are spot-on, you will see pixels in your printed part in every direction. It can look like this:
![]()
How do the Anti-Aliasing (AA) and blur settings work?
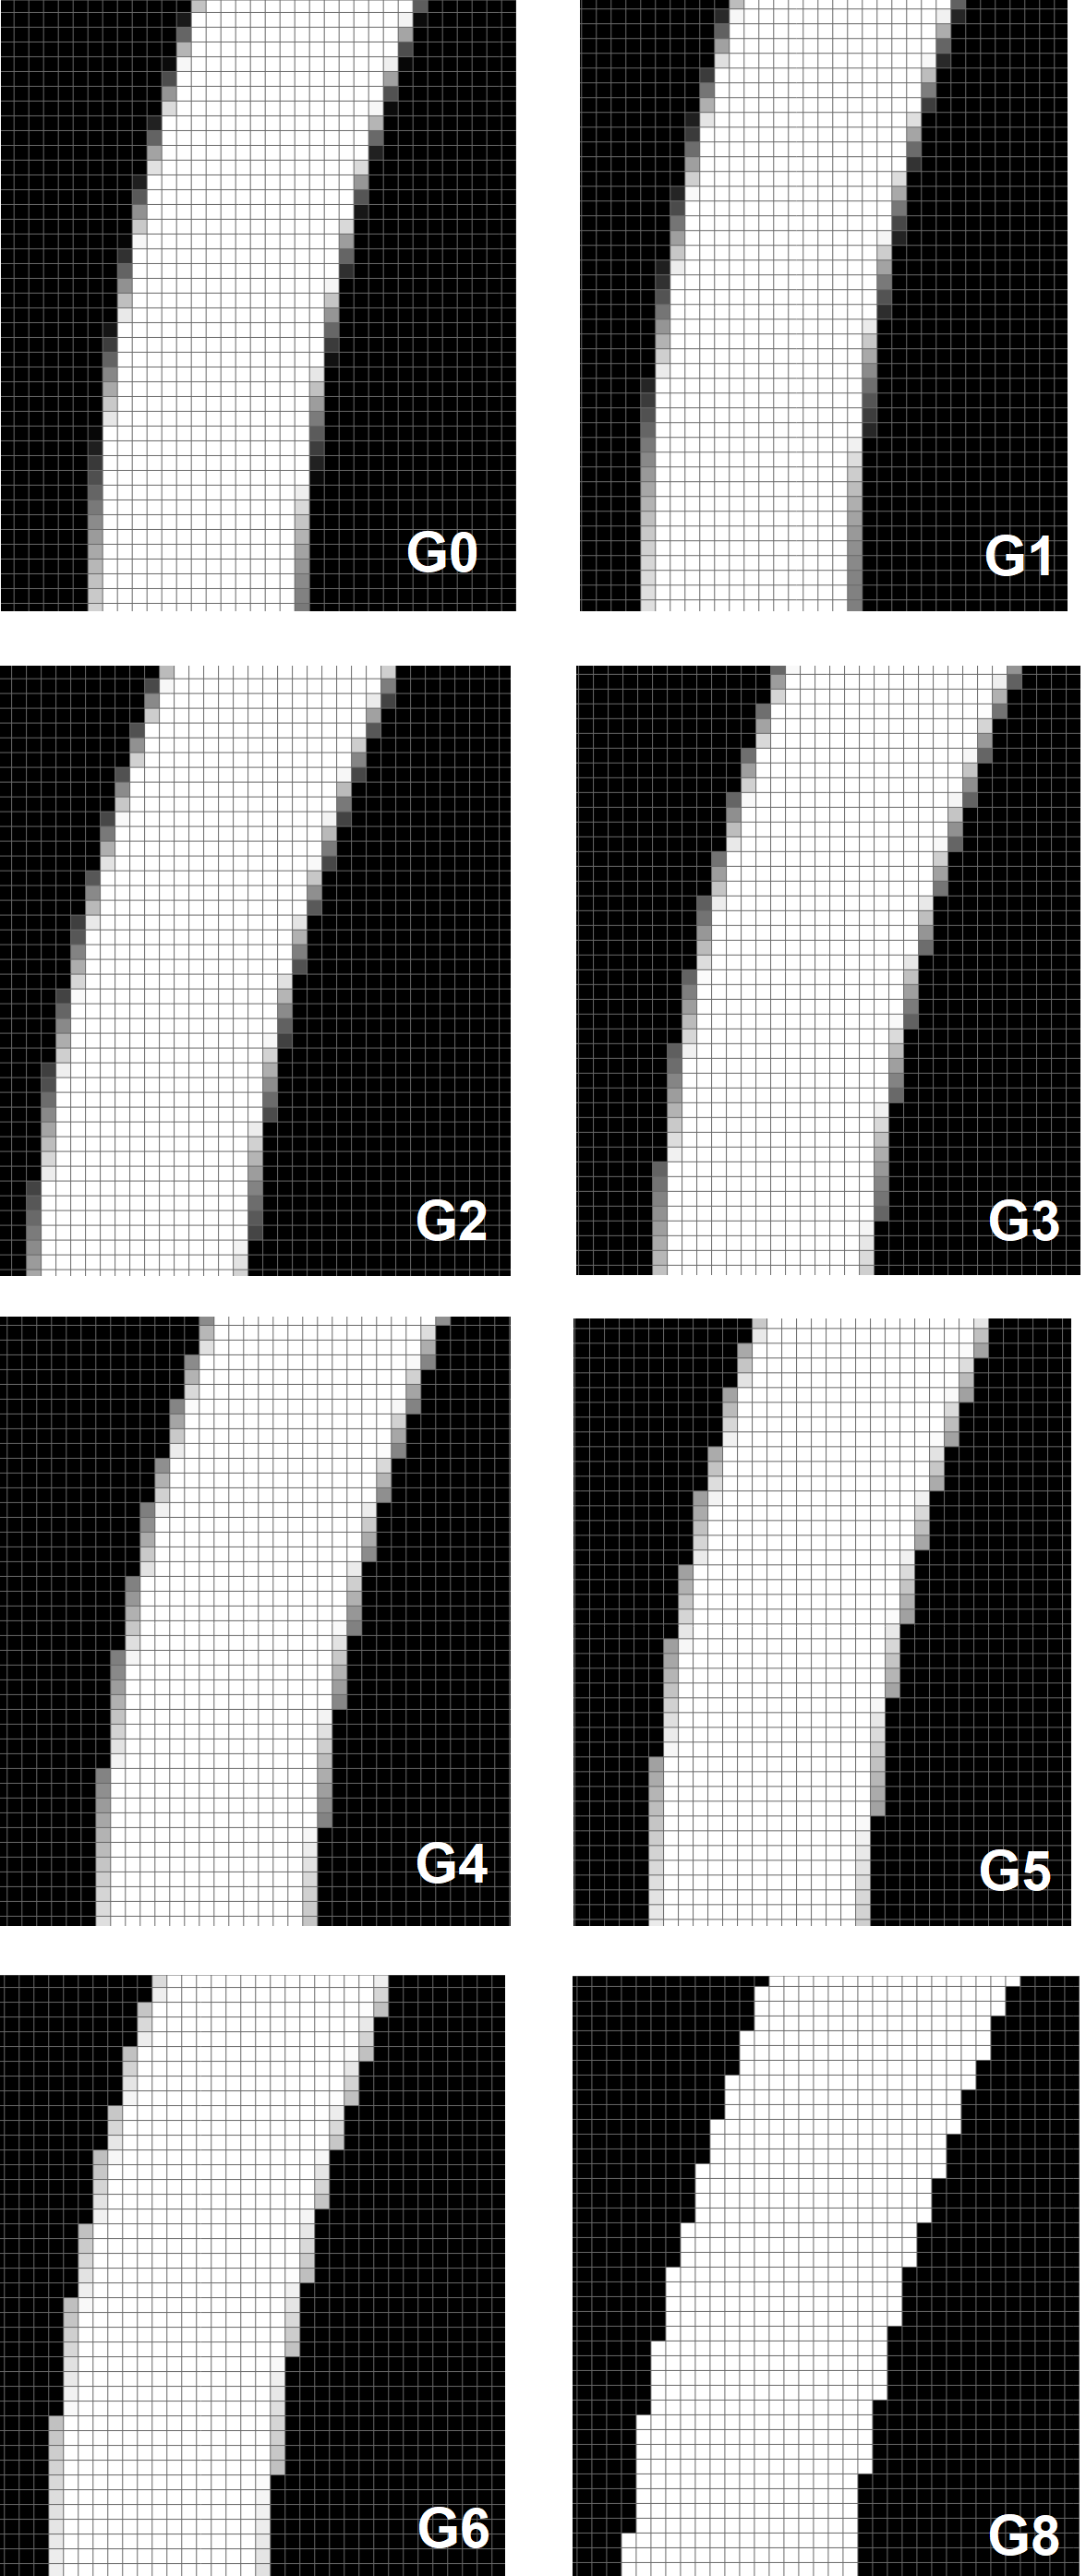
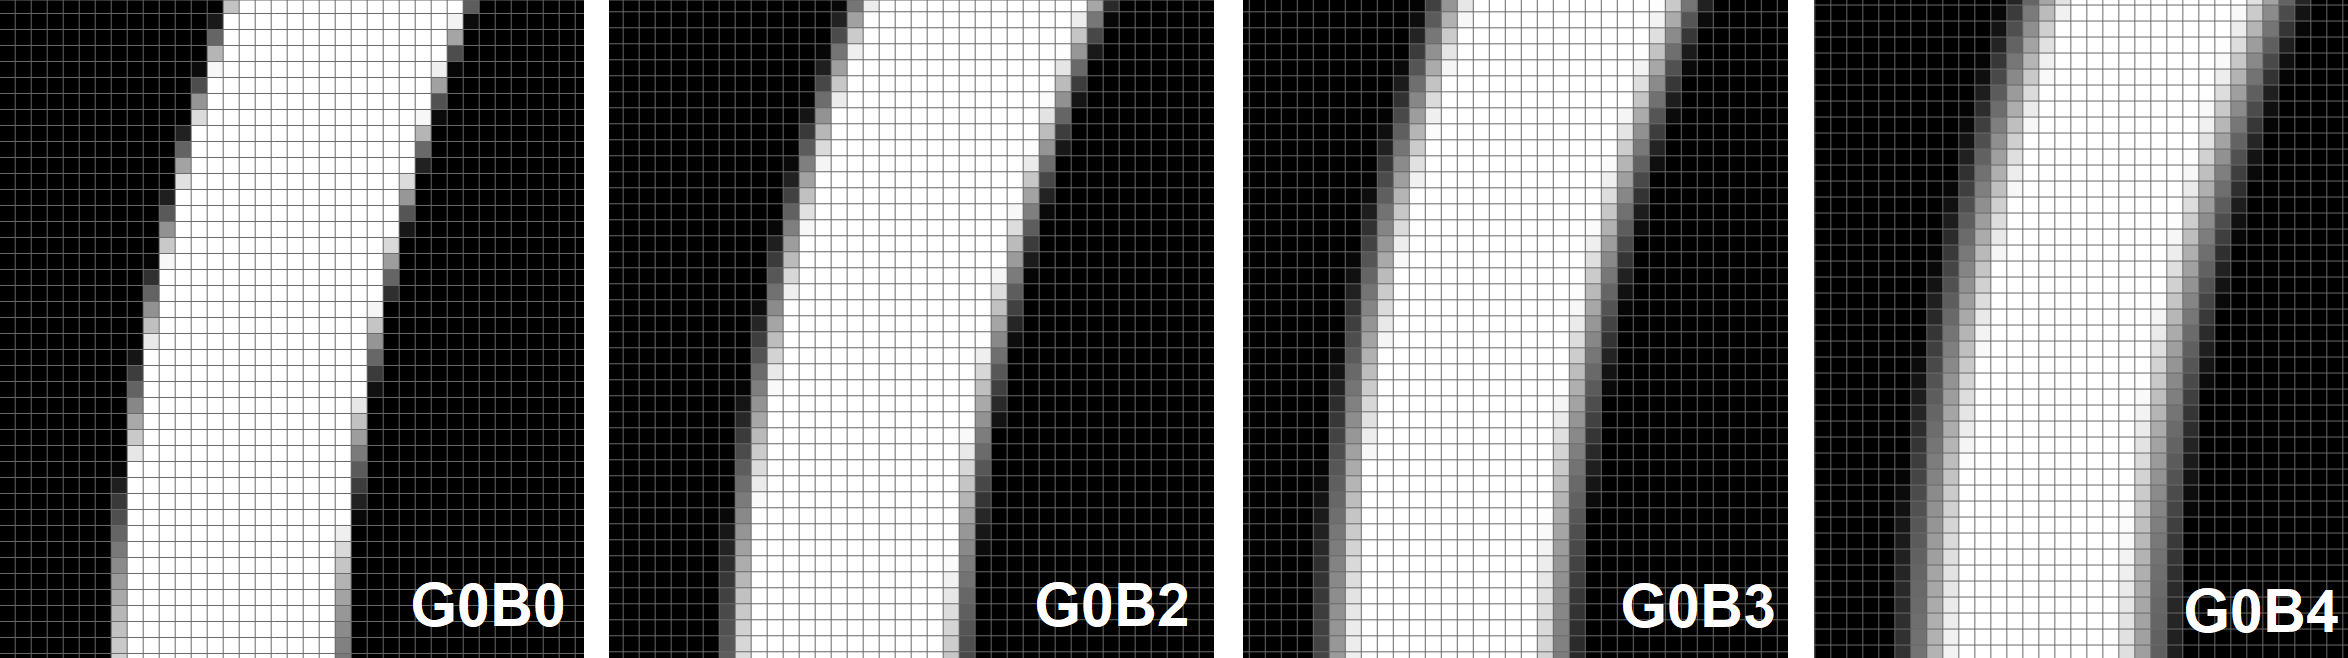
This pixilated surface can be manipulated with Anti-Aliasing (Greyscale) and blur settings when using it right. In the image below you can see what grayscale does when the Anti-Aliasing option is selected. G0 means Gray level 0 (this is the lowest gray level) and a higher number means a higher Grey level. In the images it is visible that the outer edges gets an extra layers of gray pixels. Until Gray level 2 the amount of gray shades increases, while from Gray level 3 and up only the intensity of the pixel is more bright. All the pixels are black and white again at Grey level 8, which is quite useless. In all cases the blur function is turned off.
Let’s see how the blur function works. In this example the anti-aliasing (AA) option is enabled on Grey level 0 and the blur function is changed from Blur off on the left to Blur 4 on the right.
As seen in the previous image, the grey level function will manipulate the gray scale of the outer pixel only. The blur function will manipulate how many outer layers will be influenced by gray scale. It should be noted that a in high level of blur, the grayscale starts to render inward at the same time, resulting in the original white pixels in the central area becoming gray. This may cause insufficient light power and may lead to problems with curing. When selecting image blur level, be careful when selecting higher levels.
Anti-Aliasing (AA) and blur settings in the Elegoo Mars 3
AA and blur settings are available for almost any printer when you are using the latest version of Chitubox slicing software. In the advanced setting you have the possibility to switch Anti-aliasing on or off and can choose a grey level between 0 and 8. Furthermore there is the setting to switch image blur on or off and choose a blur level between 2 and 8. All these options counted together you have 73 Anti-aliasing (AA) & Blur options!
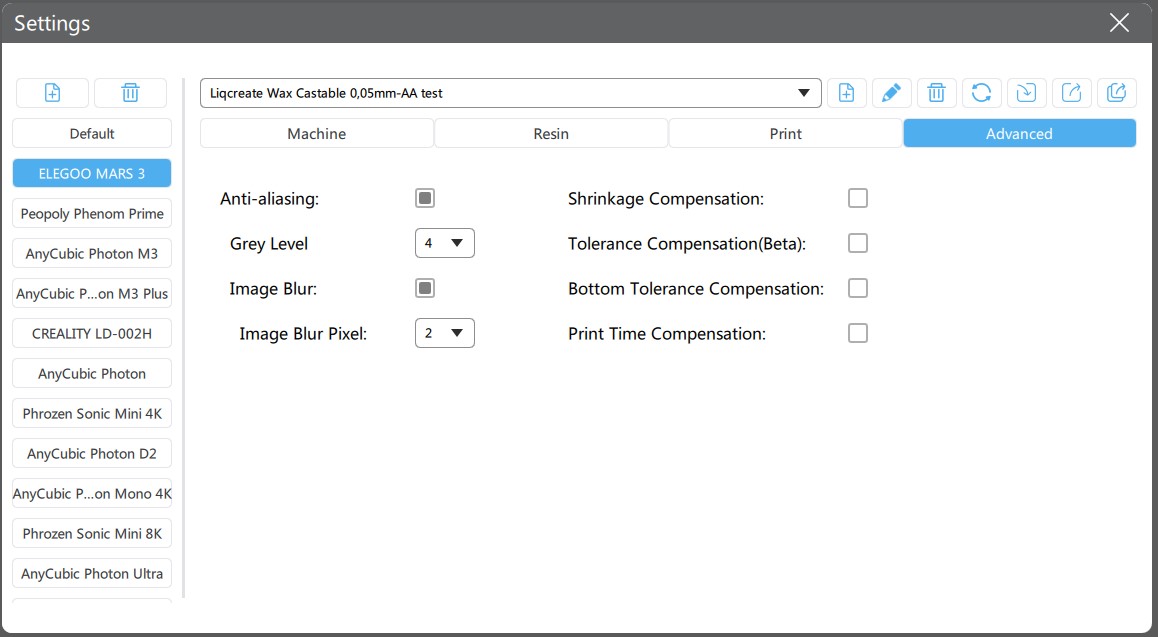
Image: Anti-aliasing and blur software options in Chitubox slicer under the advanced tab for the Elegoo Mars 3 resin 3D-printer.
To make life a bit easier, we tested the most common ones in the chapter below.
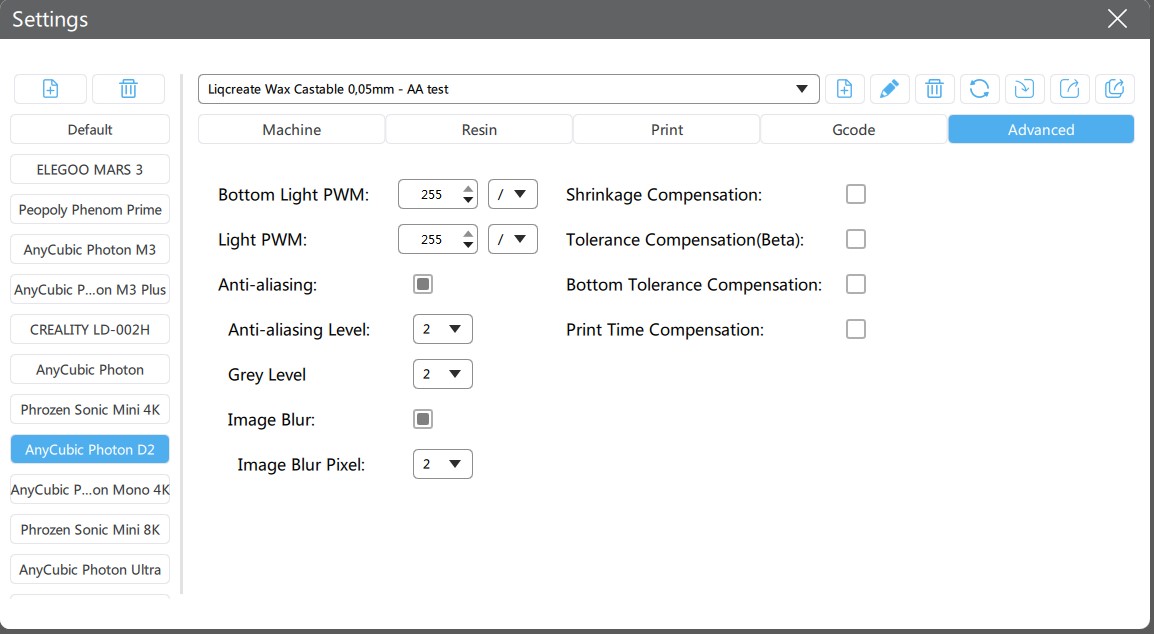
Anti-Aliasing (AA) and blur settings in the Anycubic Photon D2.
For the Anycubic Ultra D2 the settings are even more extreme. Next to anti-aliasing level we can also set grey level. As we do not exactly know what this additional function does, we hope to find out while testing. This brings the total Anti-Aliasing and Blur settings options to 217!
The good thing is, in our last article on AA and Blur with Clear Impact resin on the Mars 3 we found that a lot of settings are not worth testing. This was our conclusion from that test:
“AA and Blur can help reduce the pixilation of resin 3D-printed parts. It should be investigated per resin and application what the best setting is. The best accuracy is obtained by switching Anti-Aliasing (AA) and blur off, but pixels will be visible when the resin is dialed in properly.
If it is needed to reduce the pixilation, it is always good to stay at a Grey level between 0 and 4 and either switch blur off, or use at maximum level 2 blur. The surface will have less defined pixels when using Anti-Aliasing and blur, and some other minor defects like stripes of a fuzzy surface can appear.
Looking at our results, were we used Liqcreate Clear Impact resin on an Elegoo Mars 3 and Chitubox as a slicer. We found that the best results were with an Anti-Aliasing (Greyscale) level of 3 in combination with Blur level 2. Some minor detailed (at pixel level) are washed out together with the pixels. If this is acceptable for your application, then it is an option to work with Anti-Aliasing and Blur settings.”
This means we can limit our testing to a greyscale level of ≤4 and a blur level of ≤2. Let’s print some parts now!
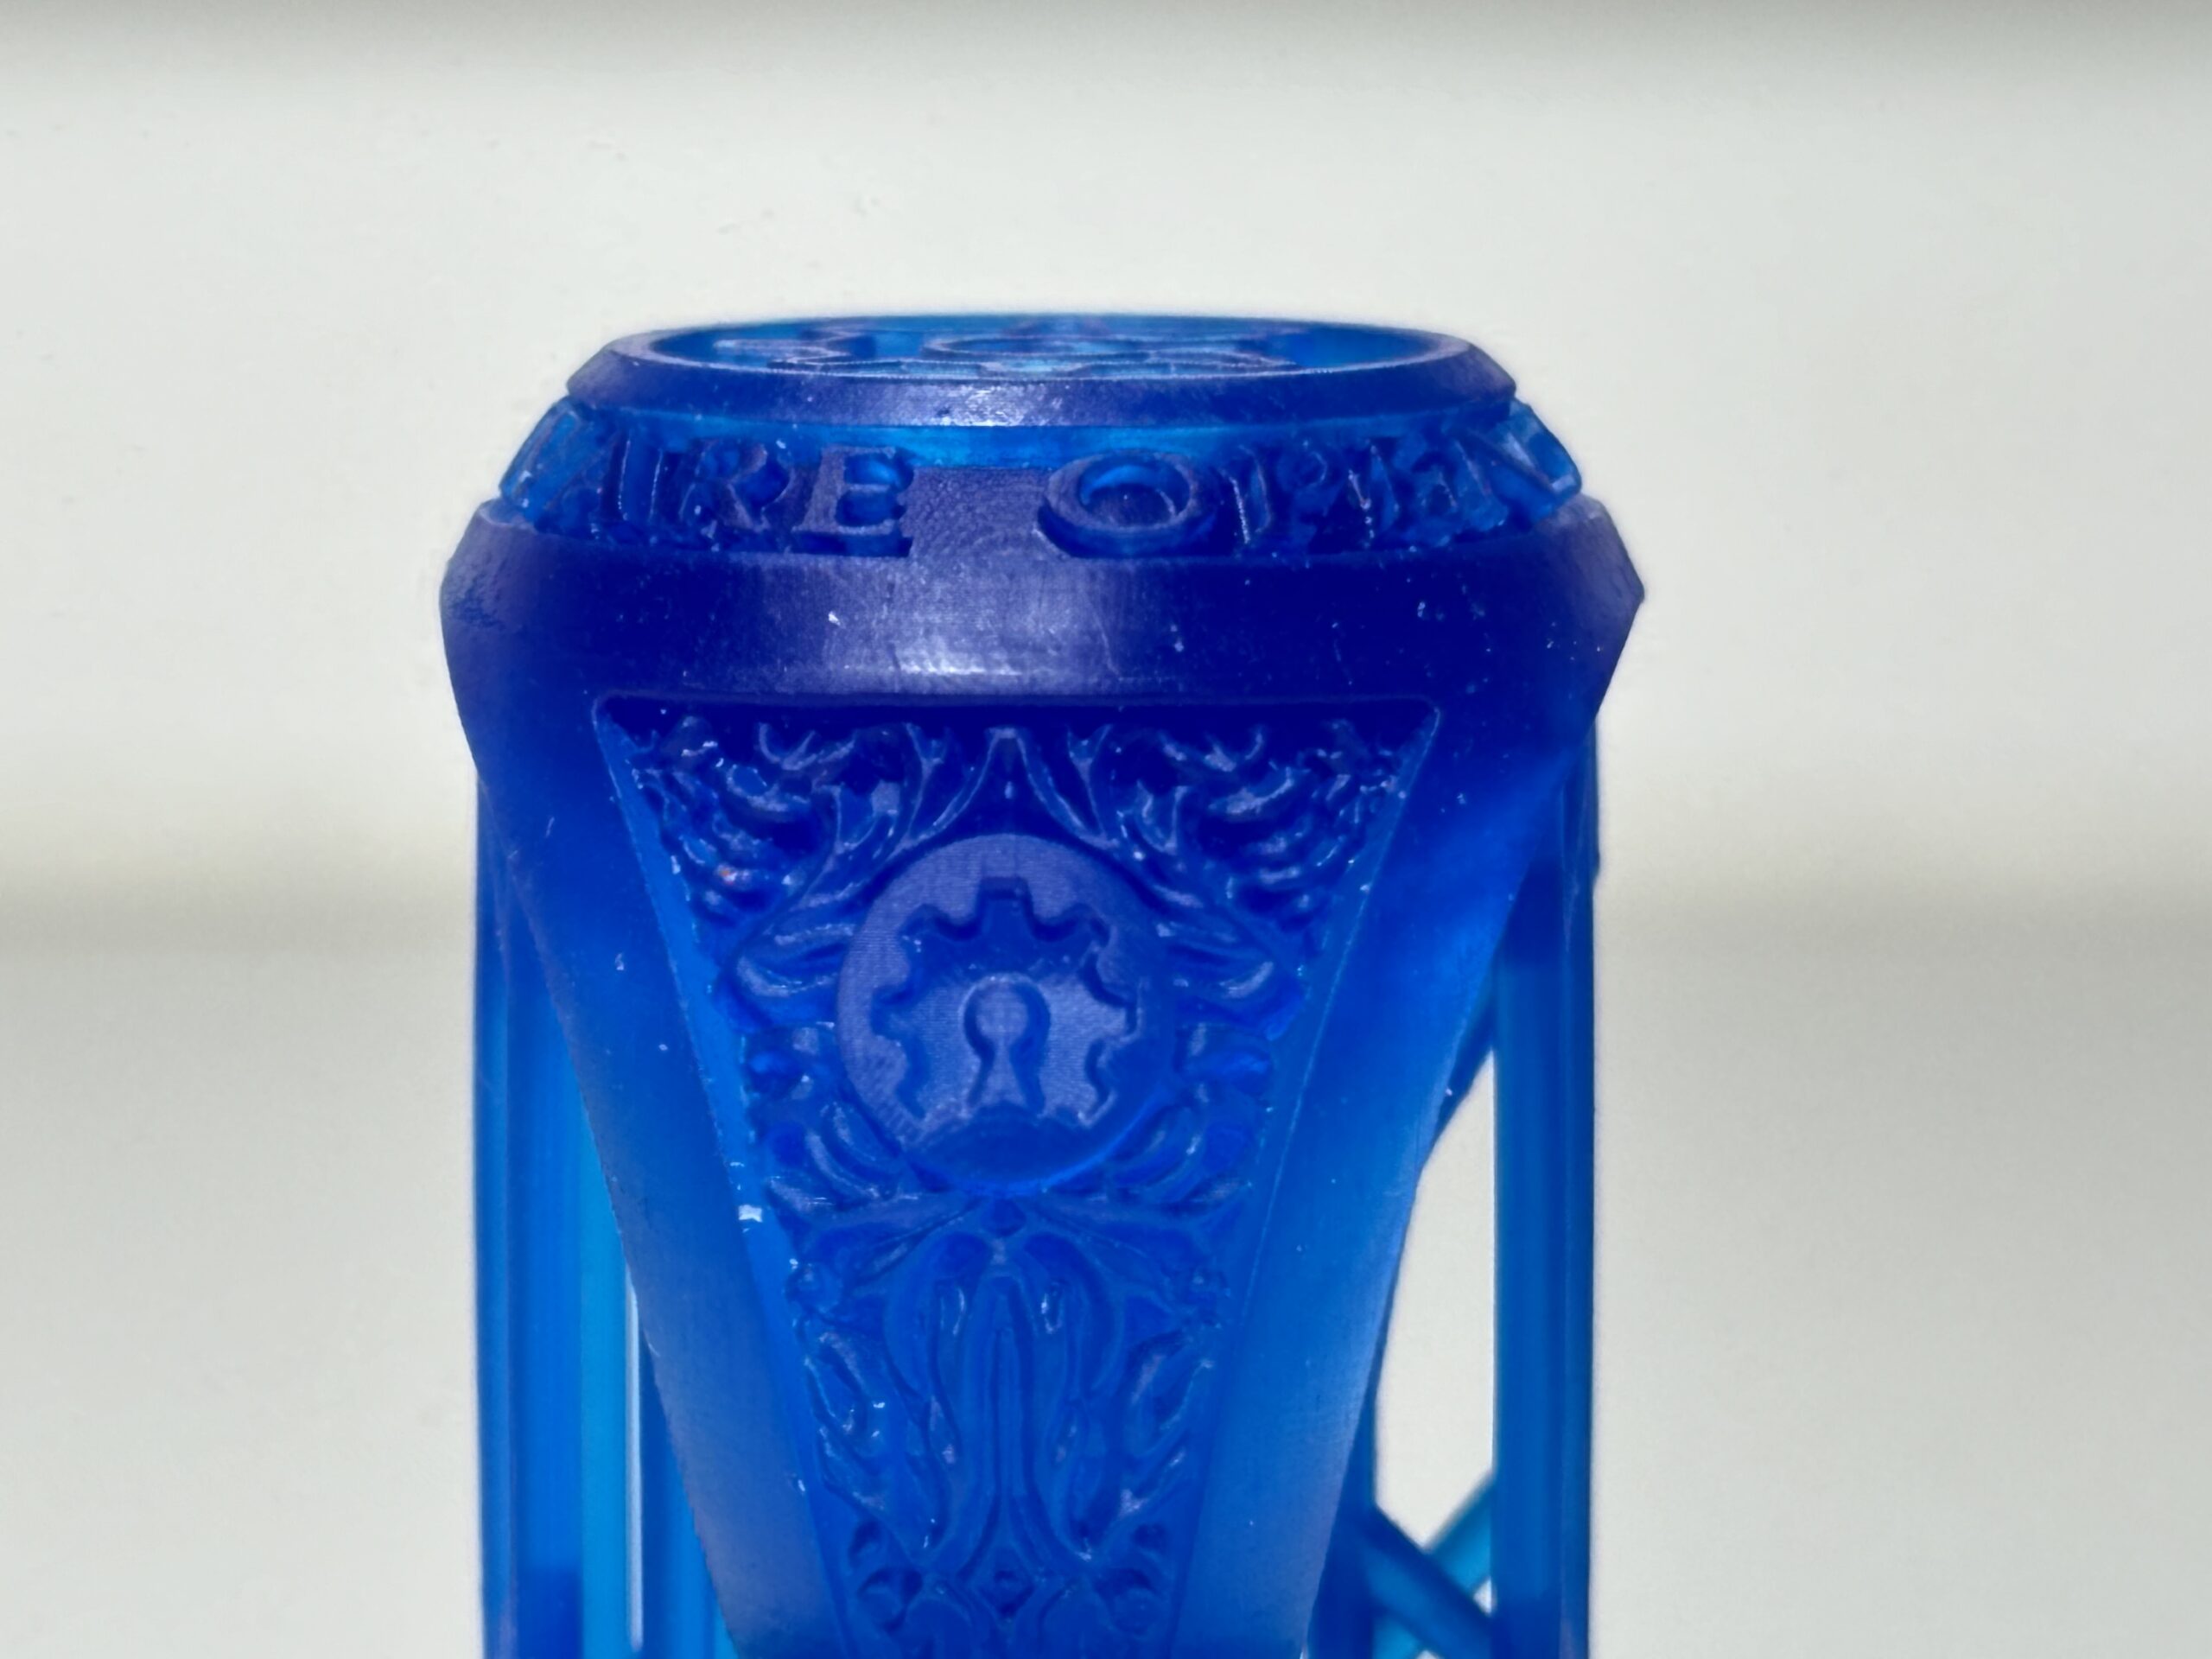
Results of Anti-Aliasing / Greyscale and blur on Liqcreate Wax Castable resin for Jewelry on the Elegoo Mars 3.
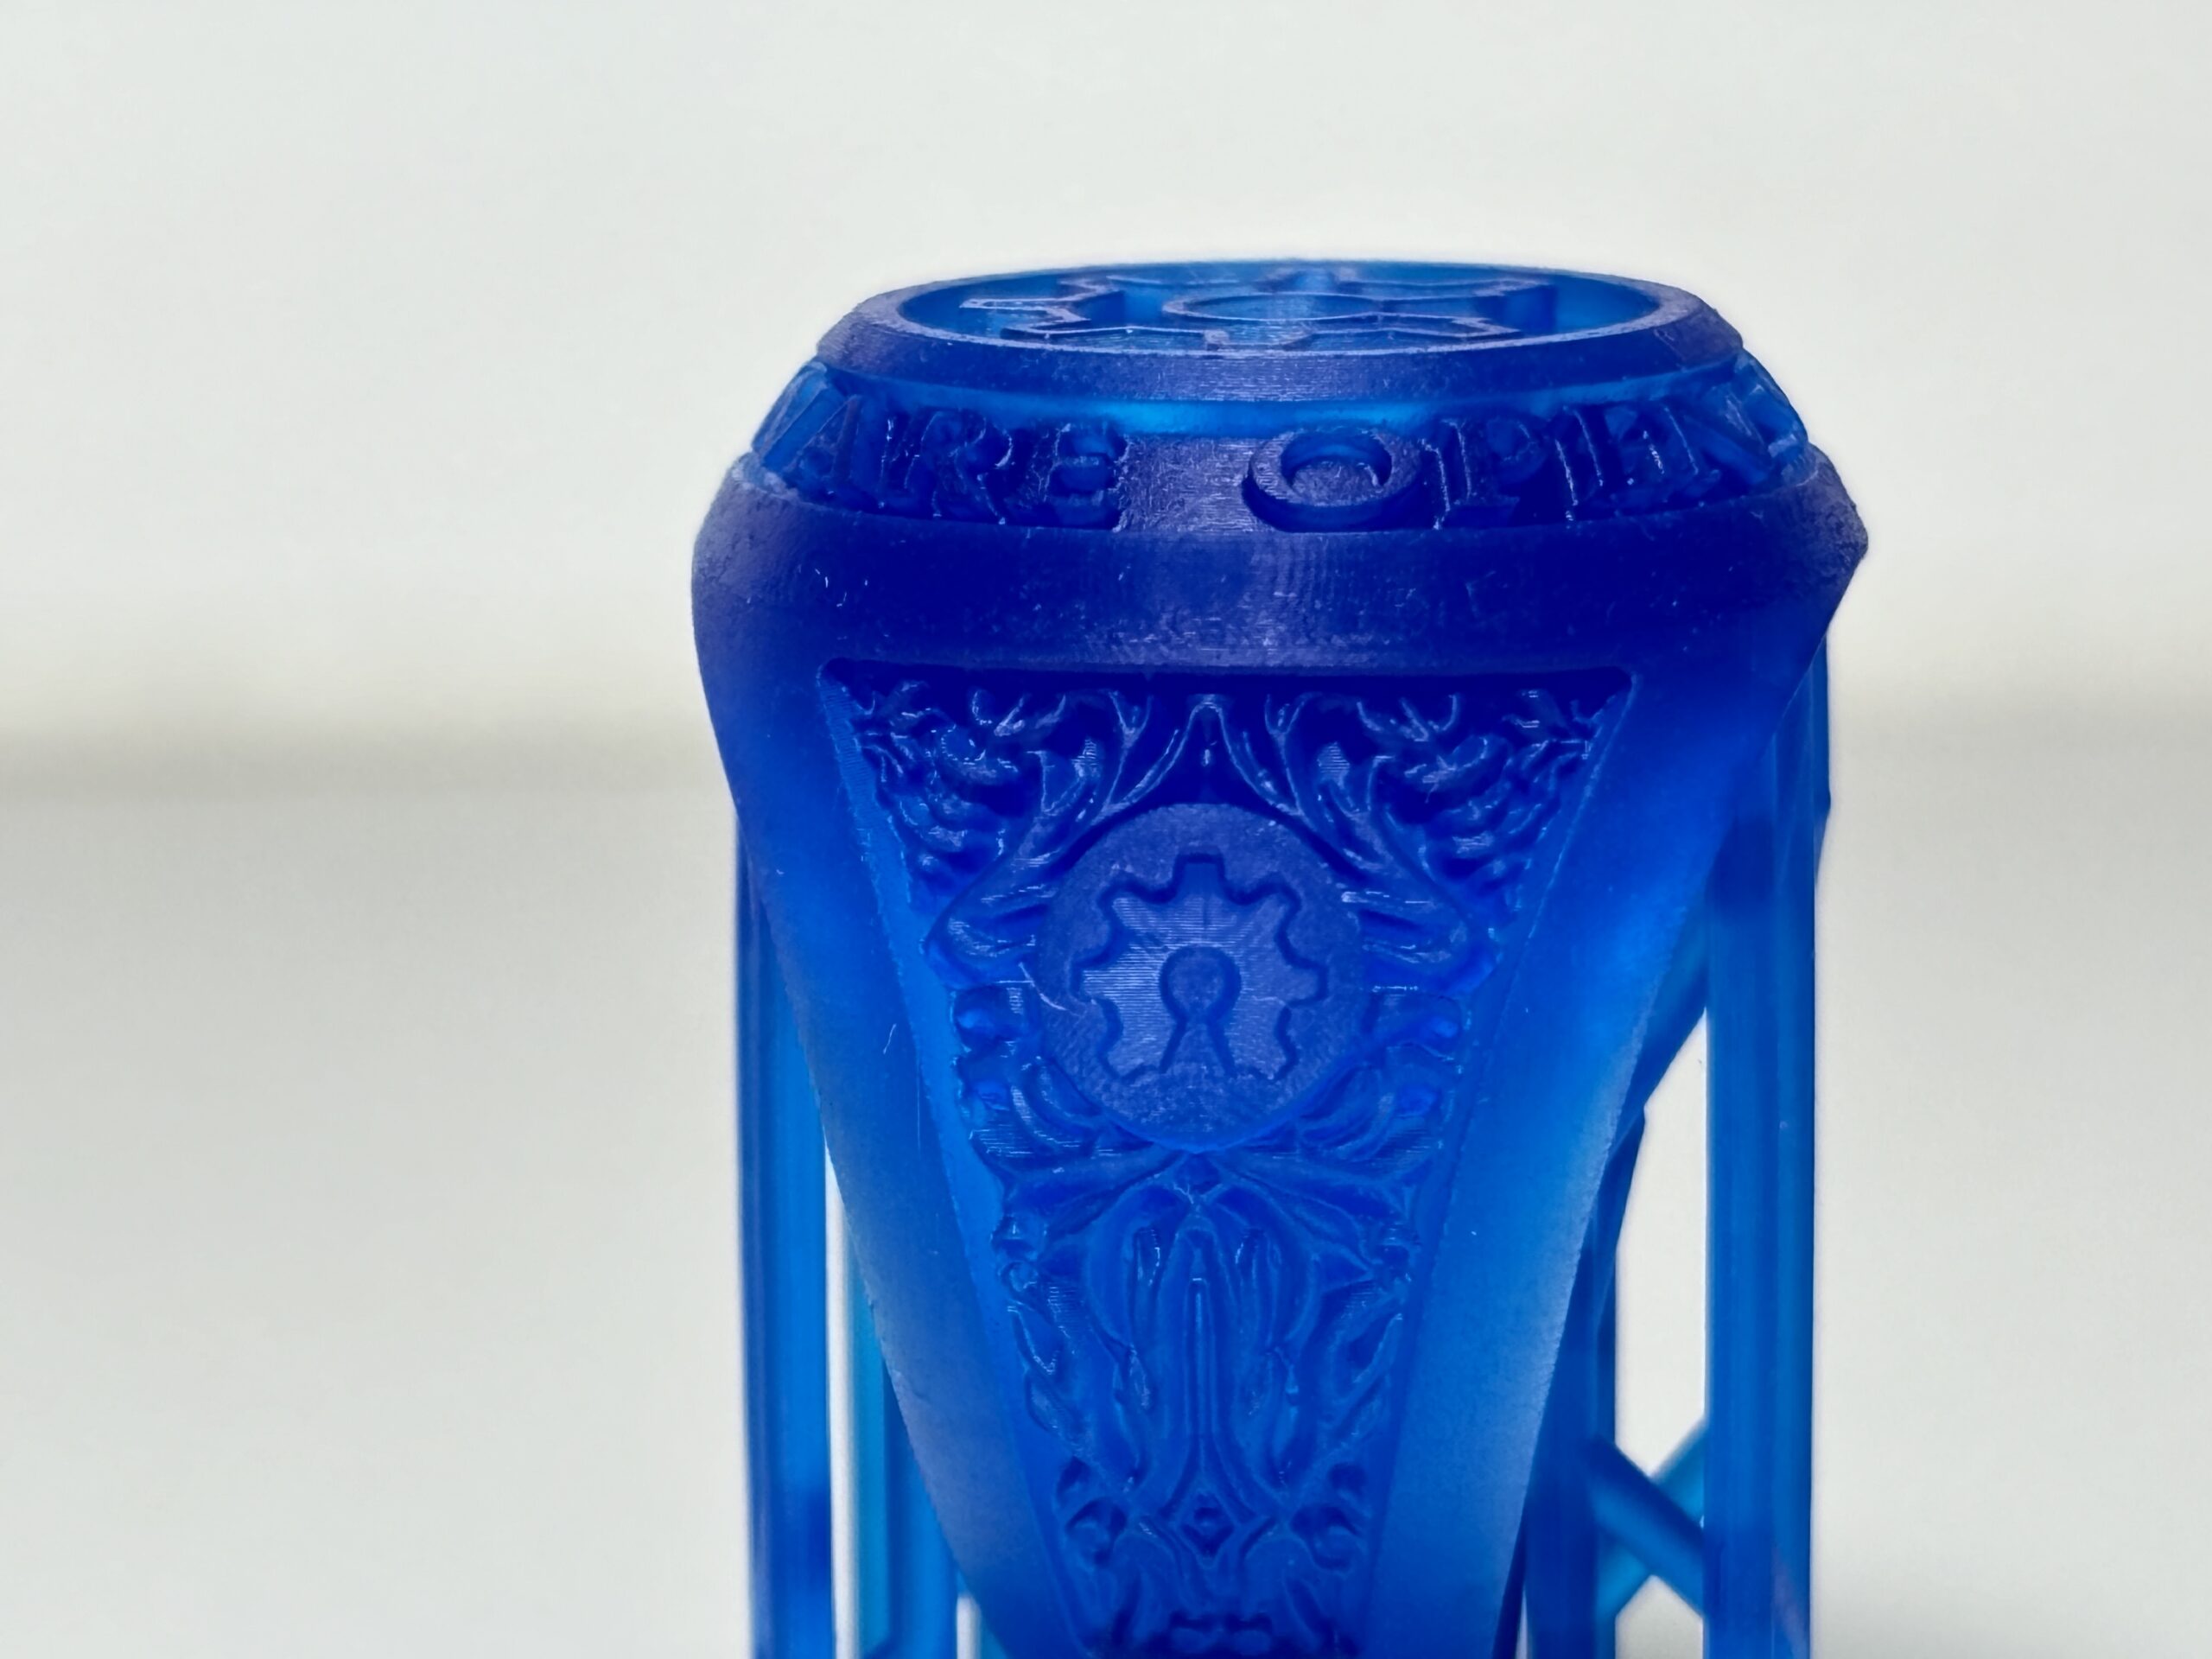
First the basic parameters where the Anti-Aliasing (AA) and blur settings are switched off. The pixels are very visible as expected:
With this picture it is easier to photograph and capture the details as there is some contrast. Apologize for the following series. as the part gets smoother there is less contrast and it is very difficult to capture:
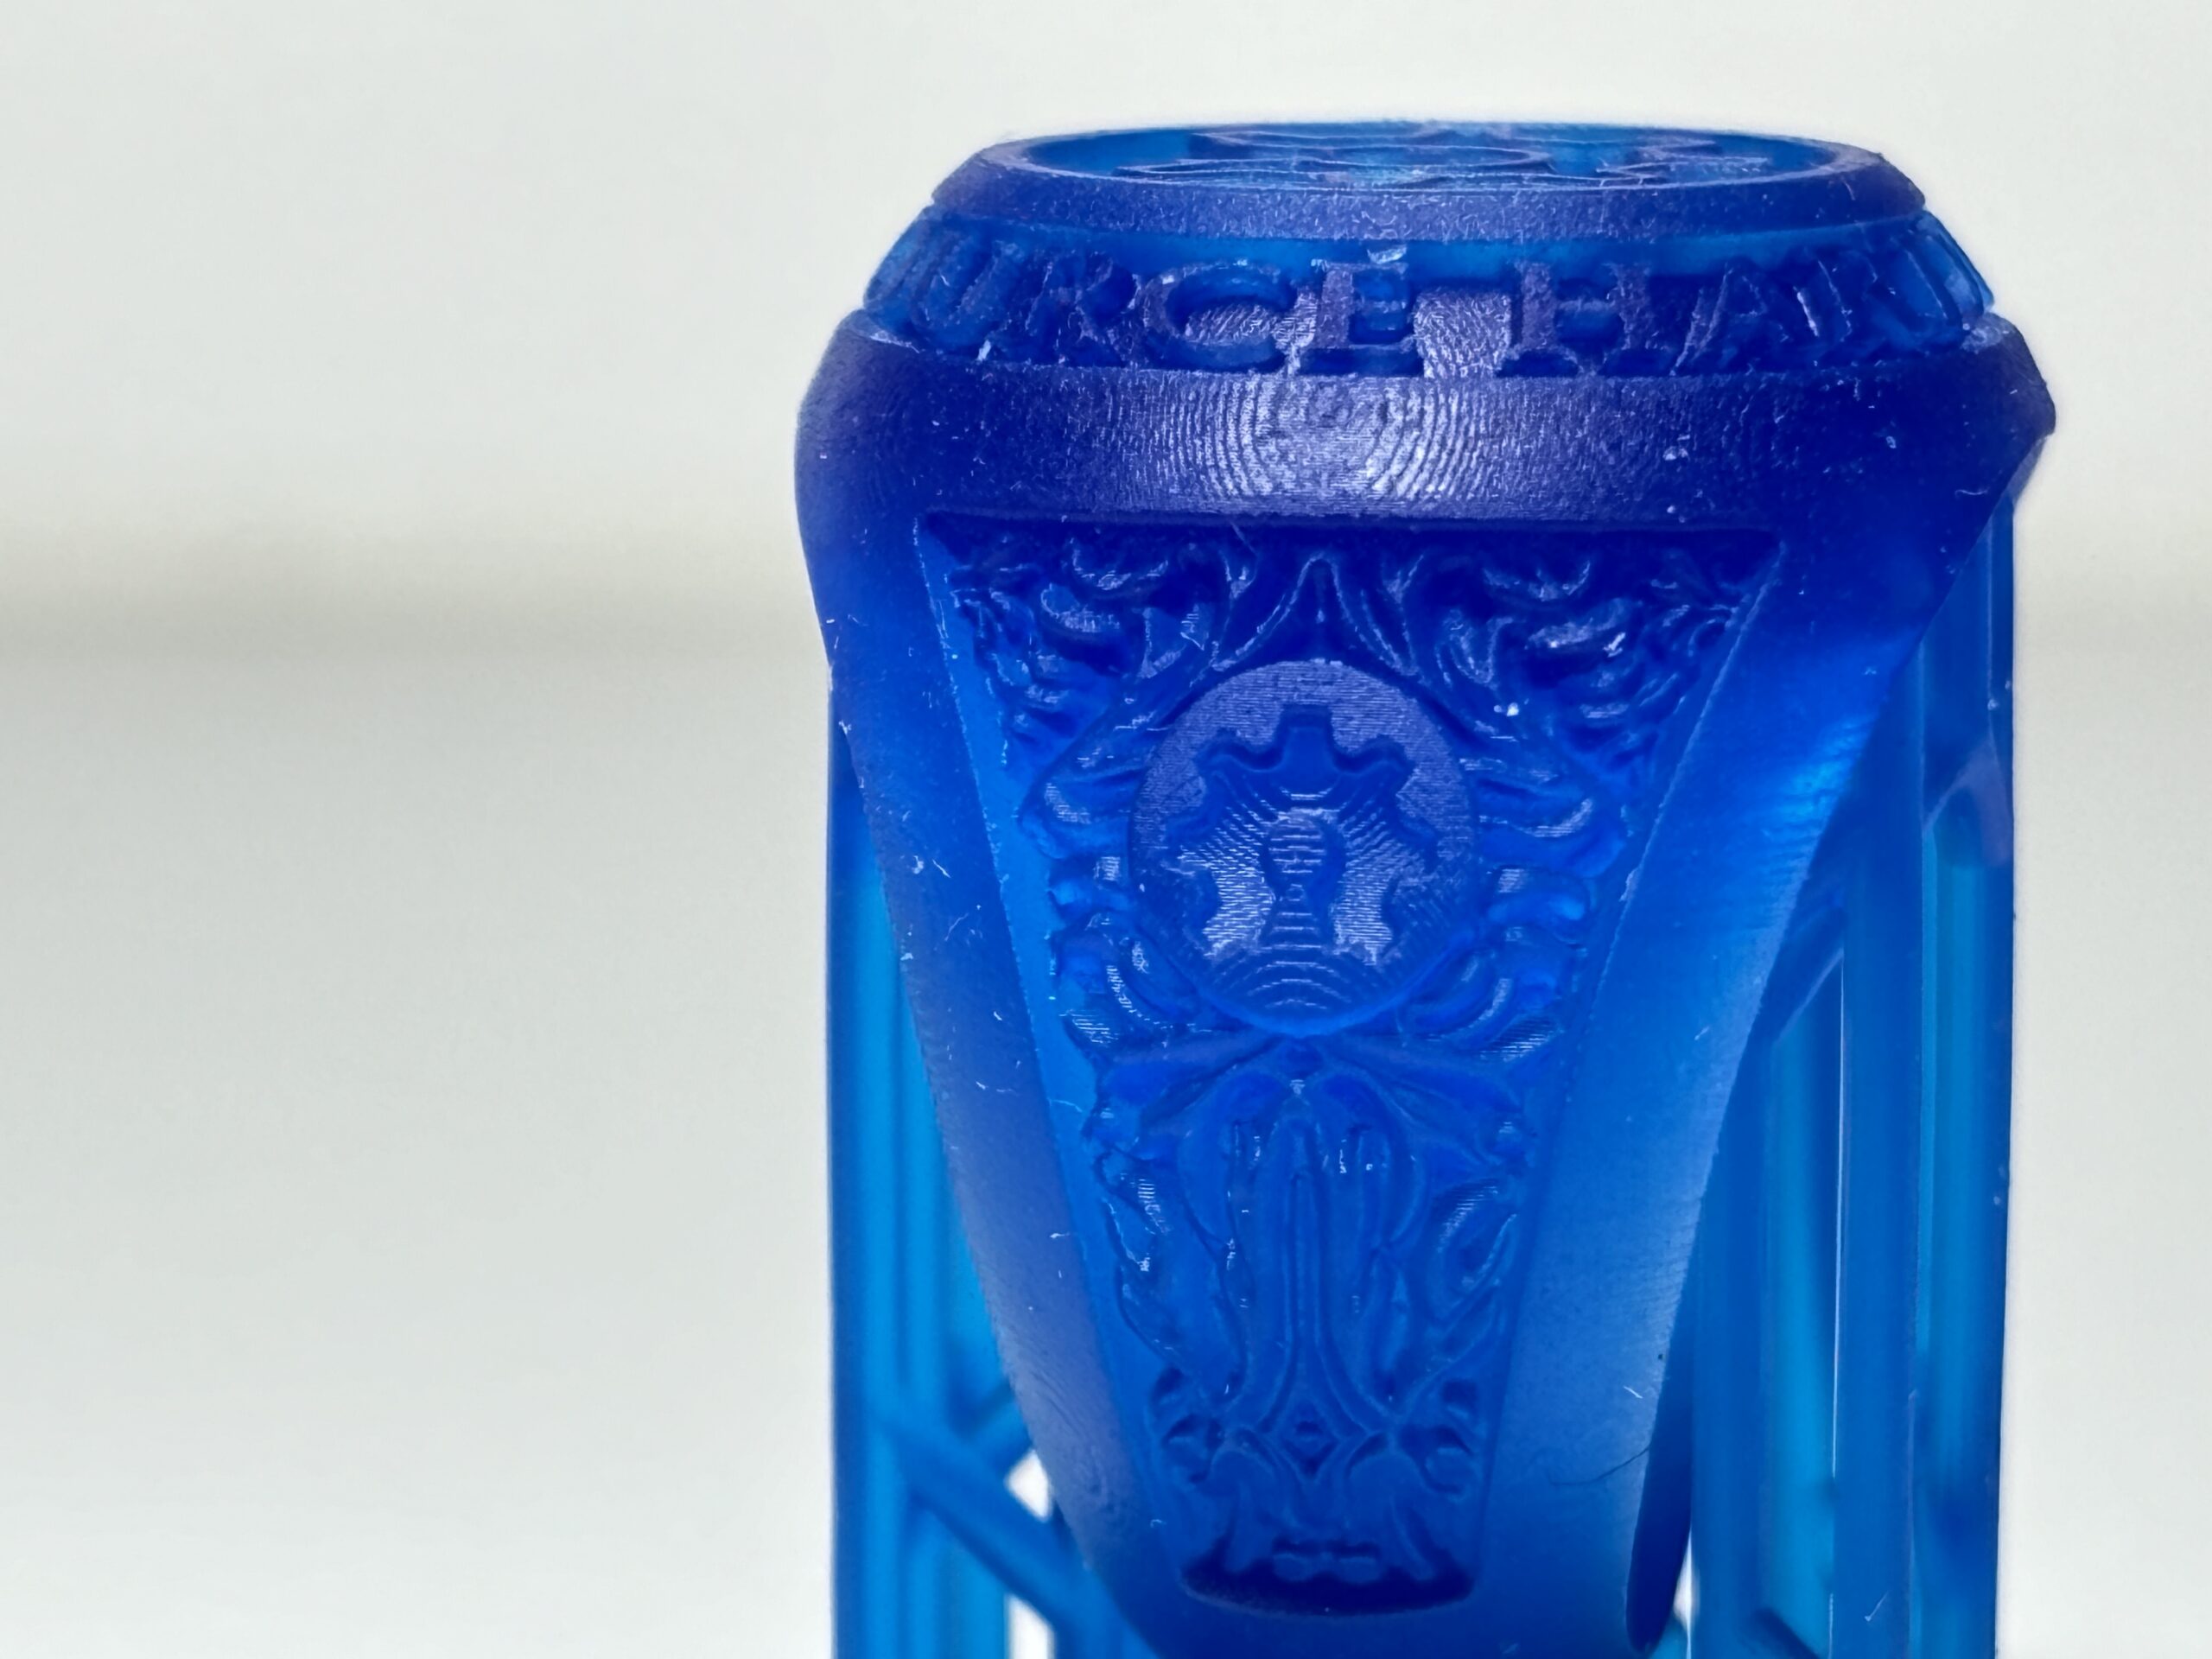
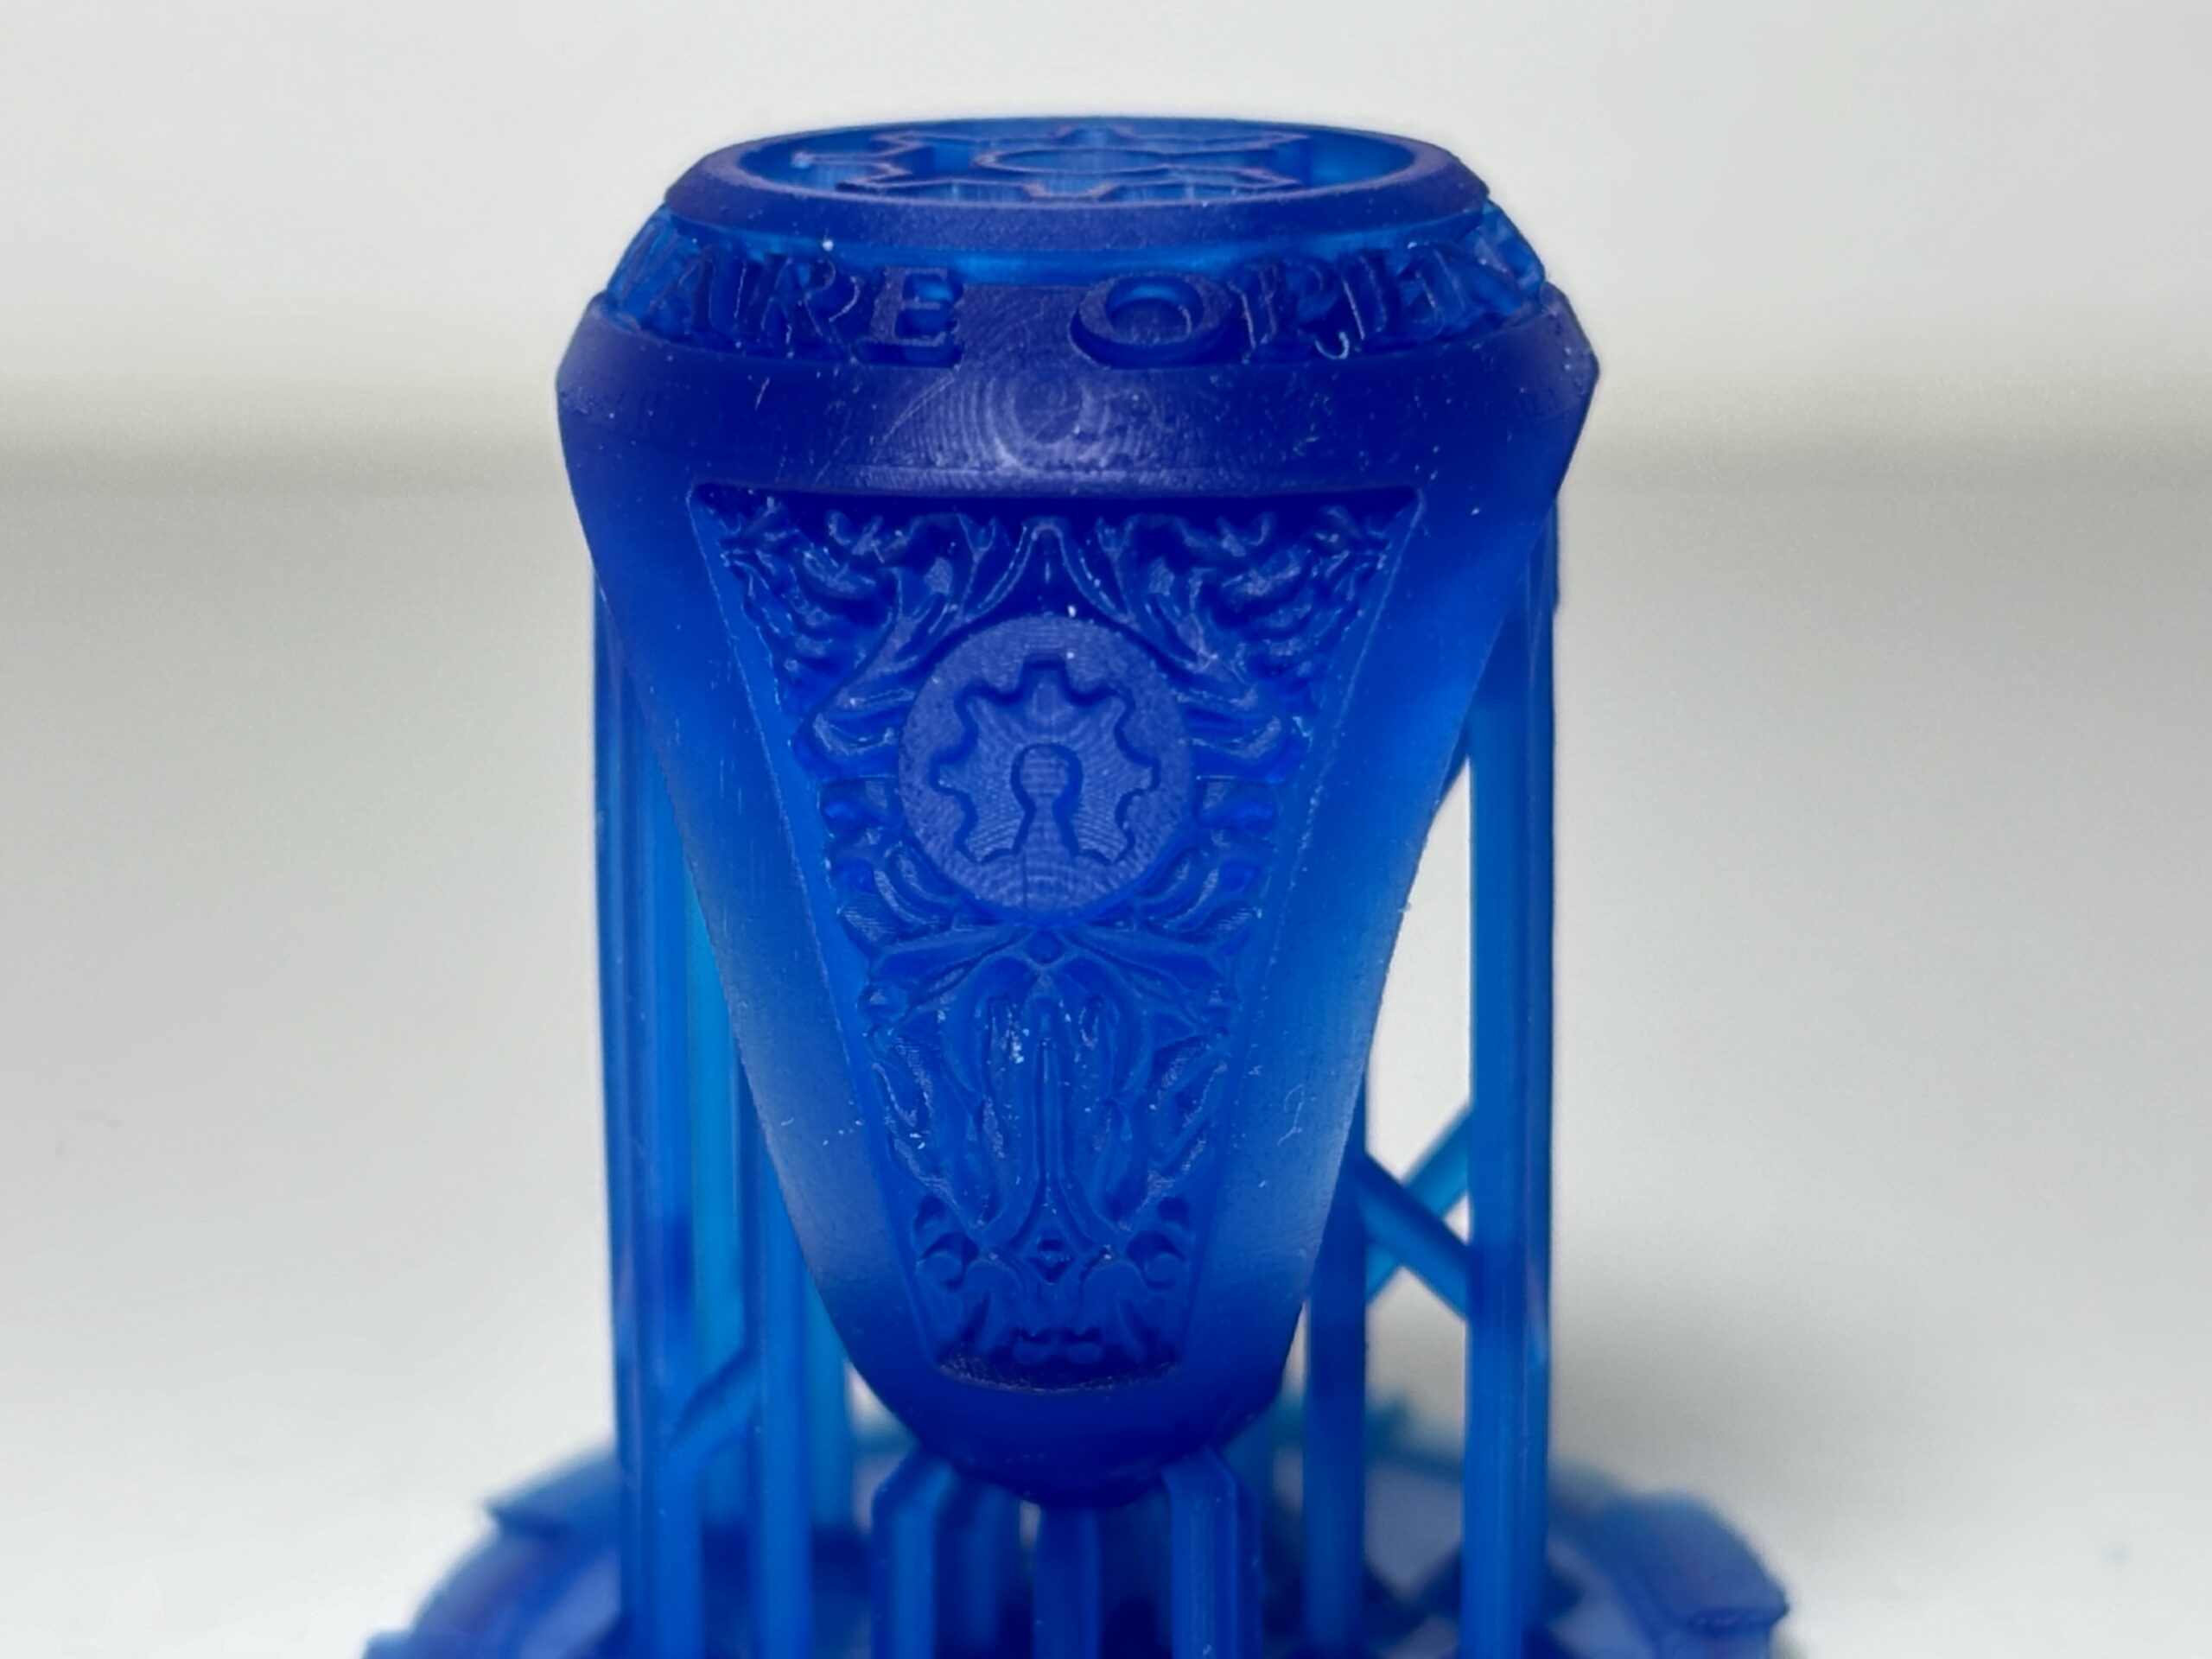
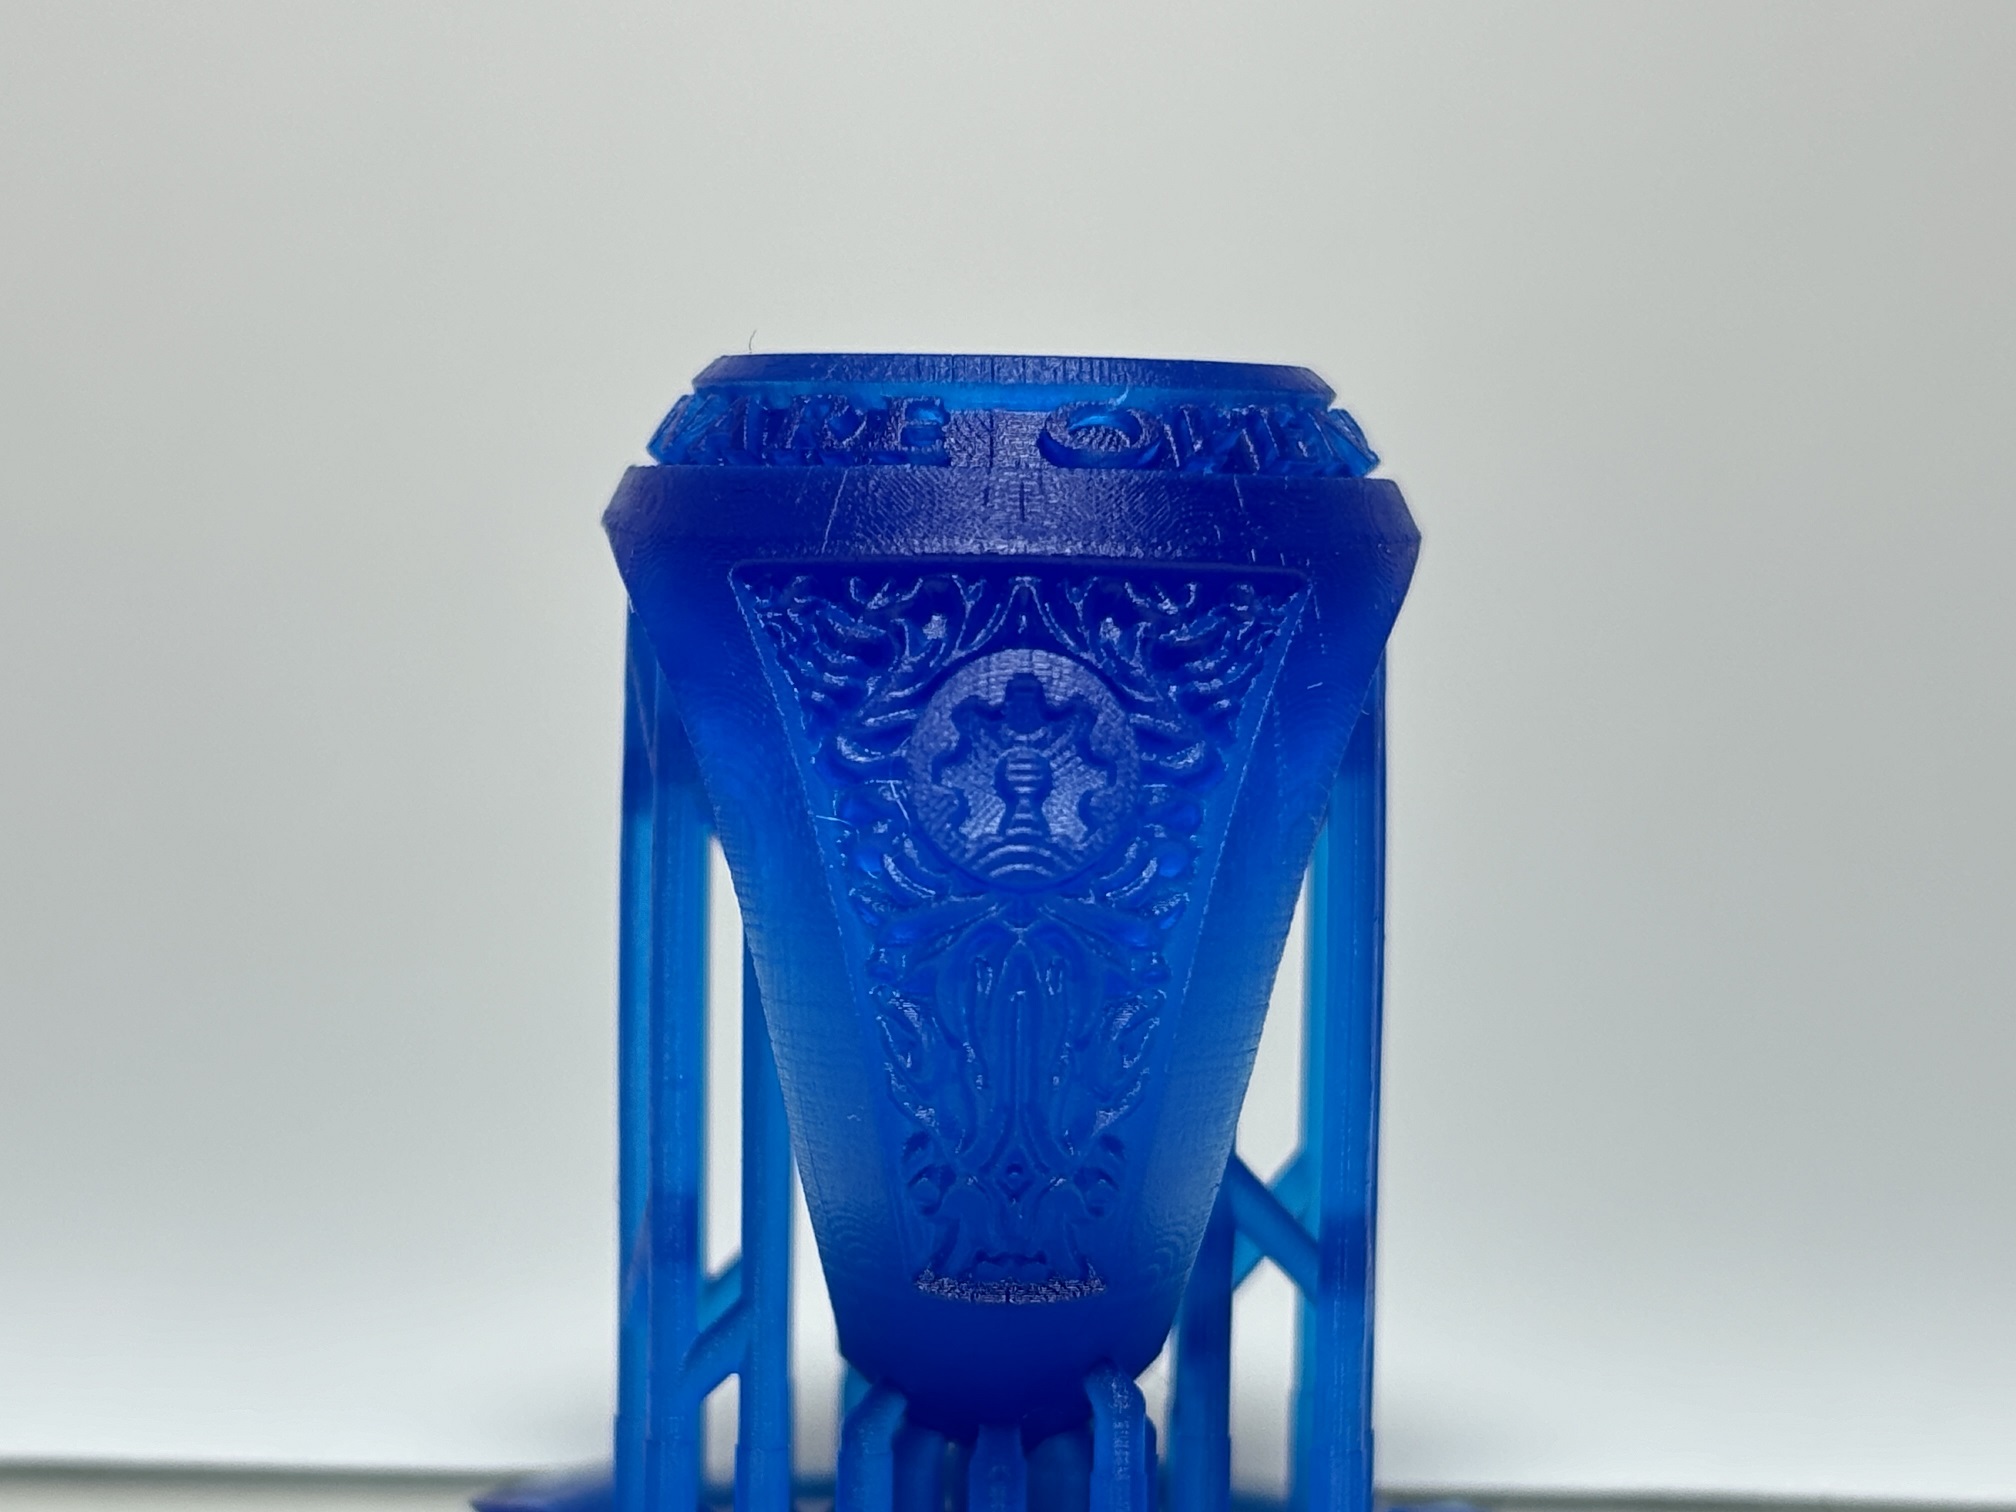
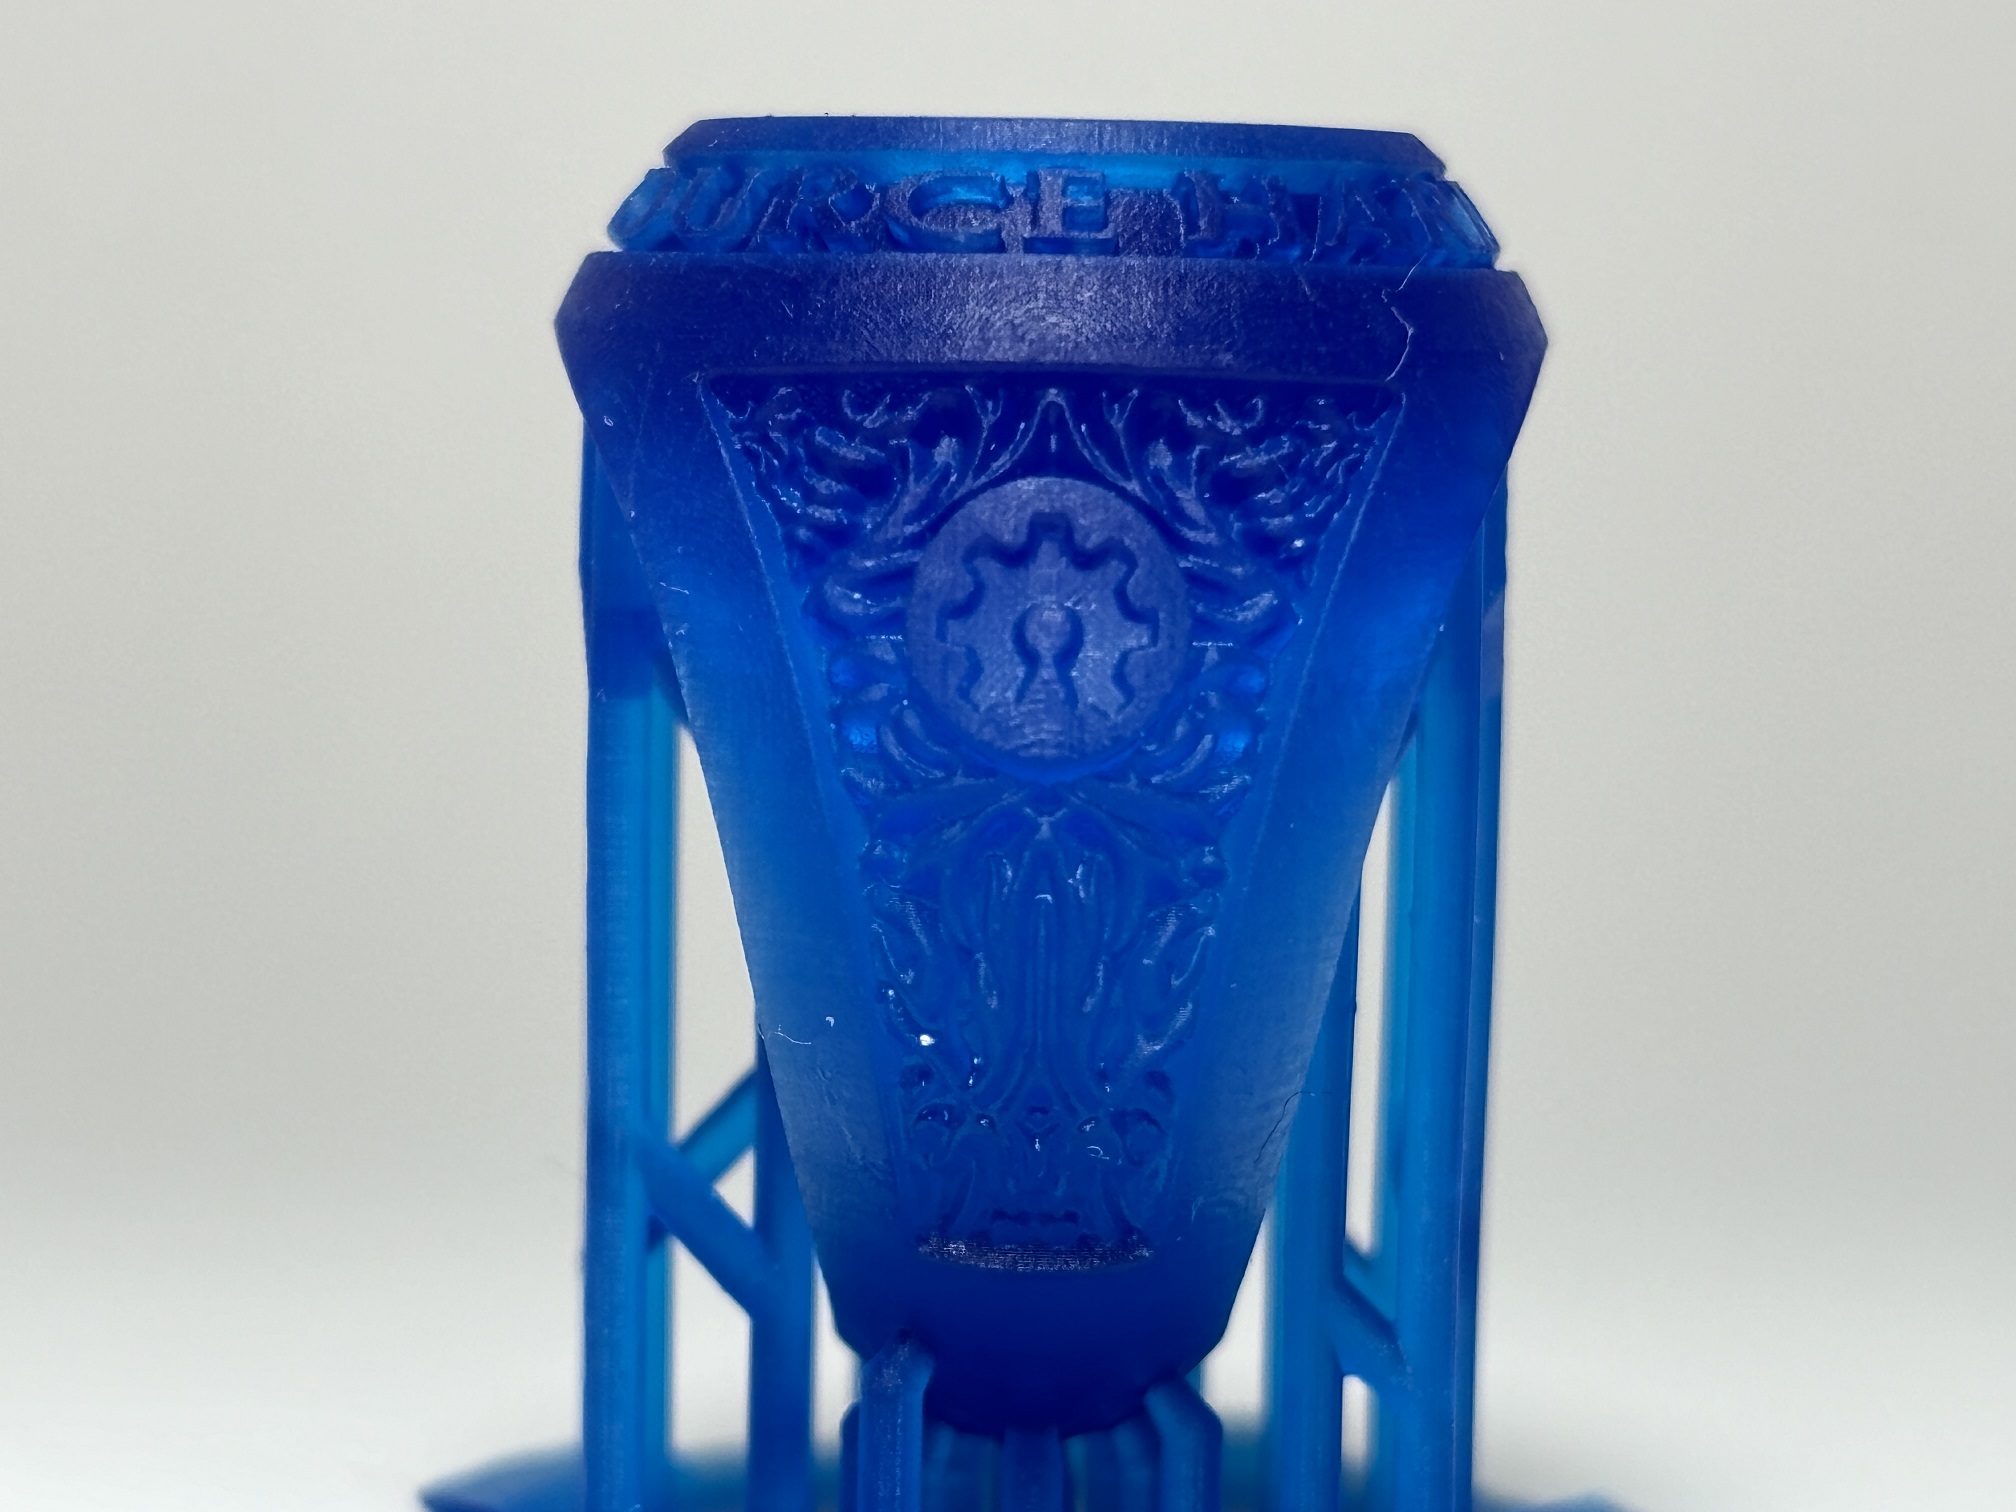
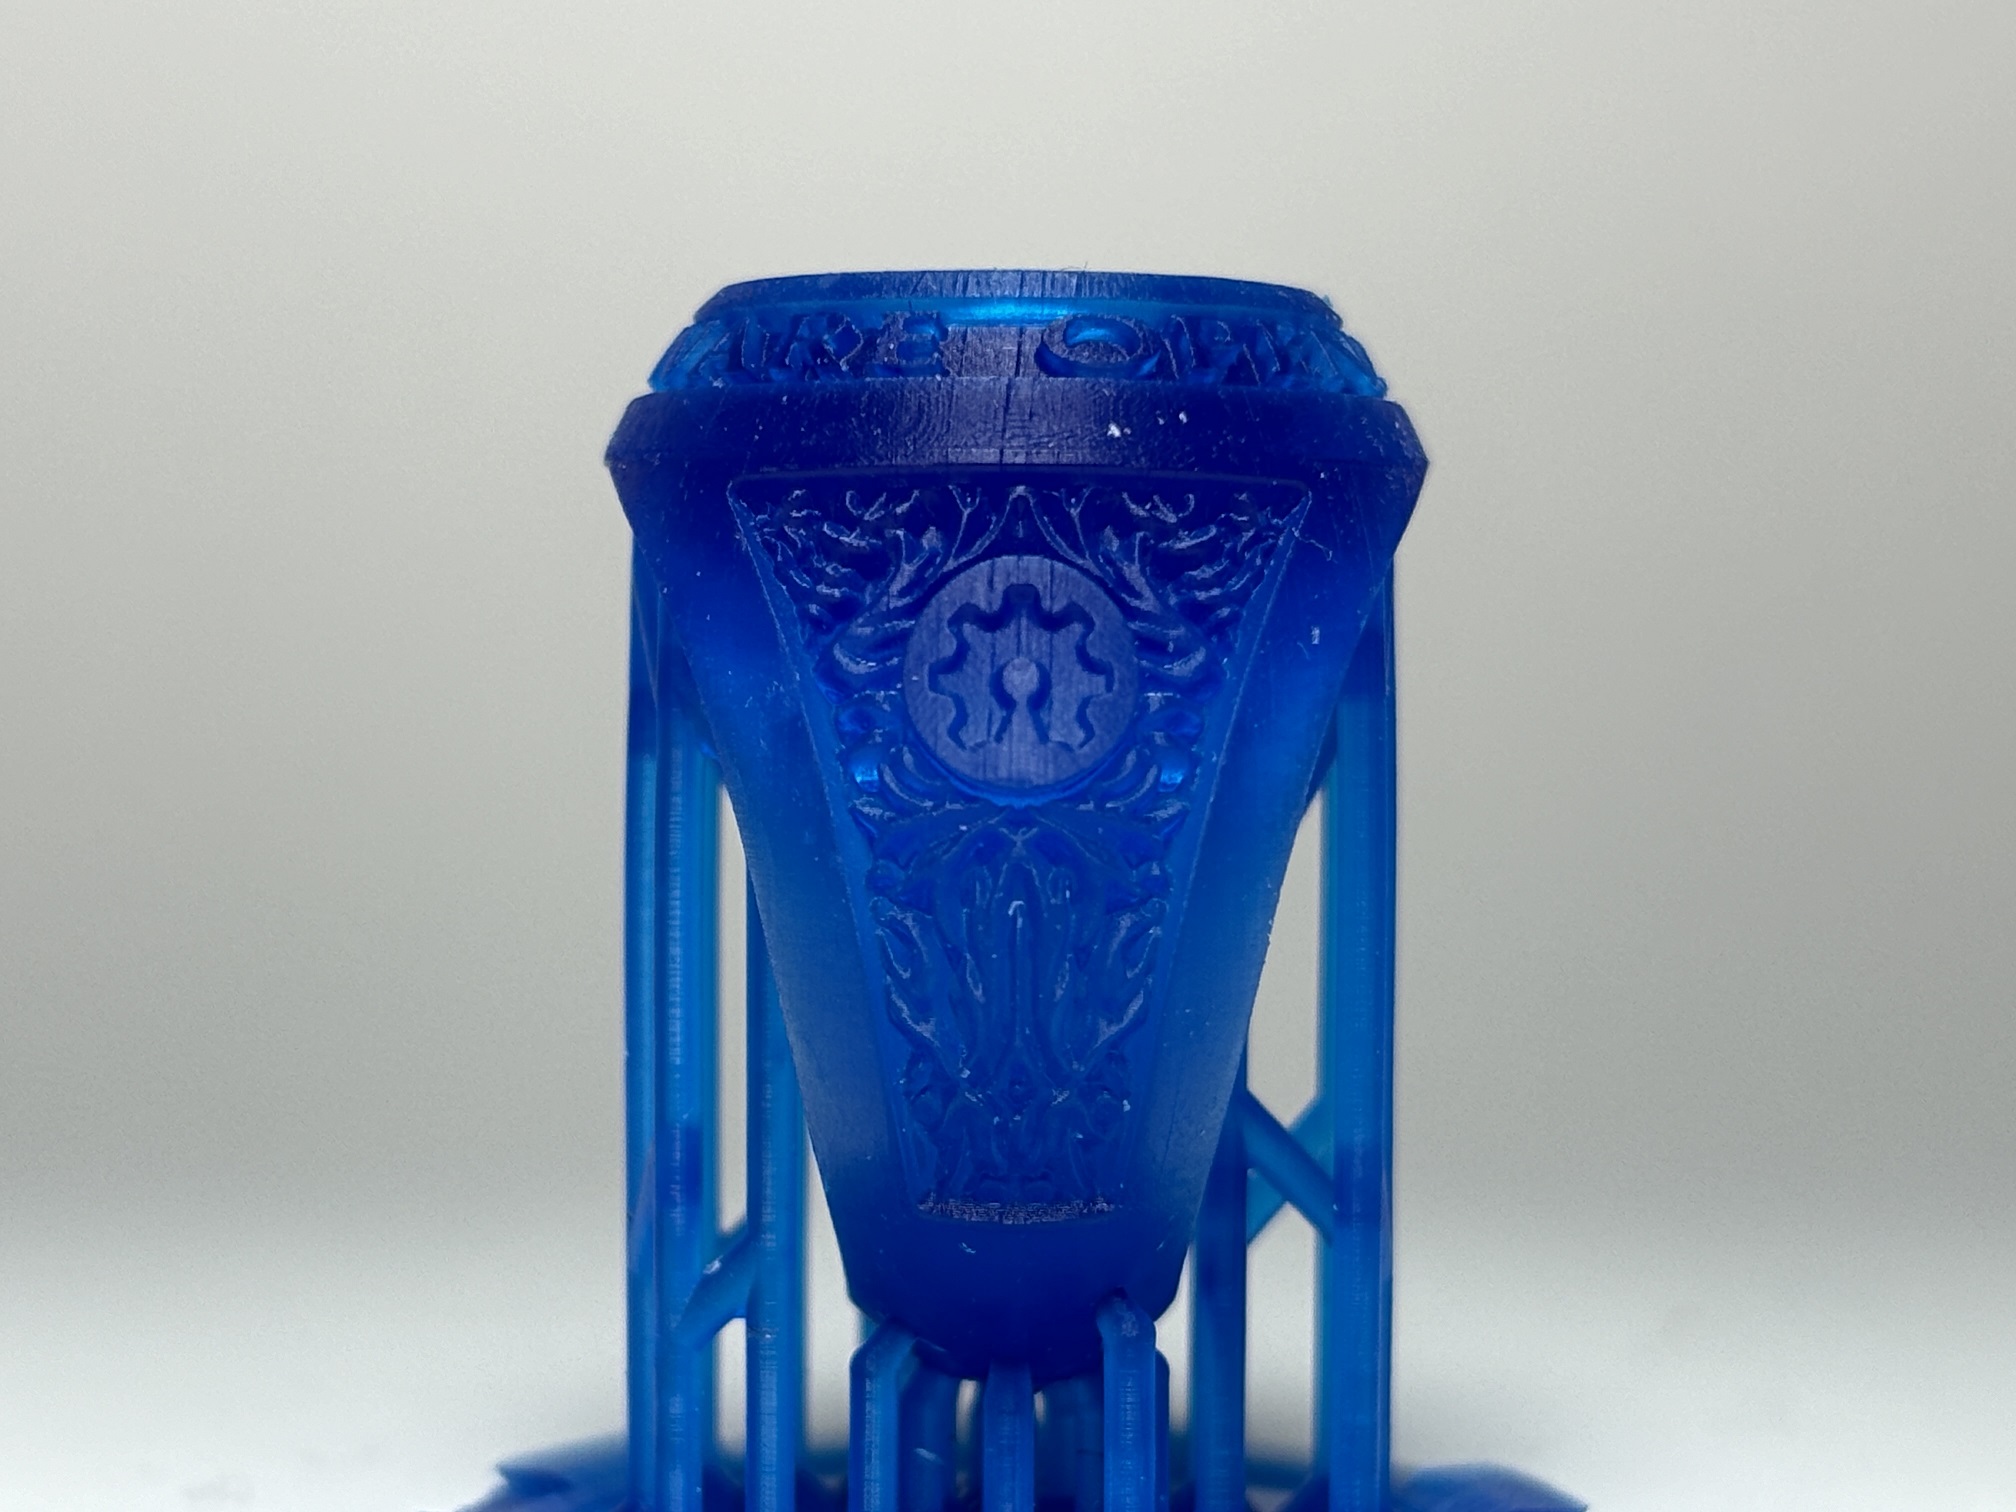
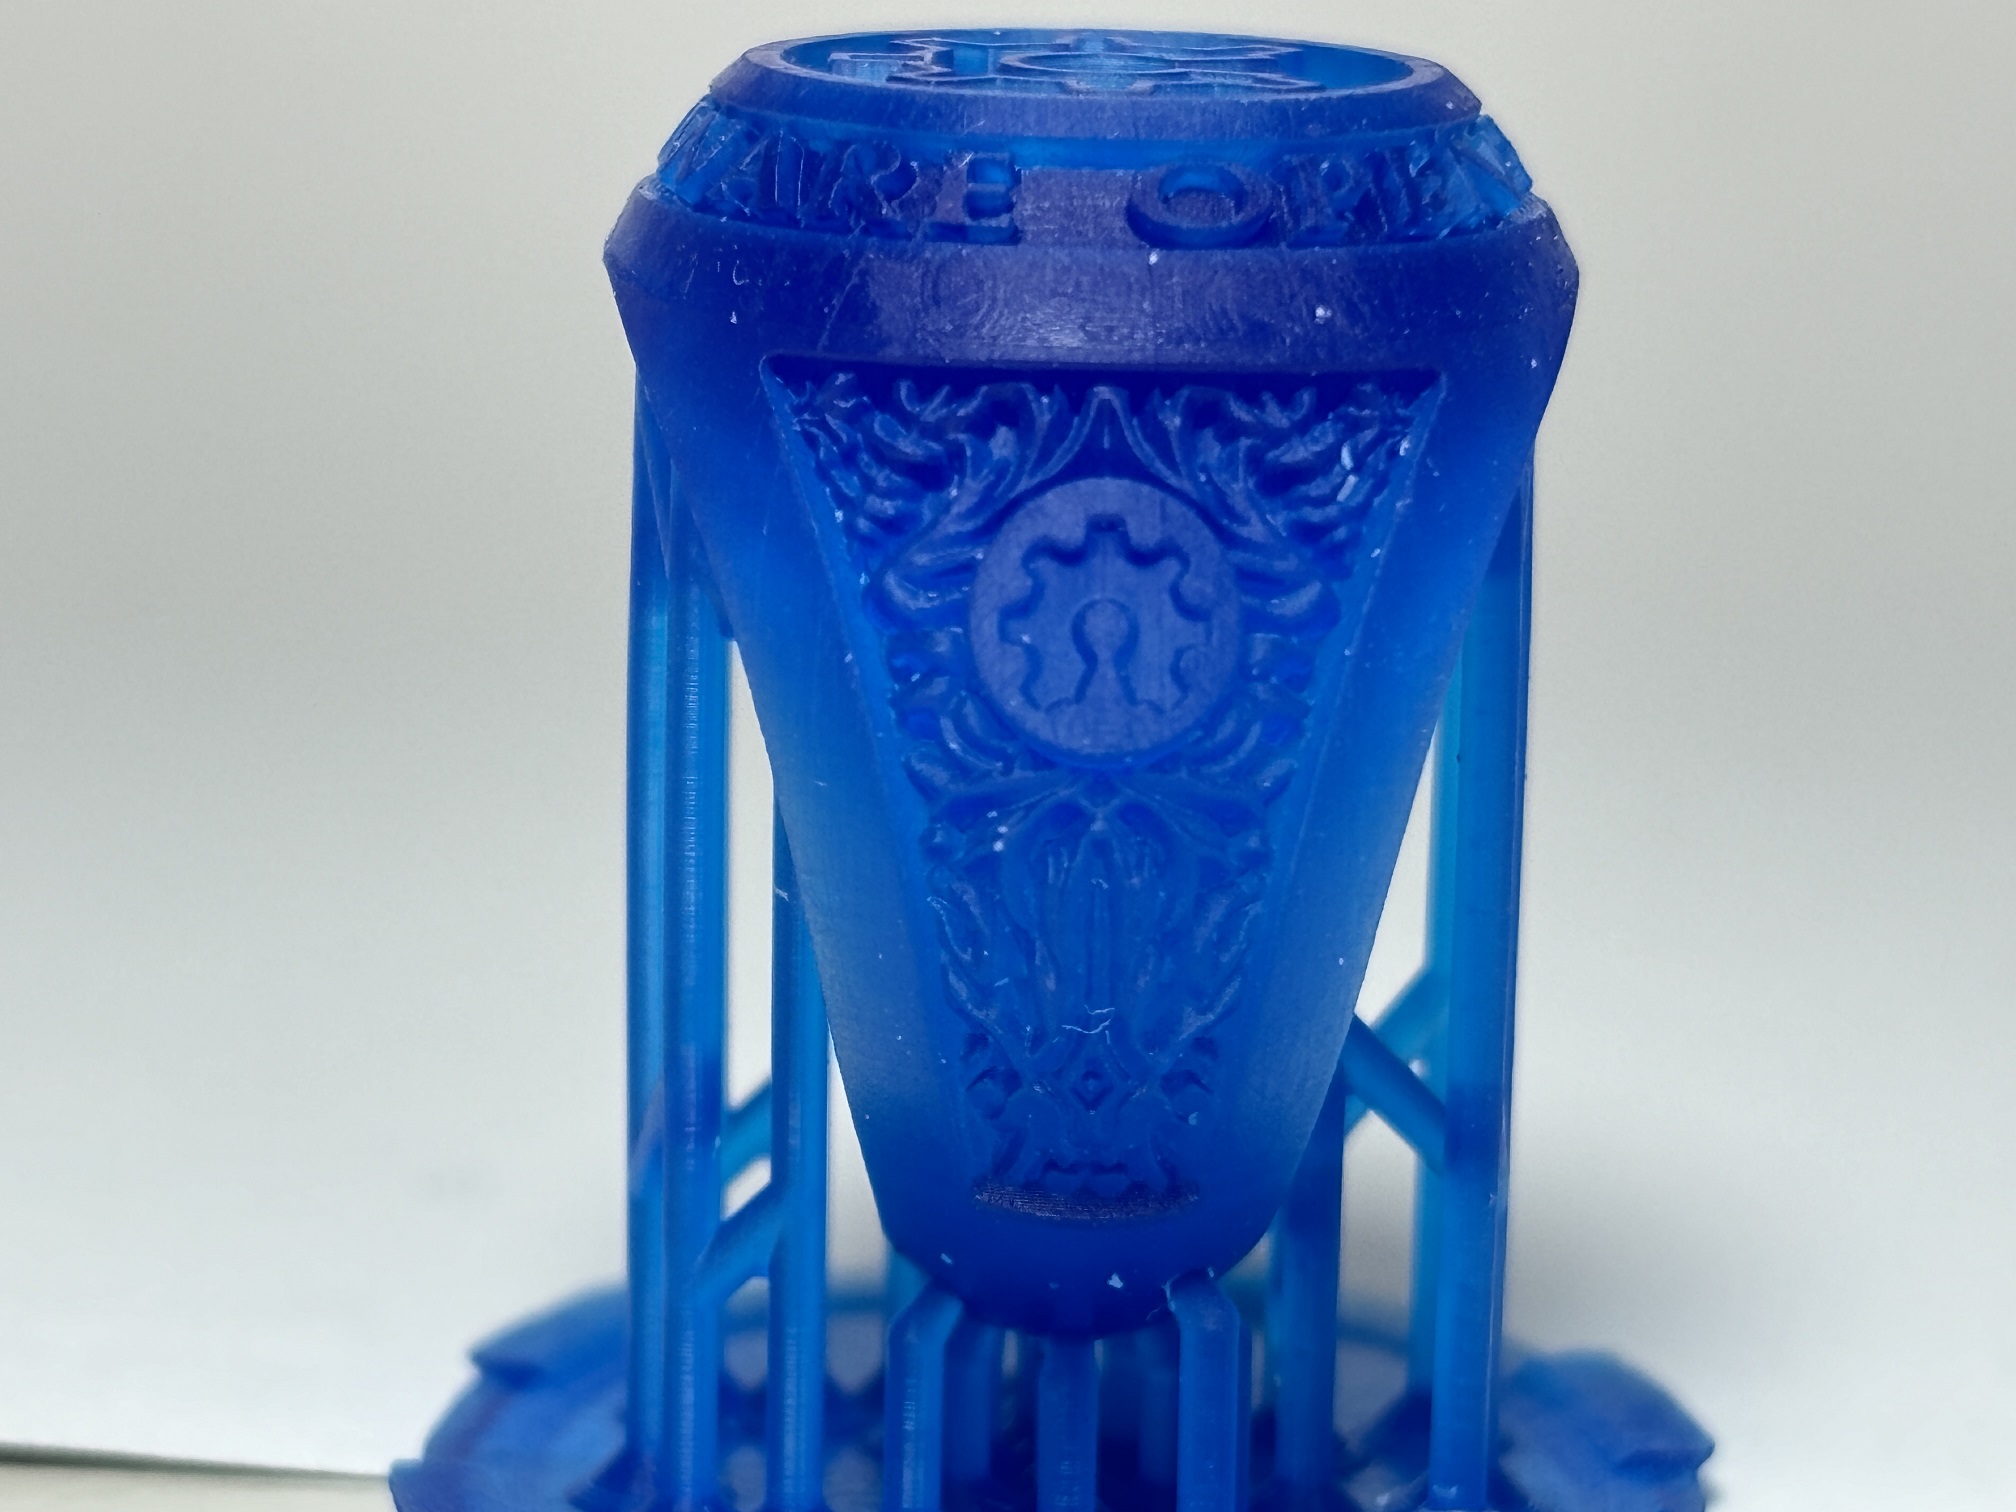
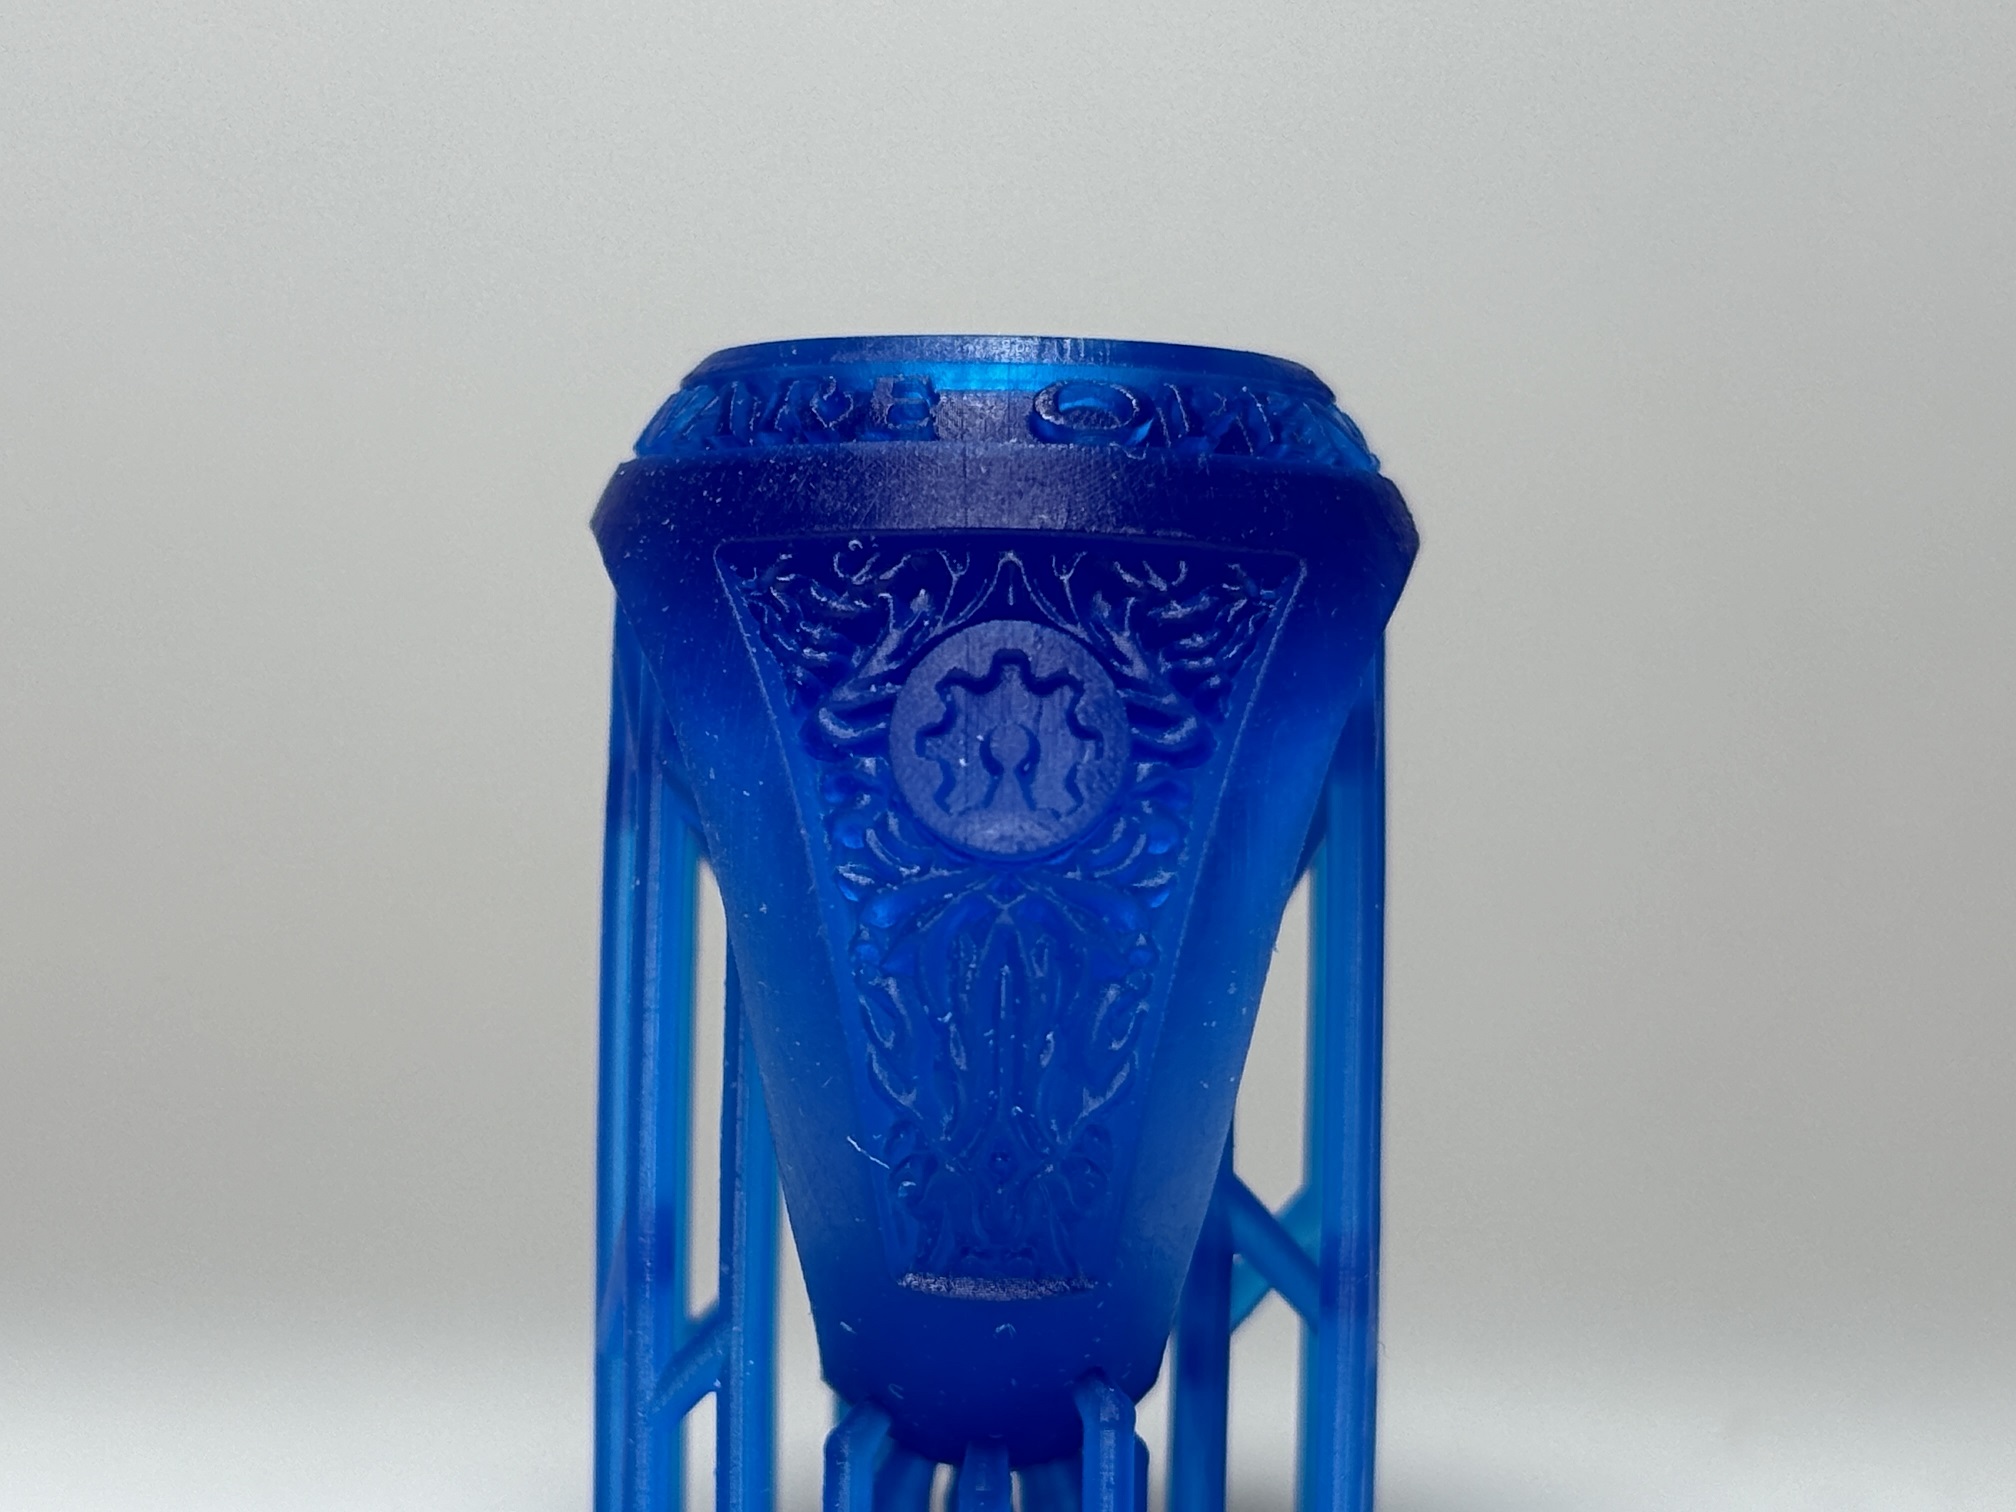
Liqcreate Wax Castable print with Grey 0; Blur off
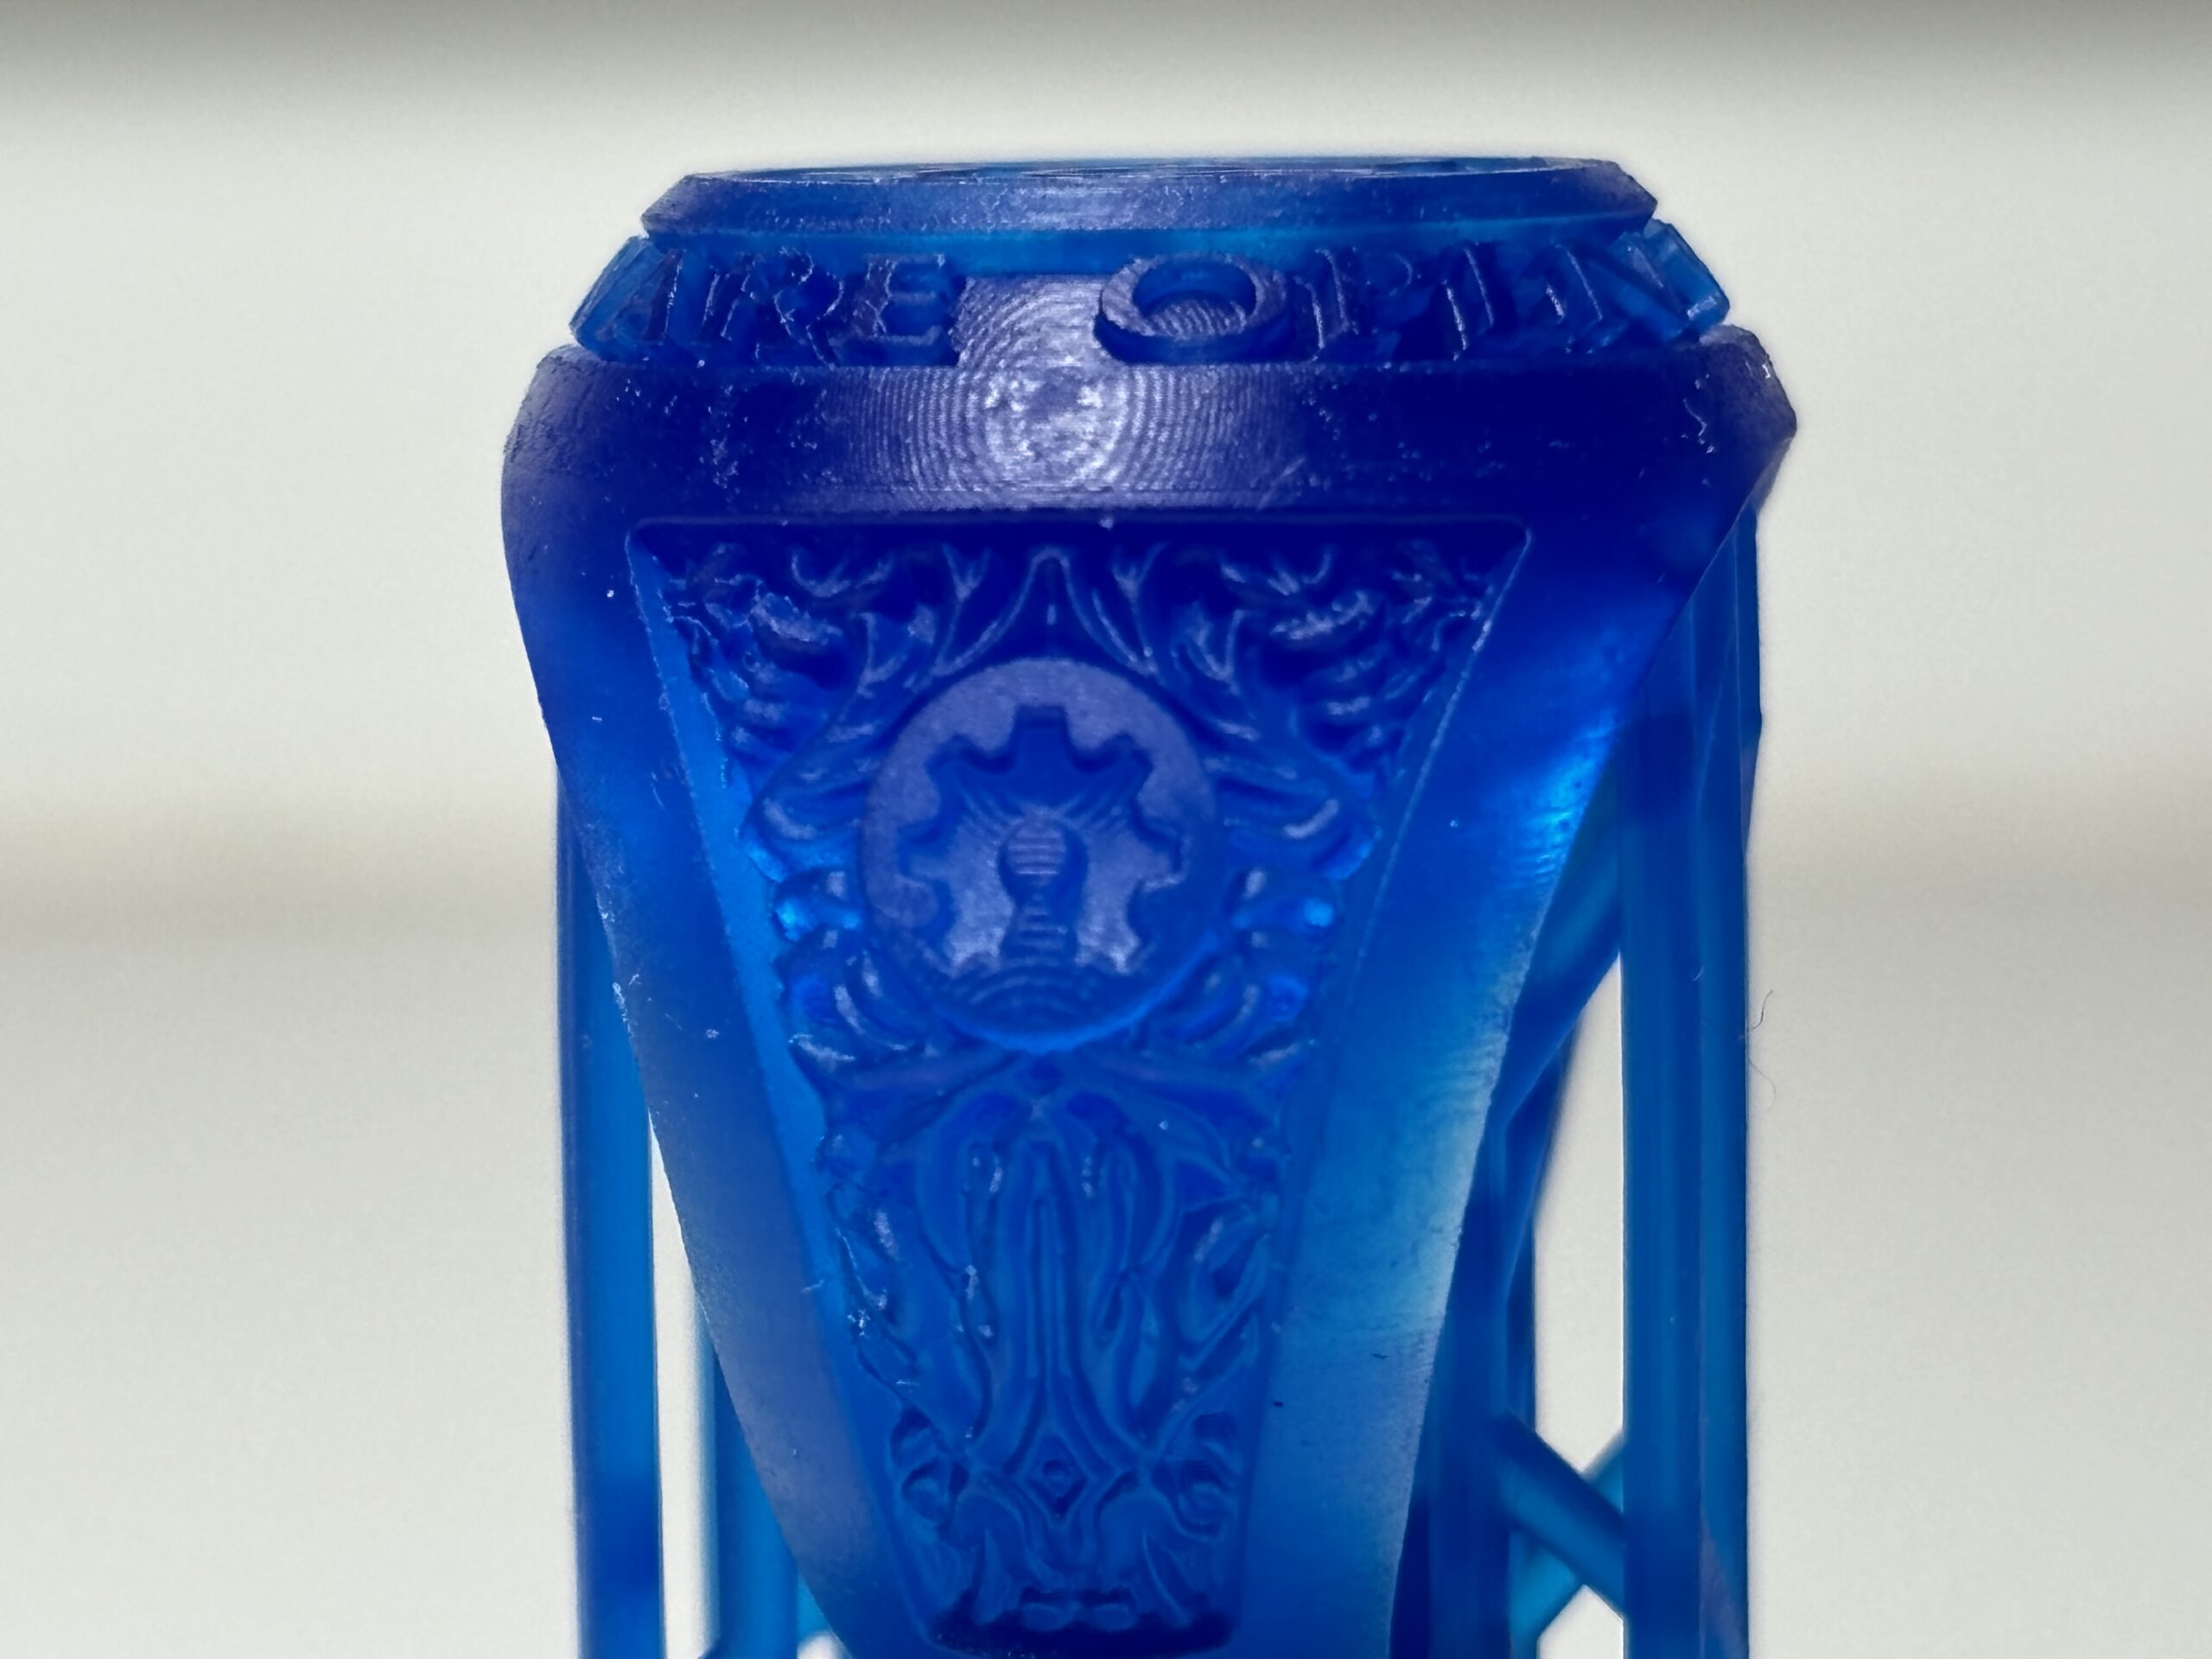
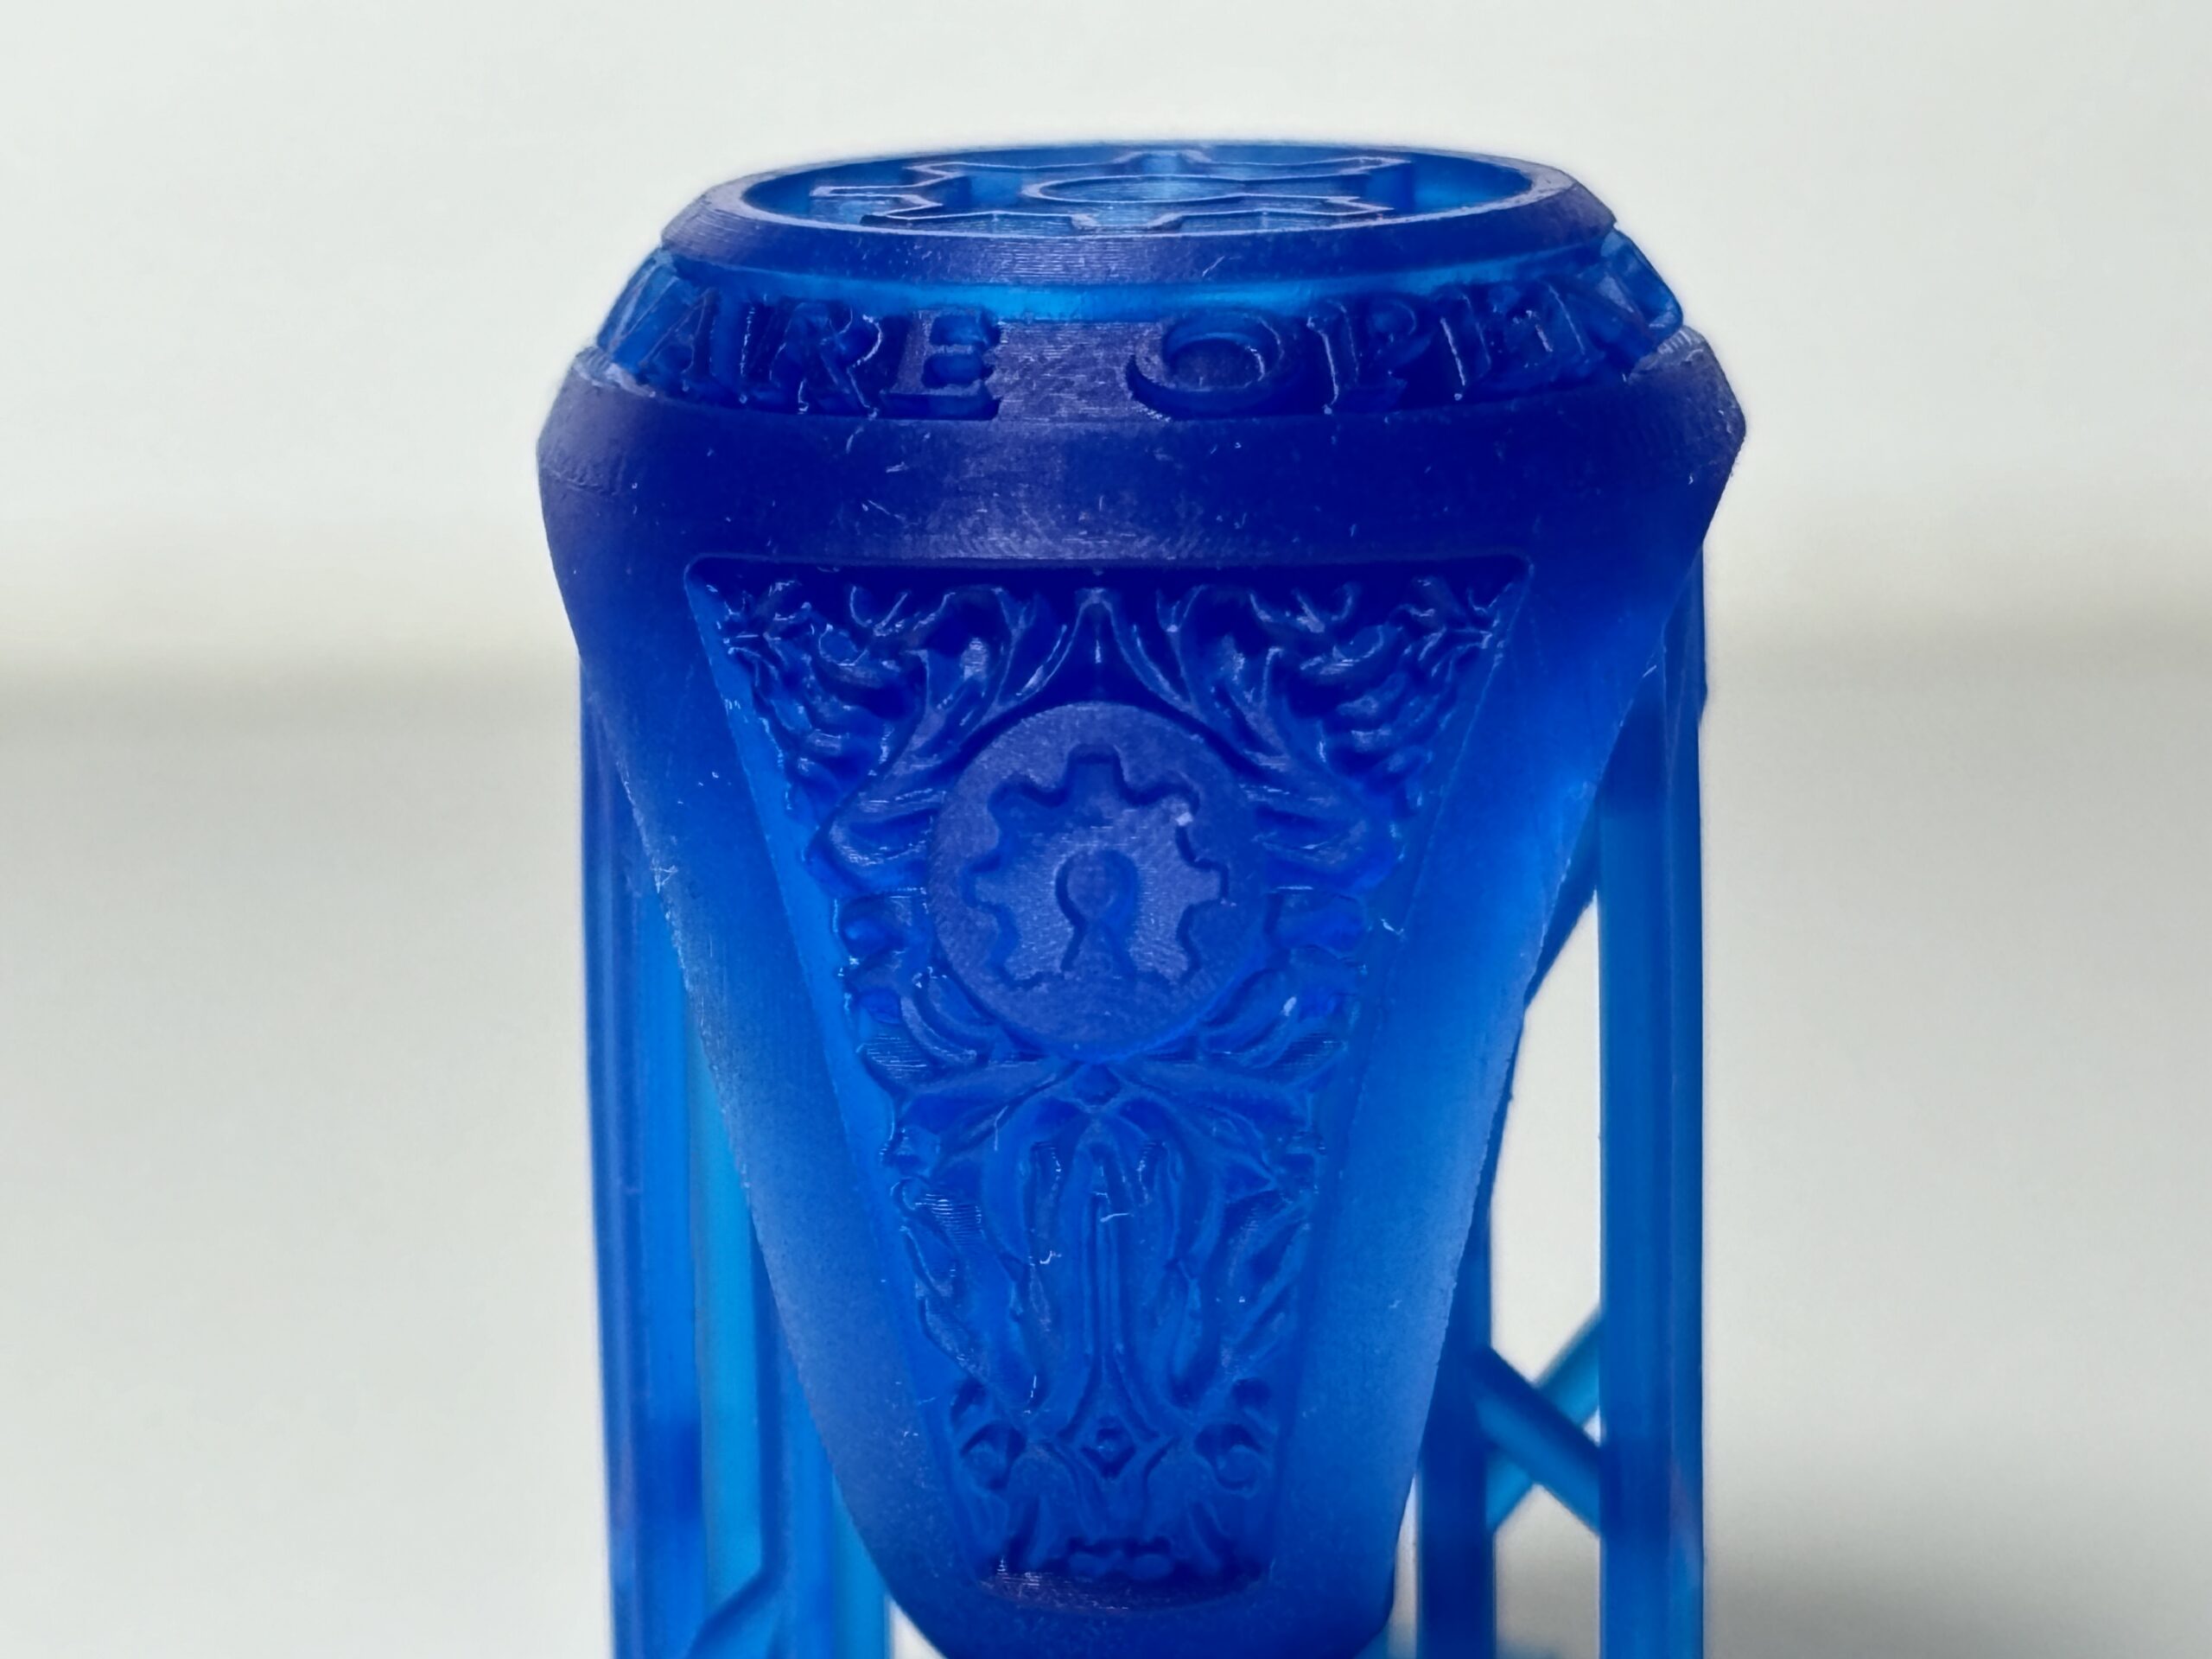
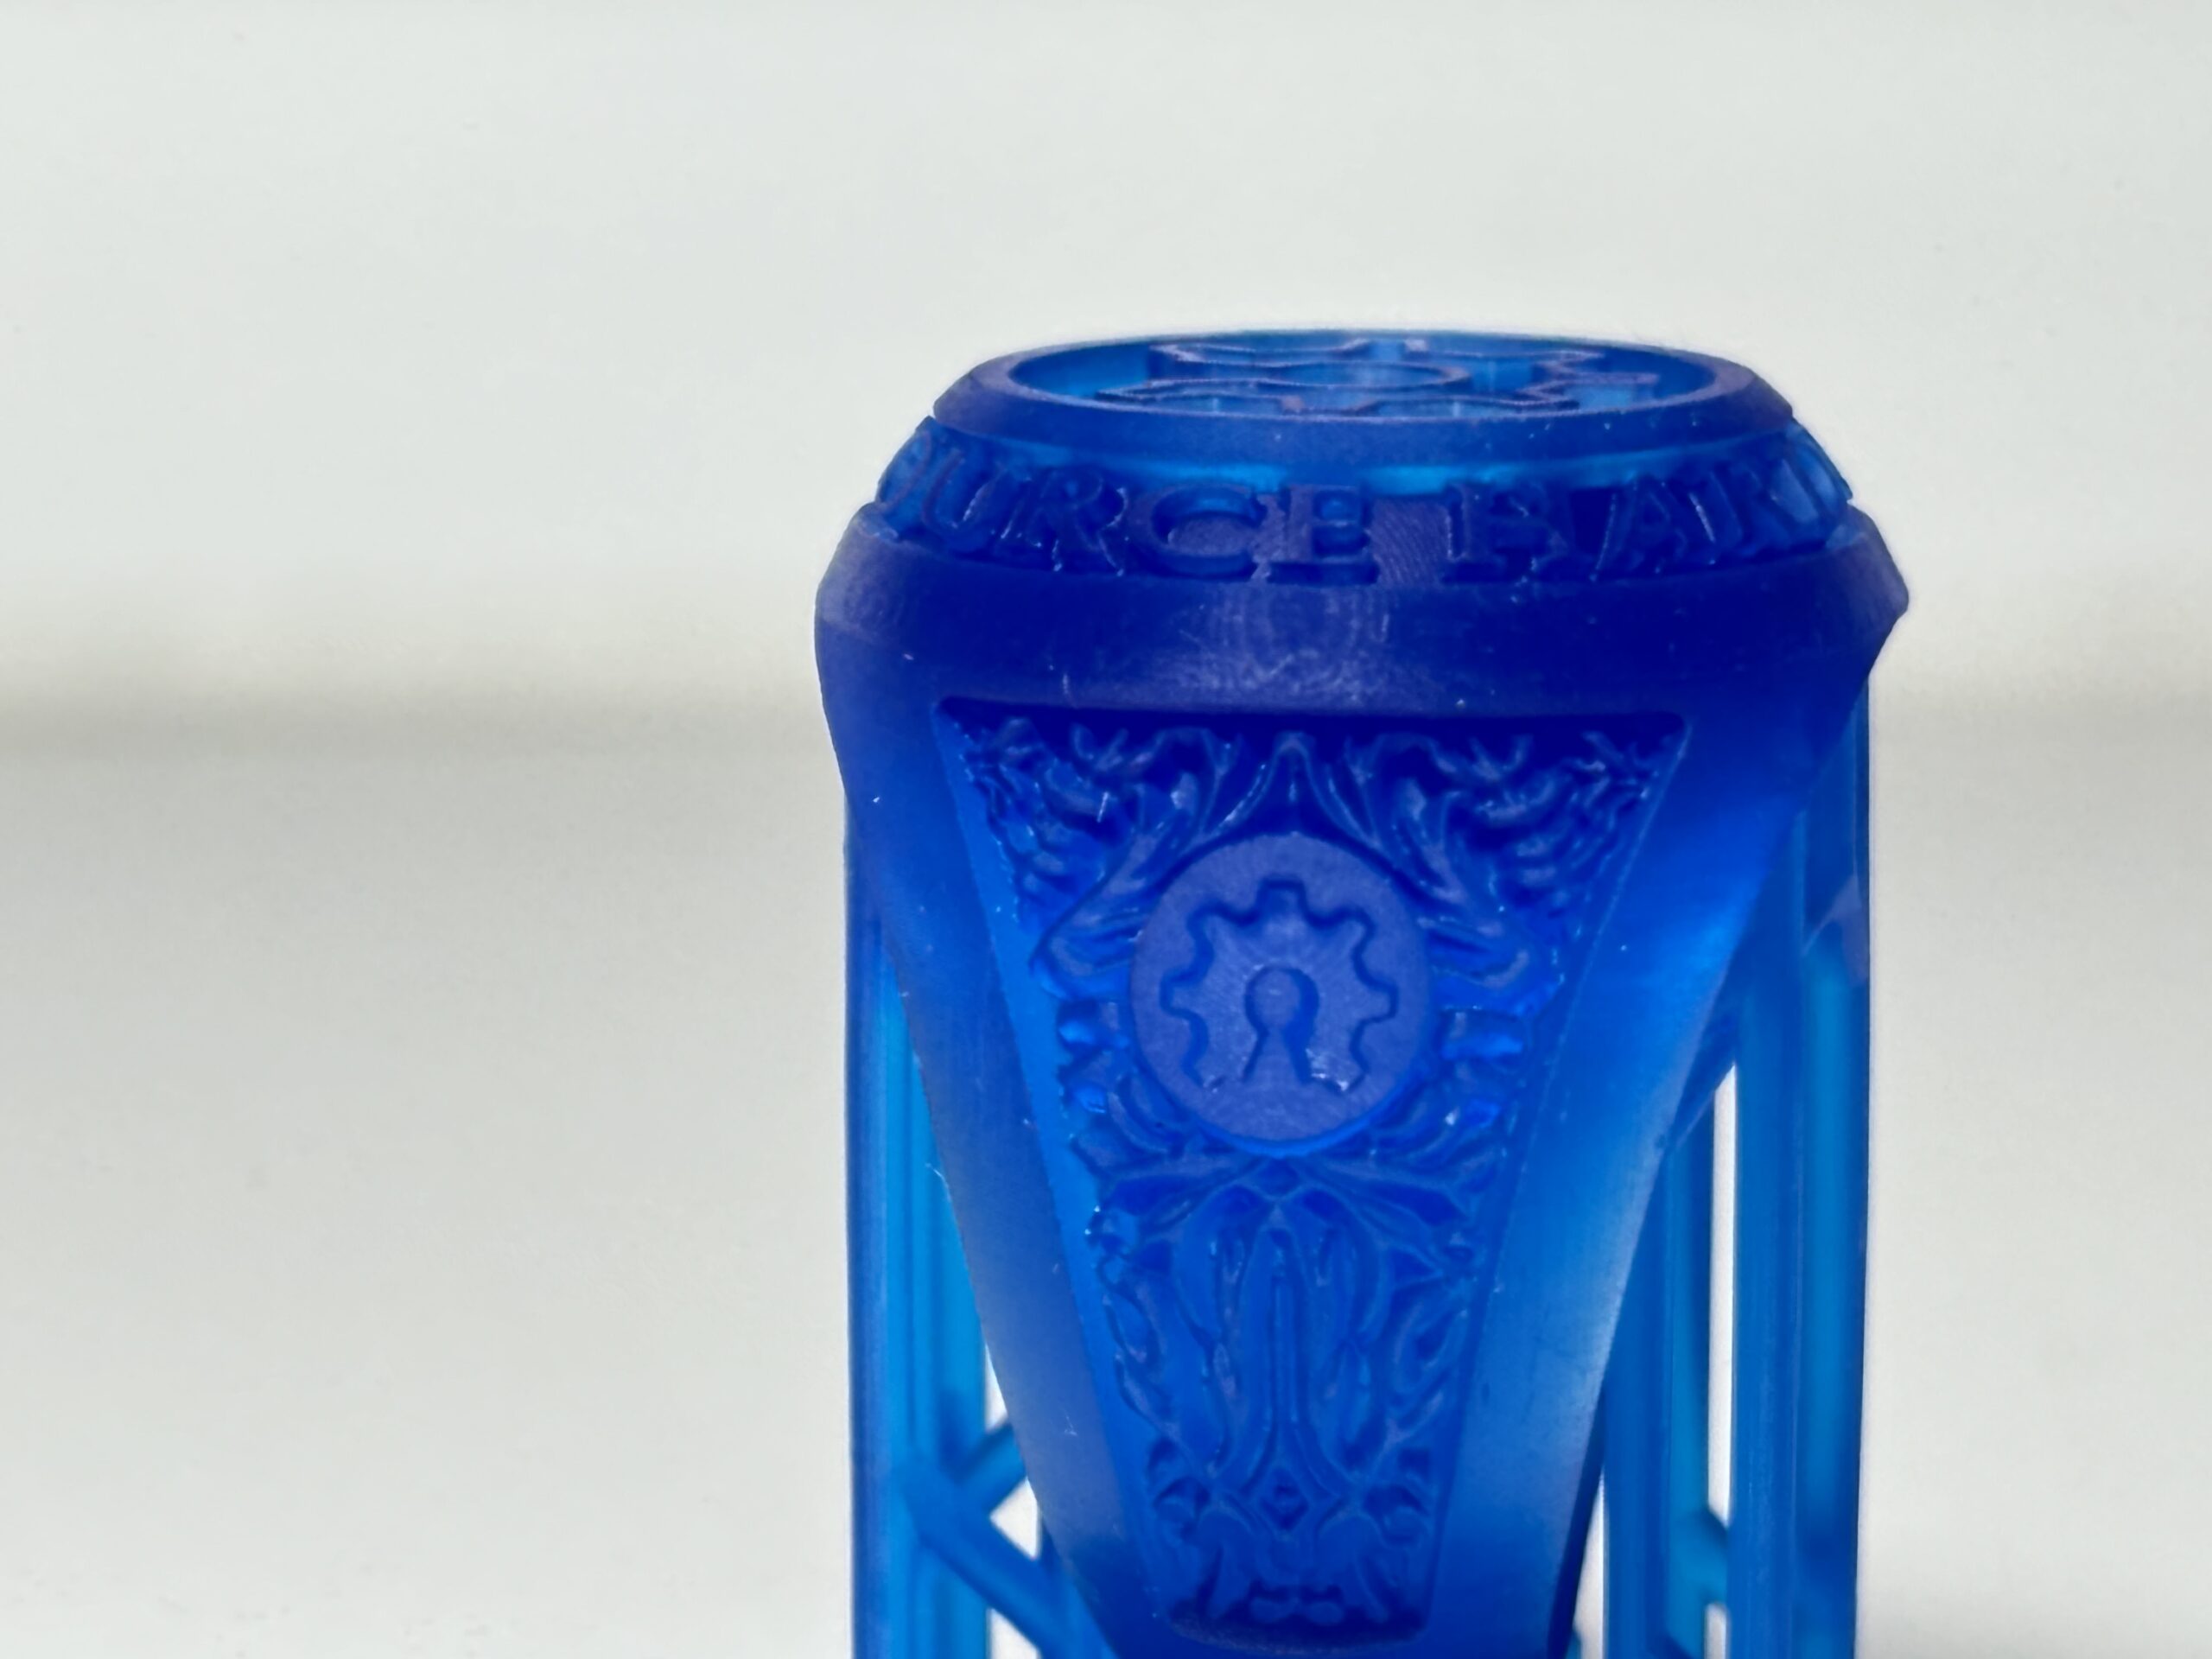
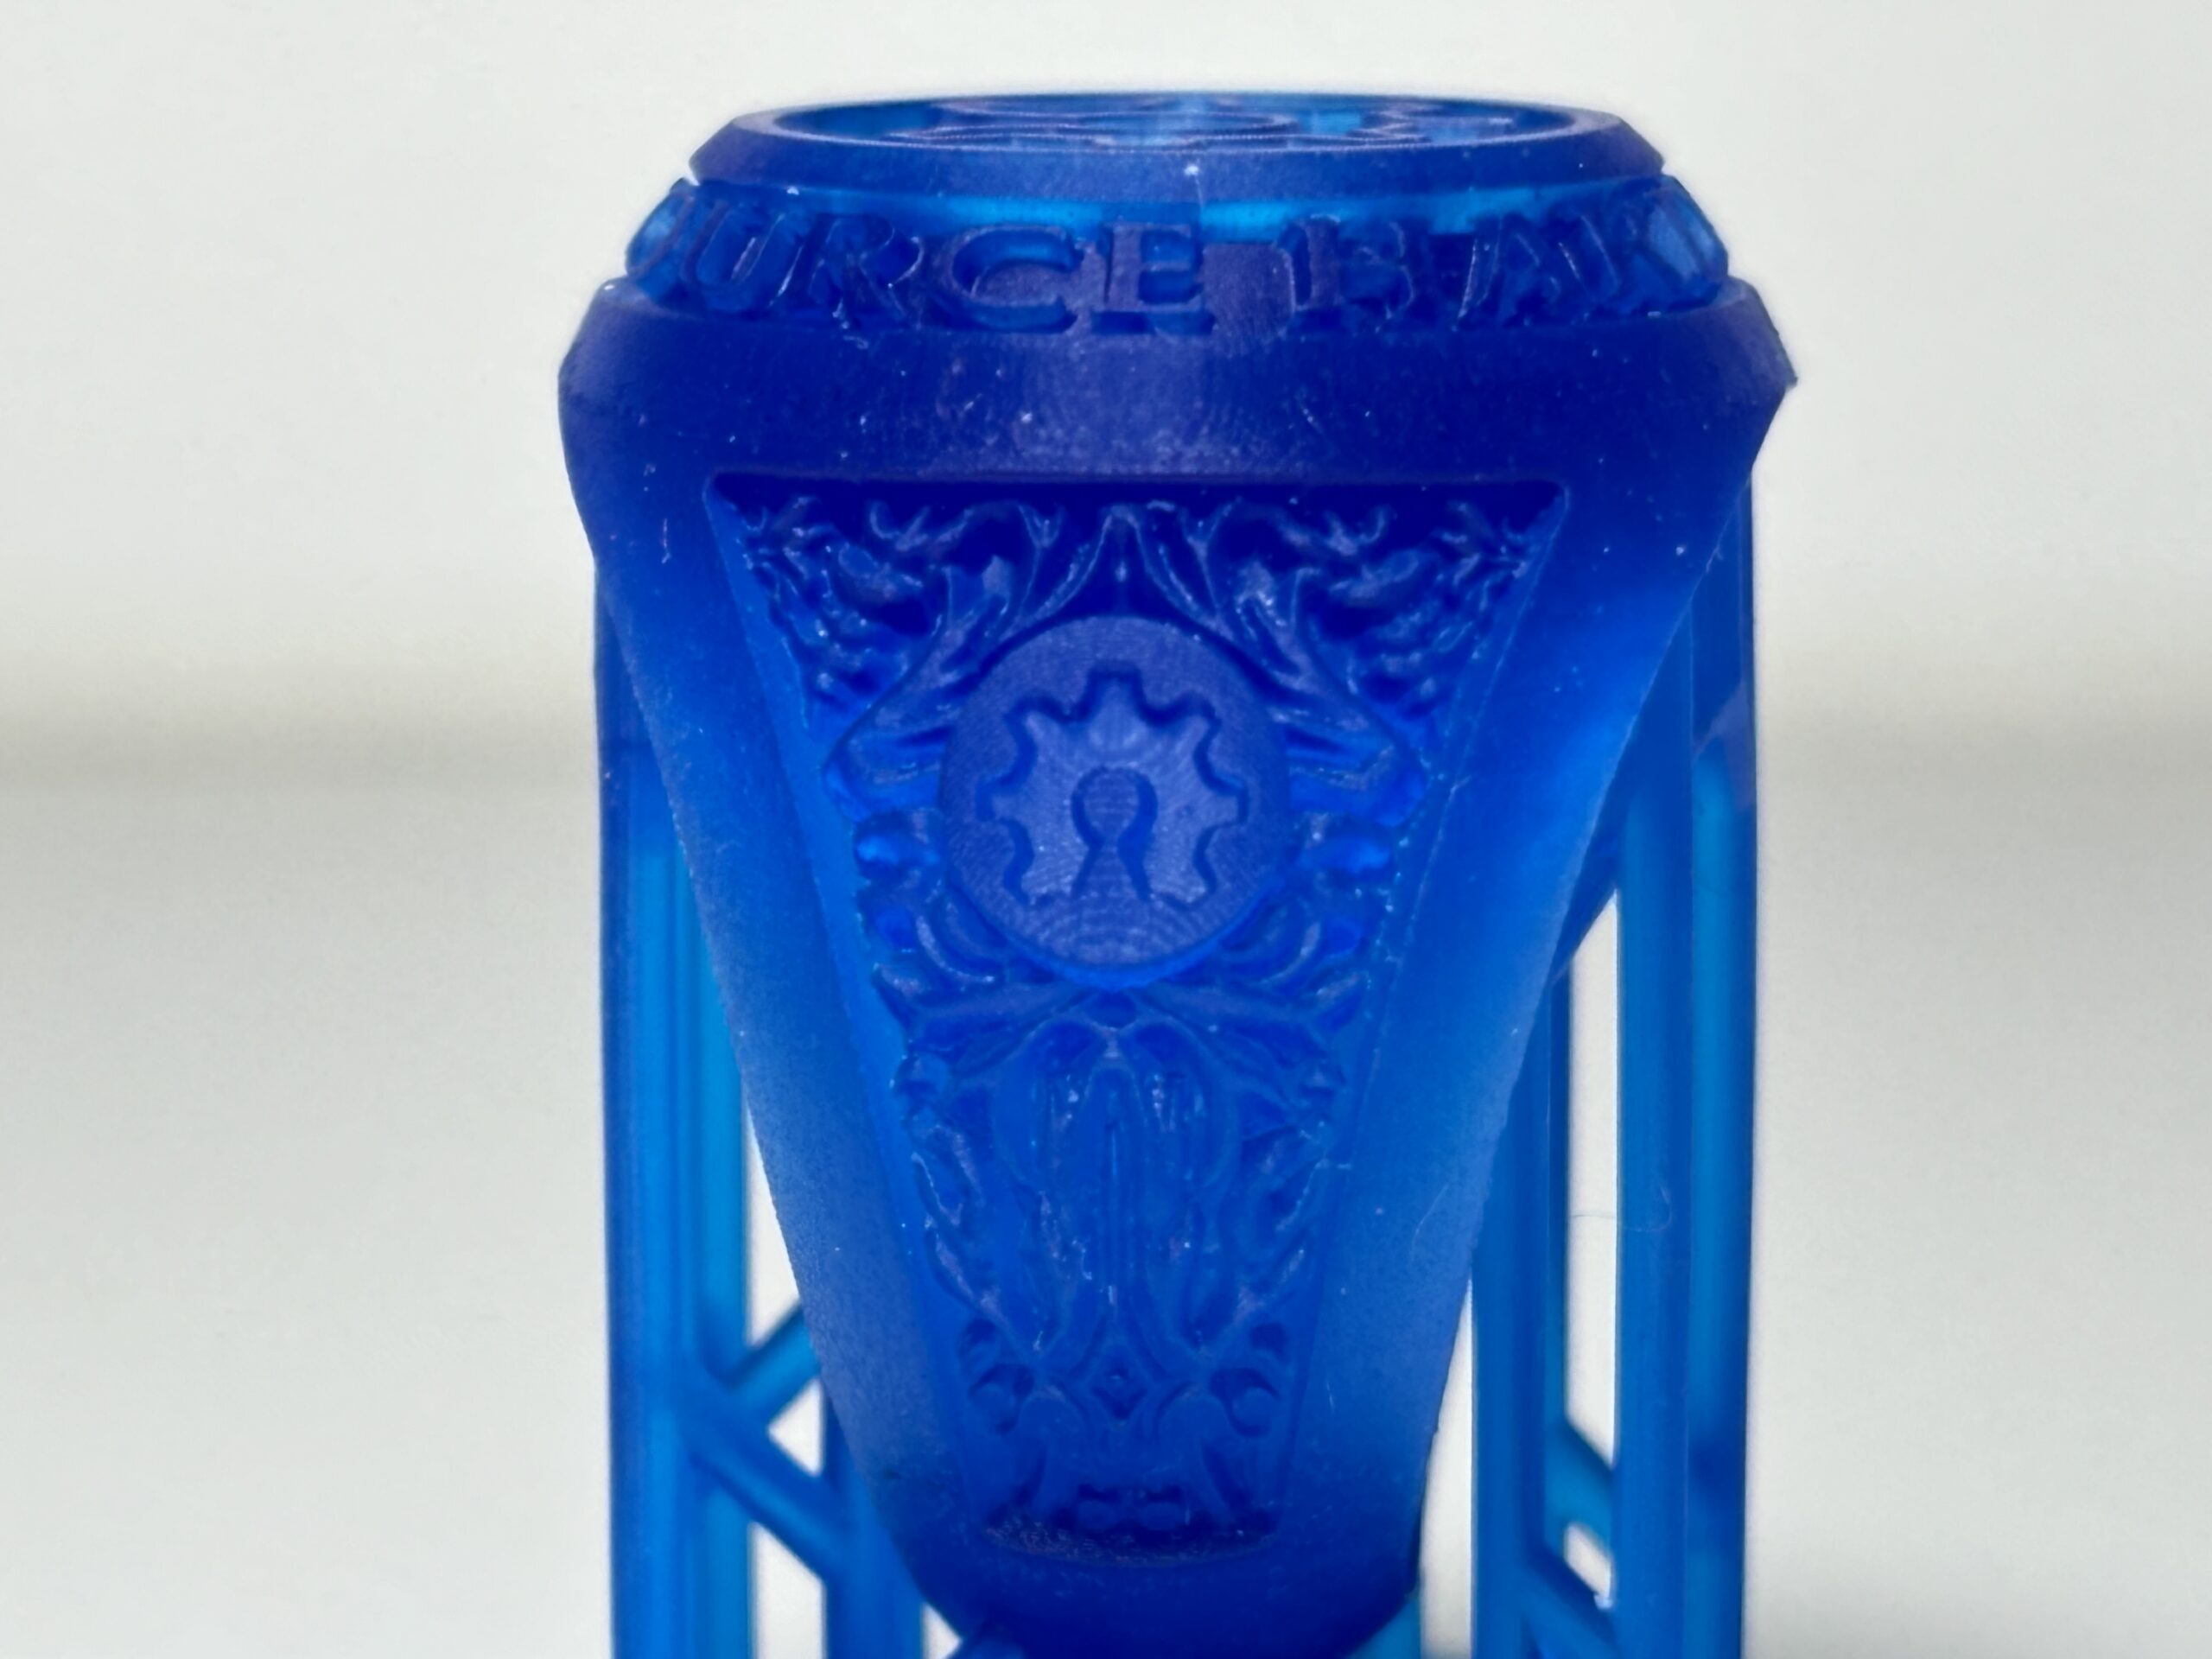
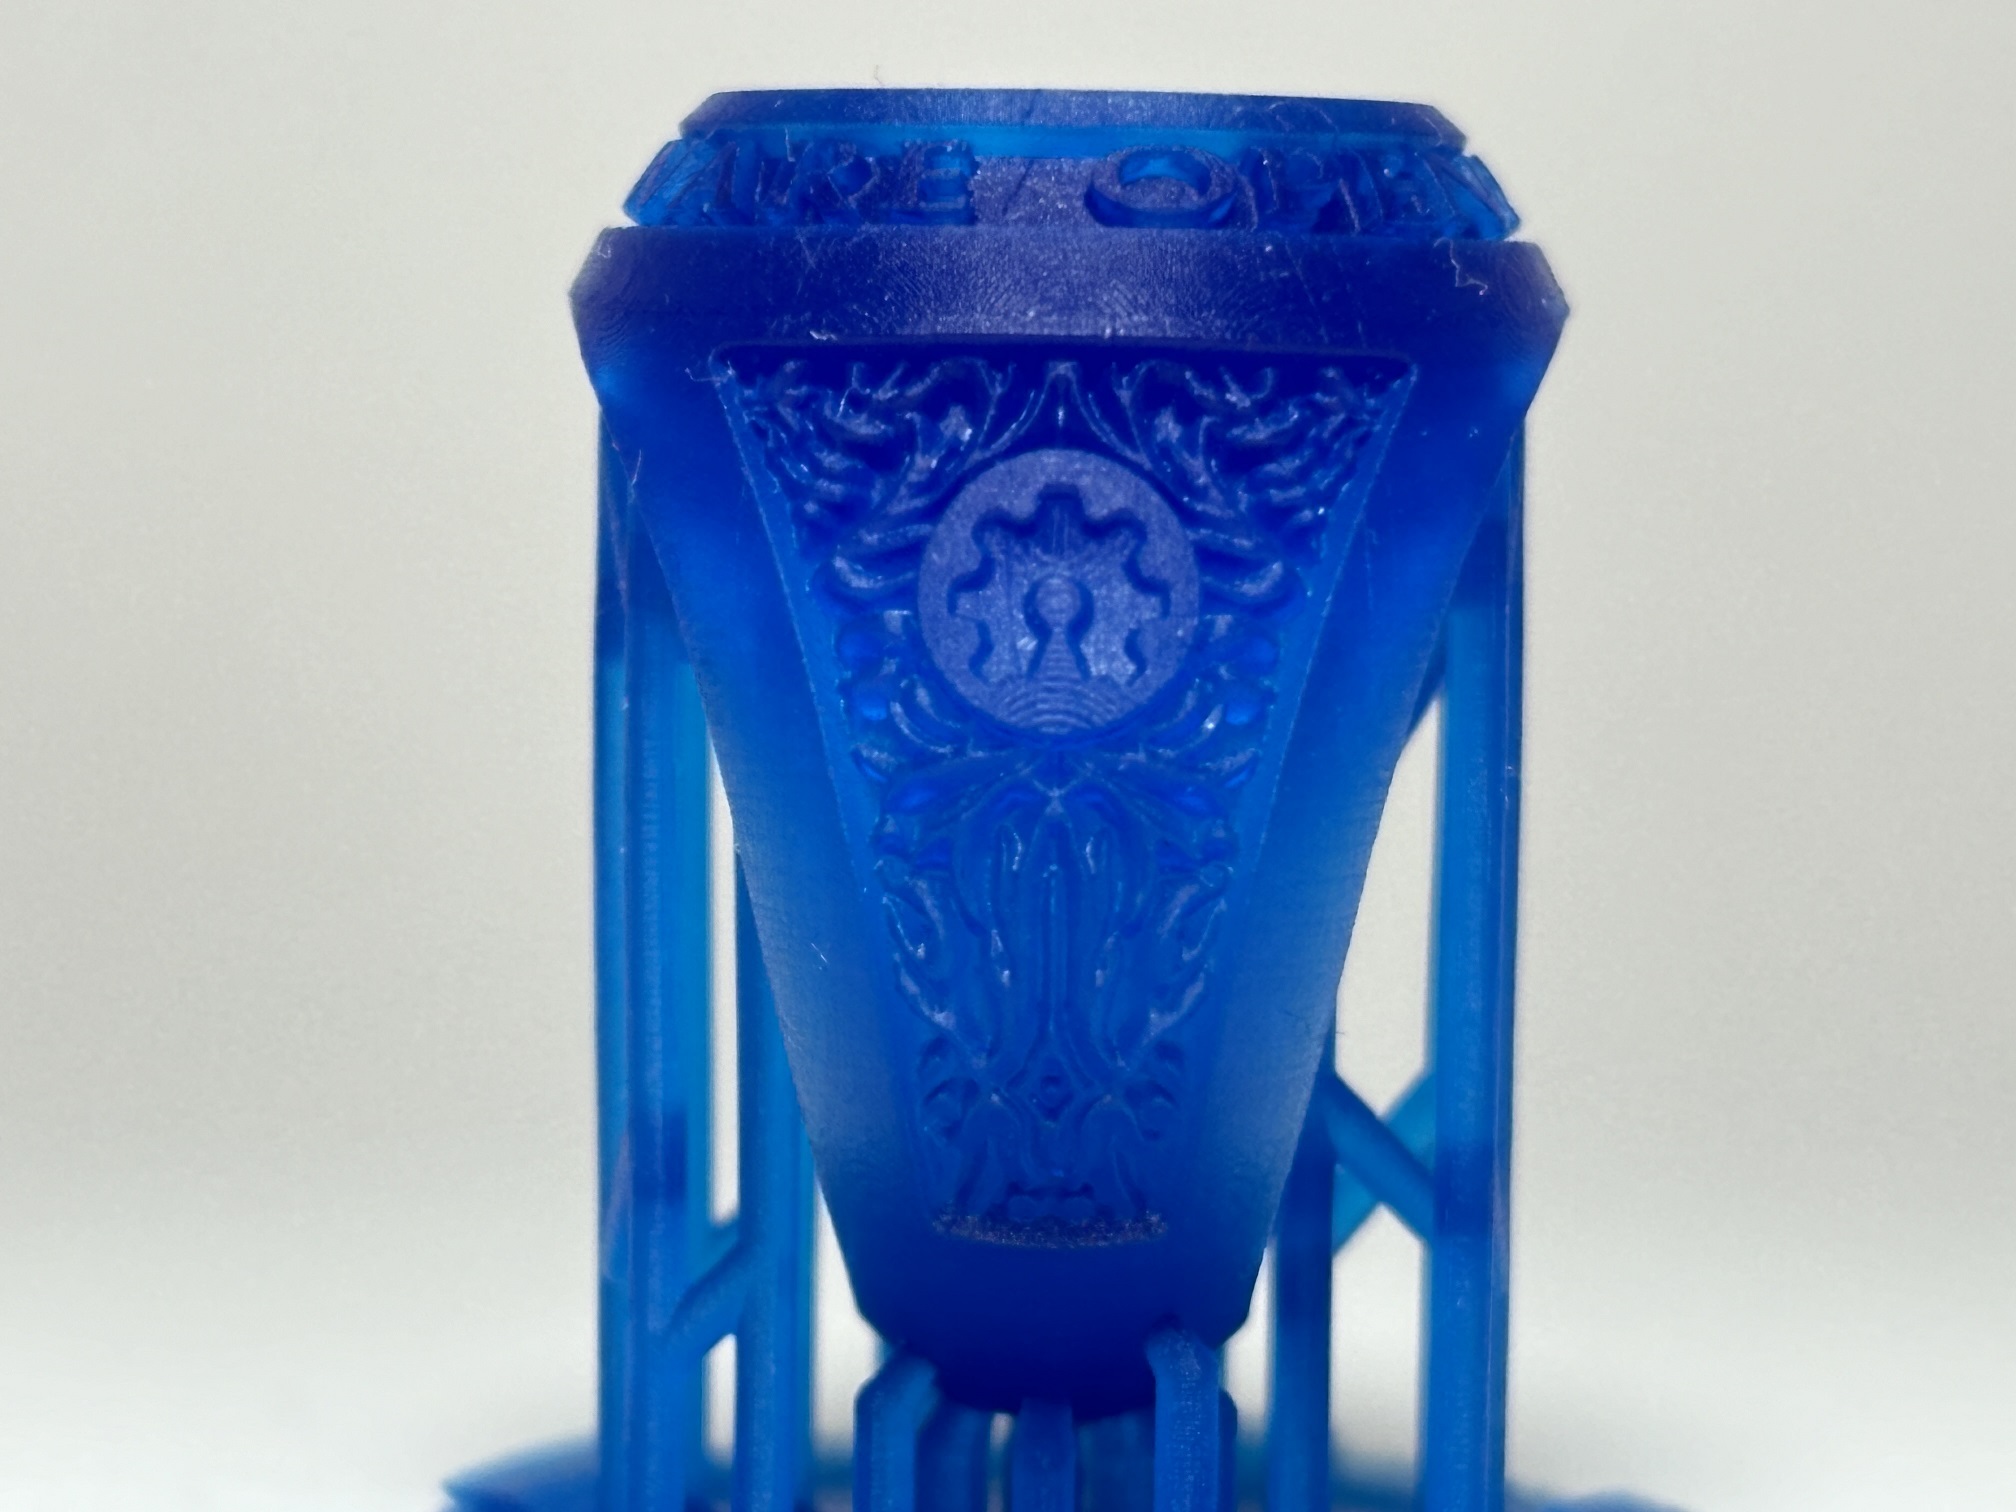
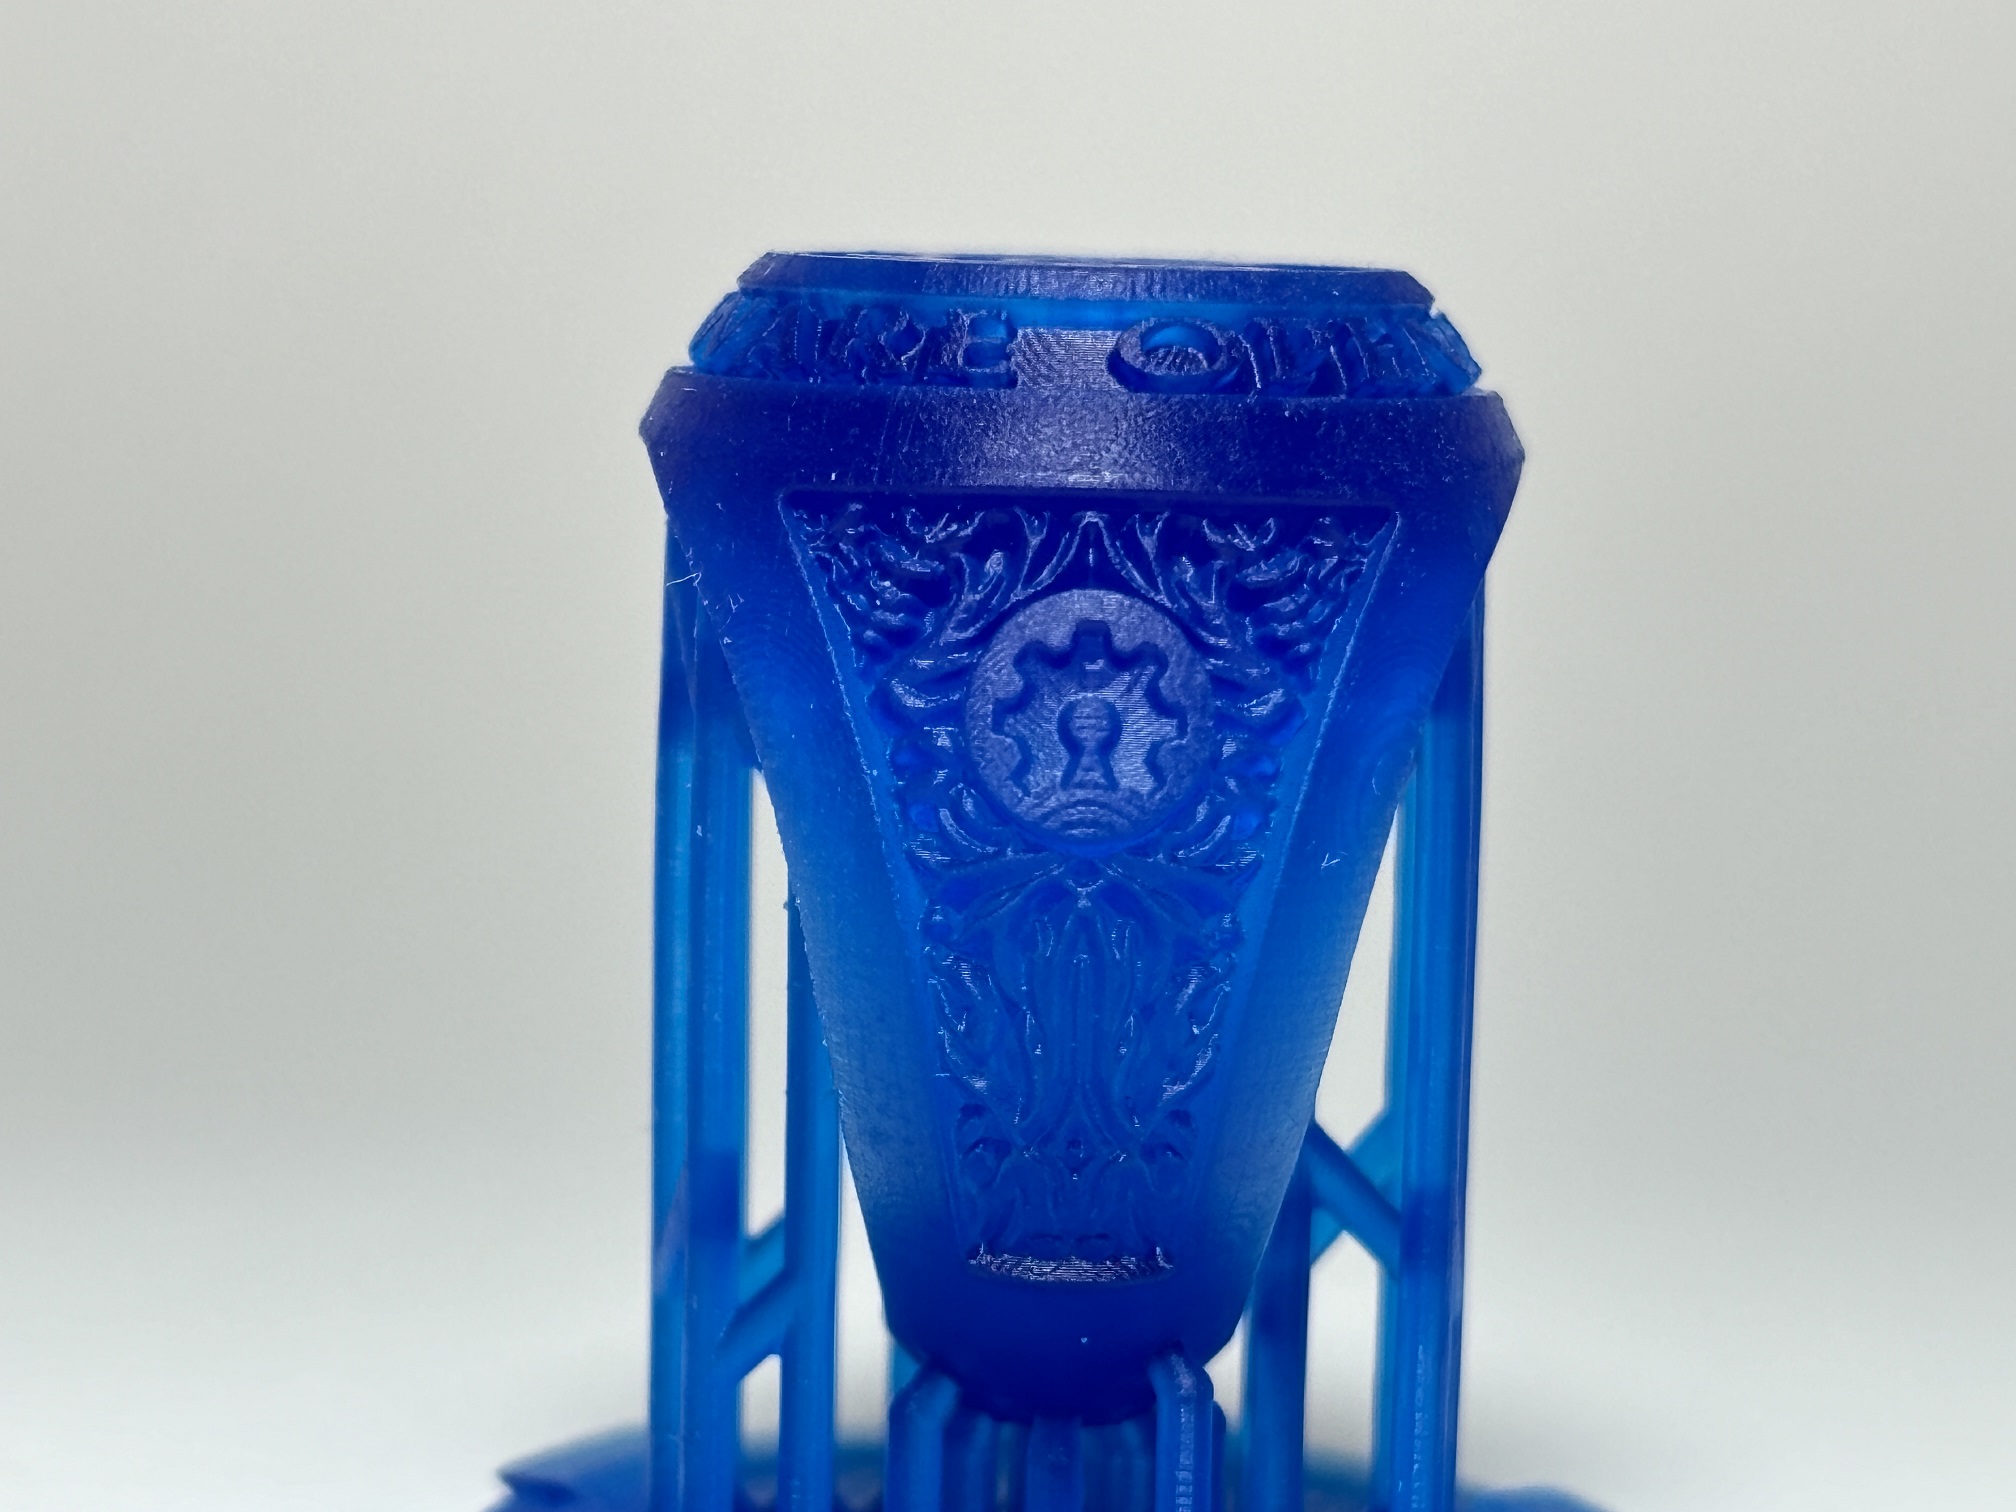
Liqcreate Wax Castable print with Grey 0; Blur 2 (best one, below this text)
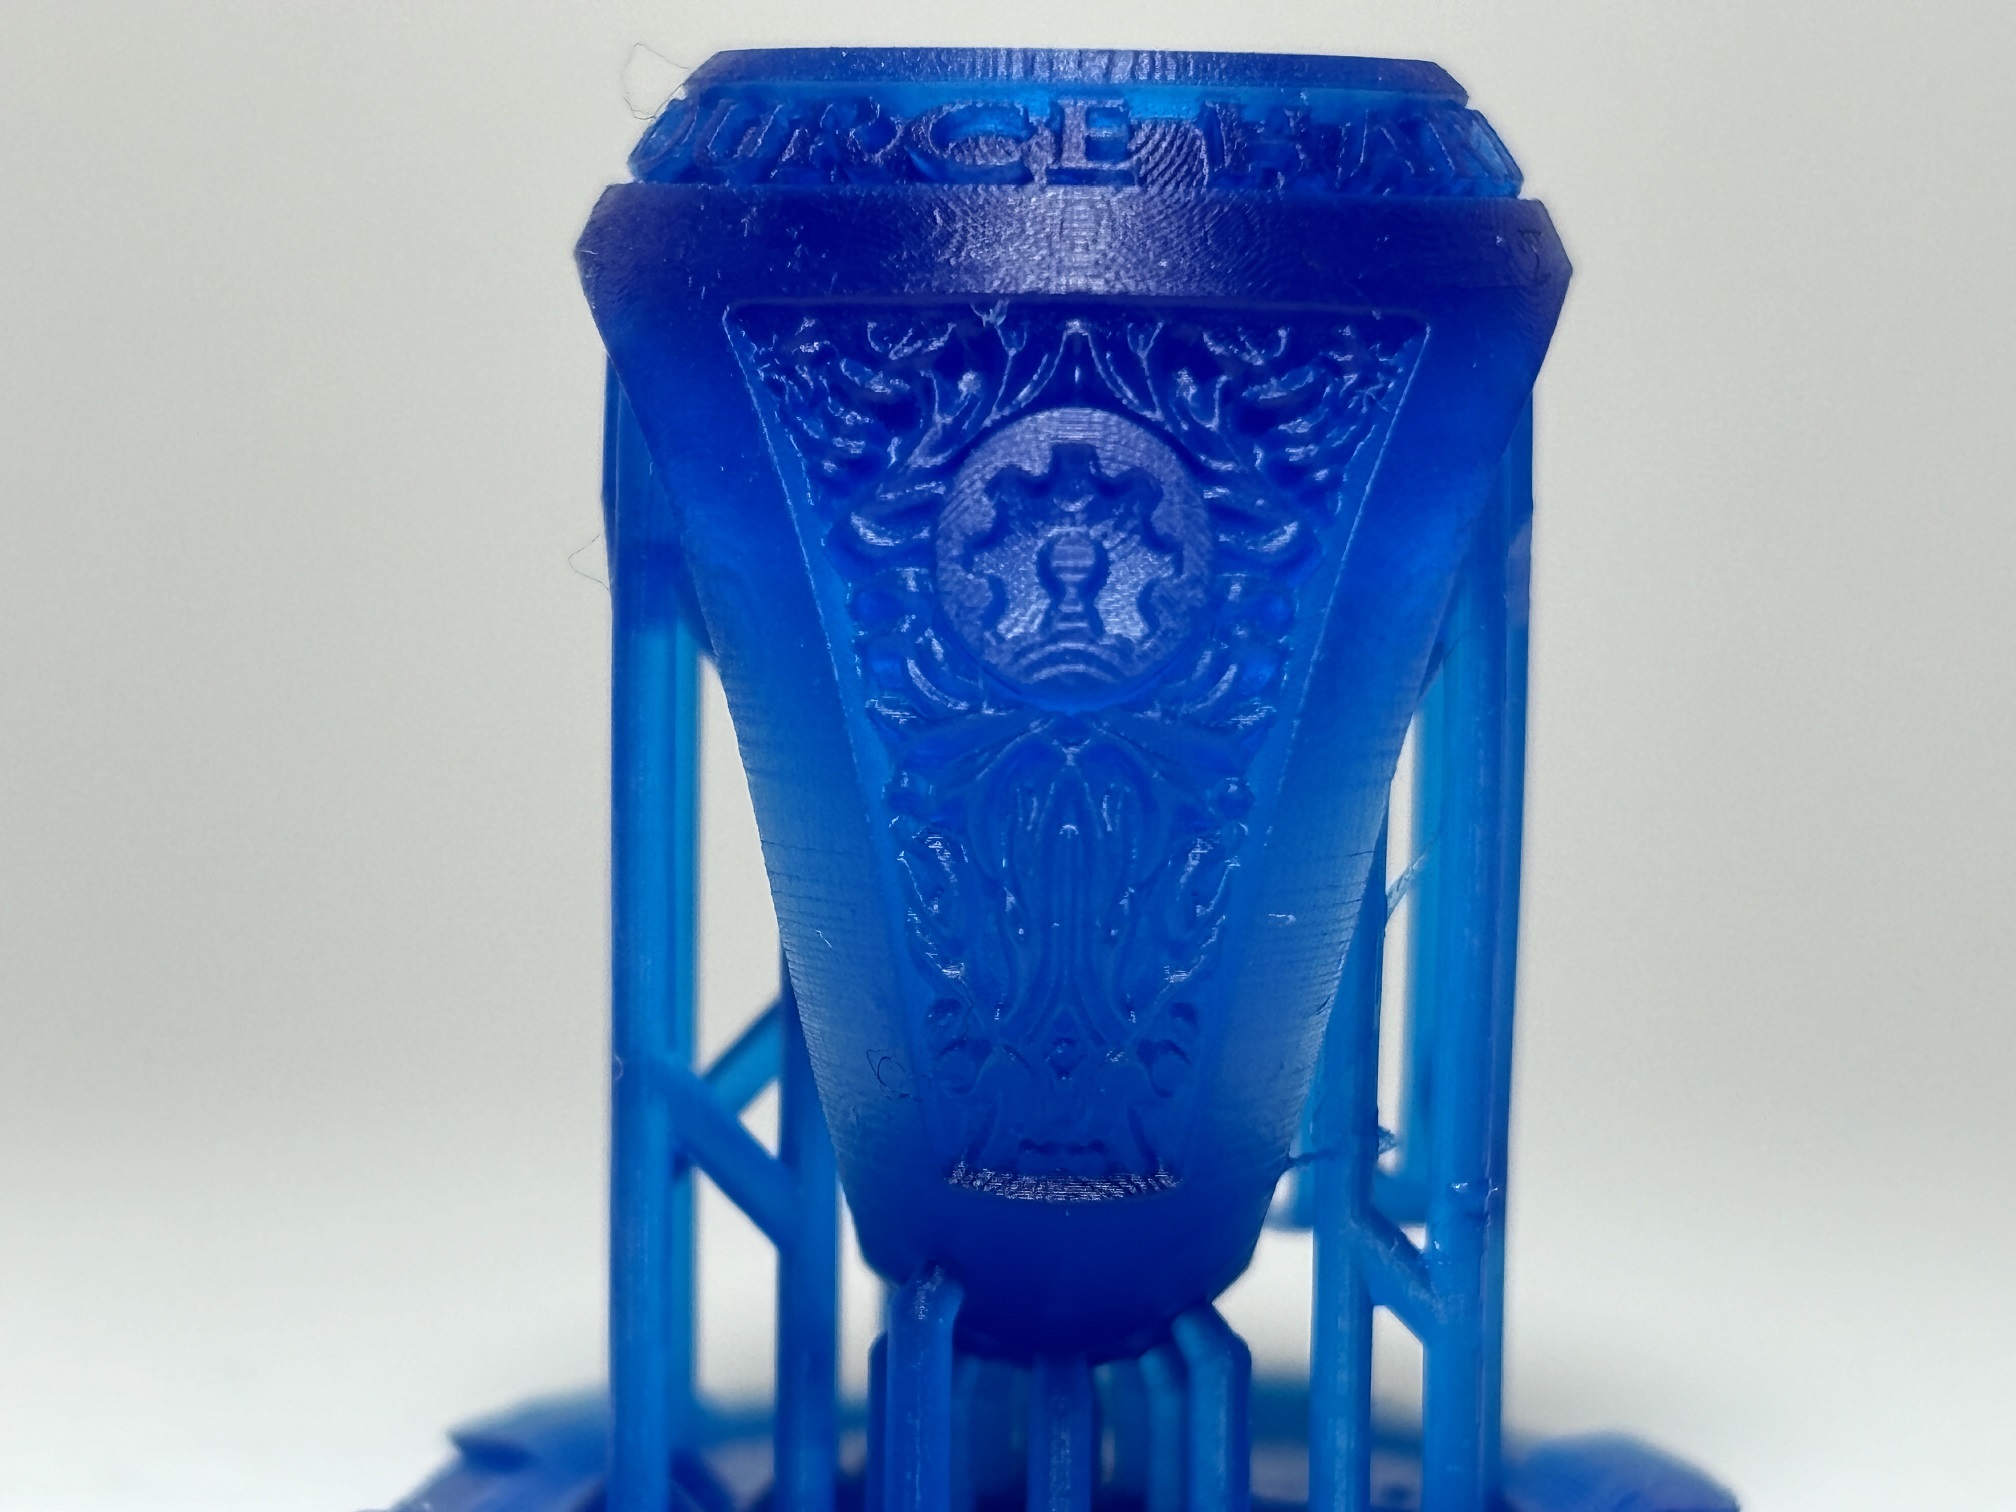
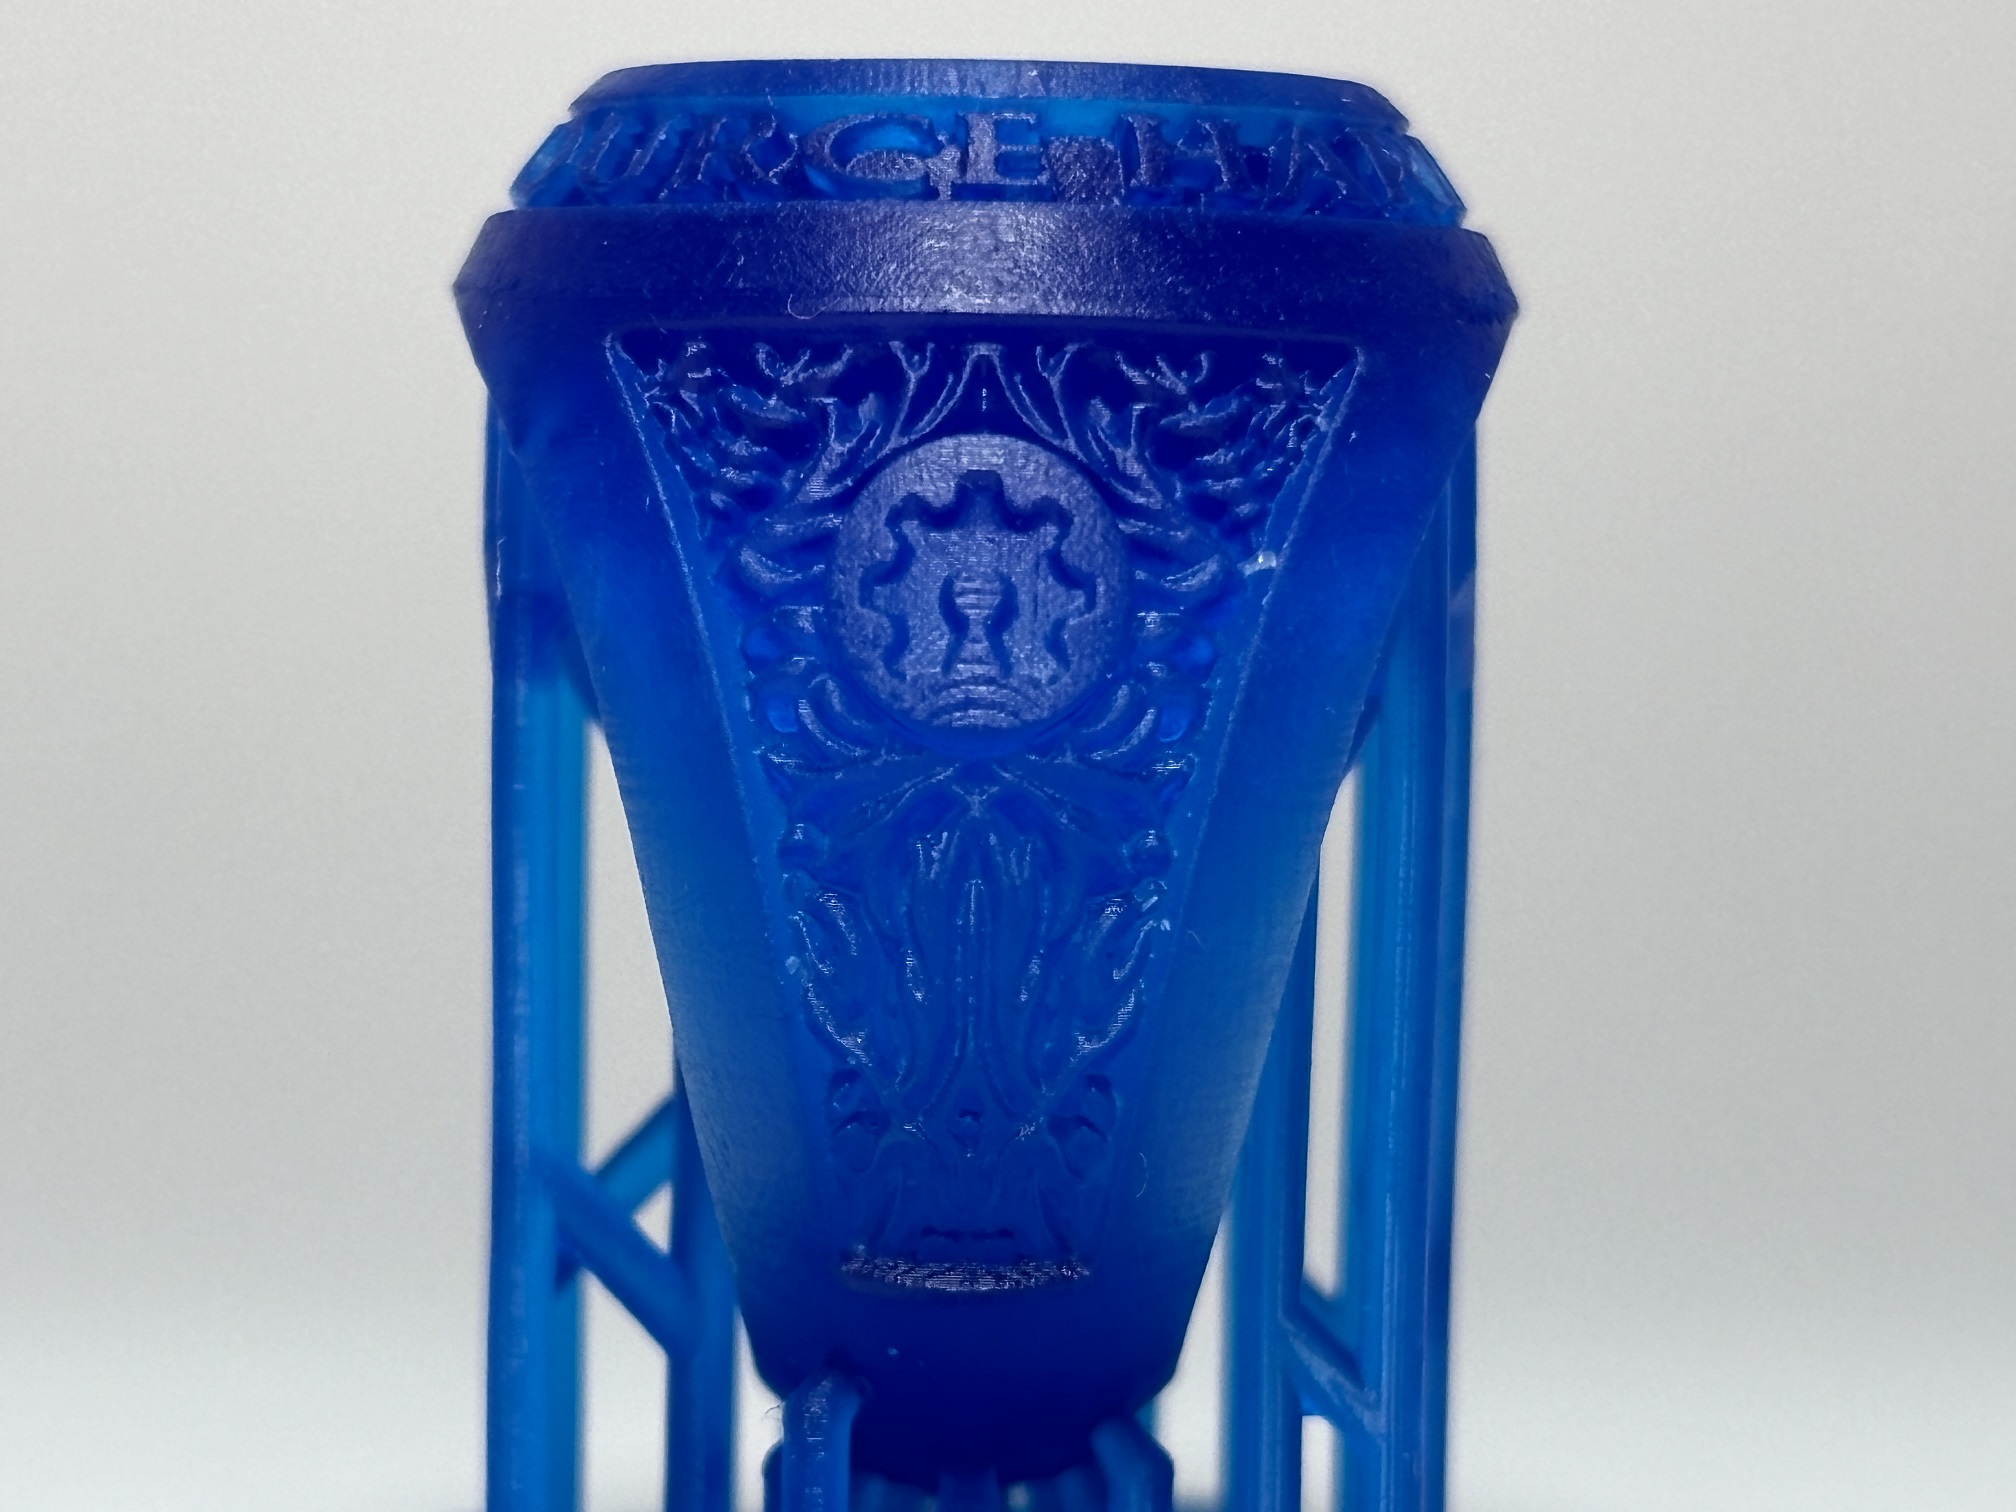
Liqcreate Wax Castable print with Grey 1; Blur off
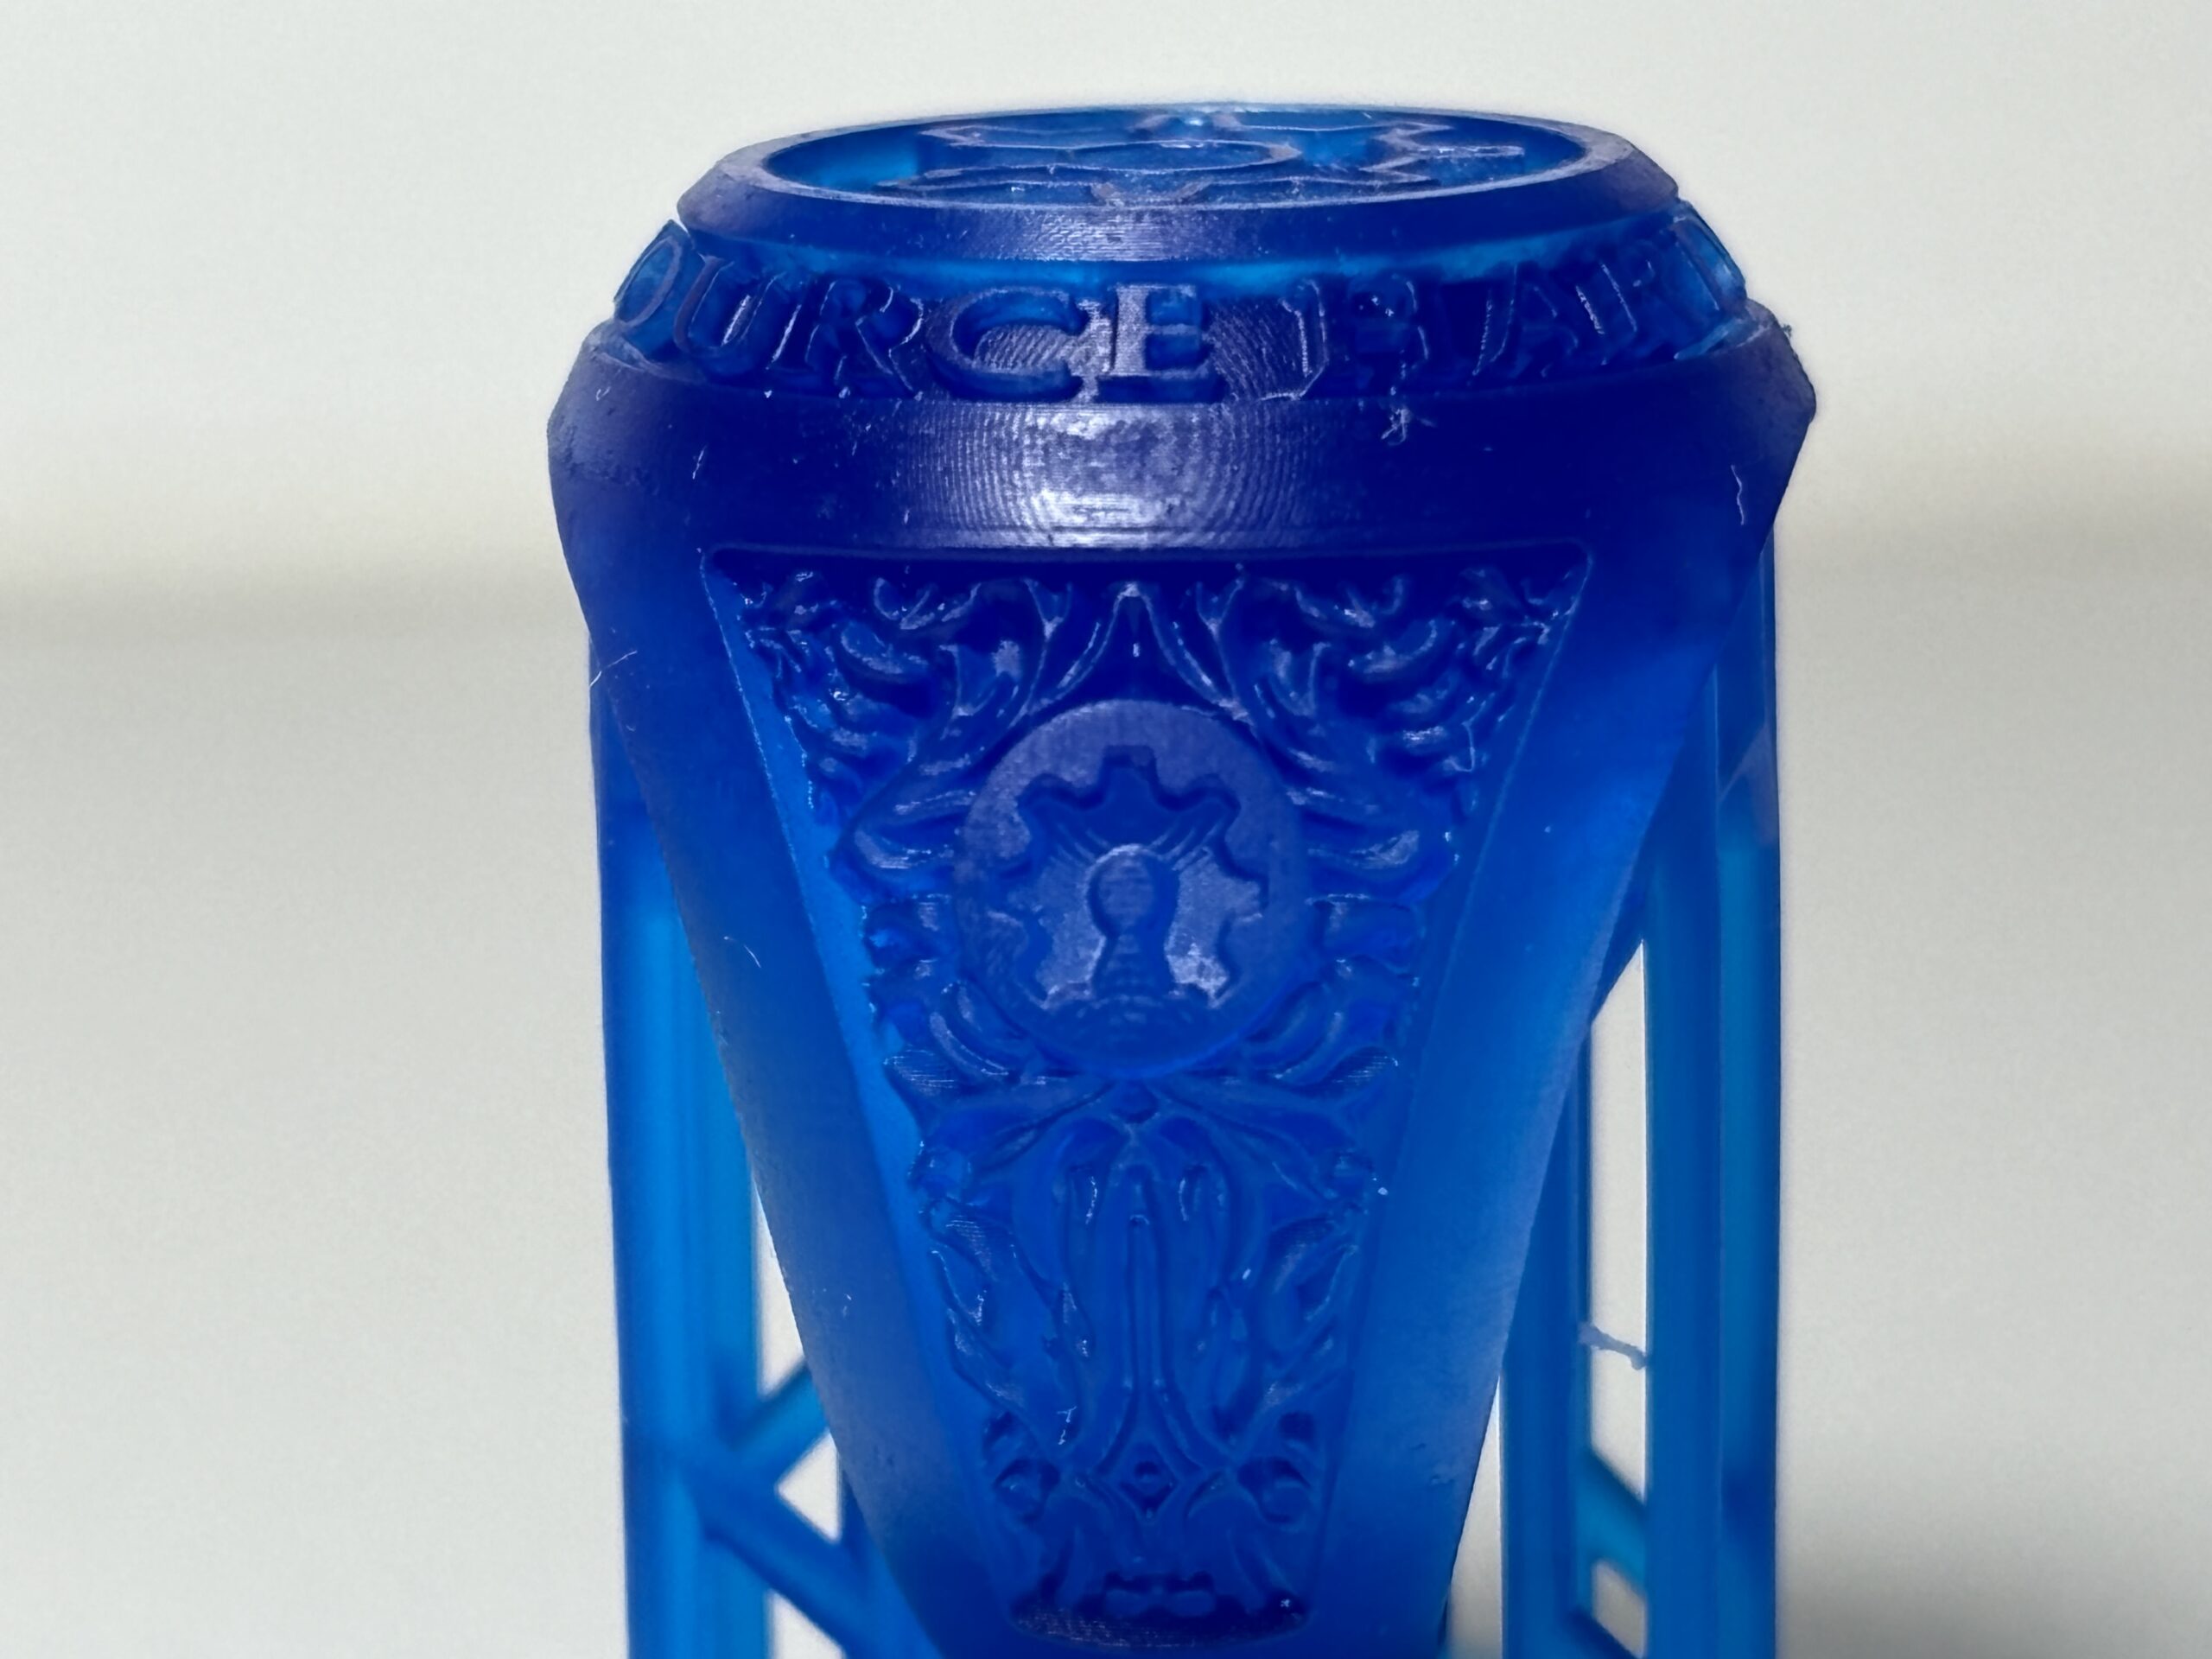
Liqcreate Wax Castable print with Grey 1; Blur 2
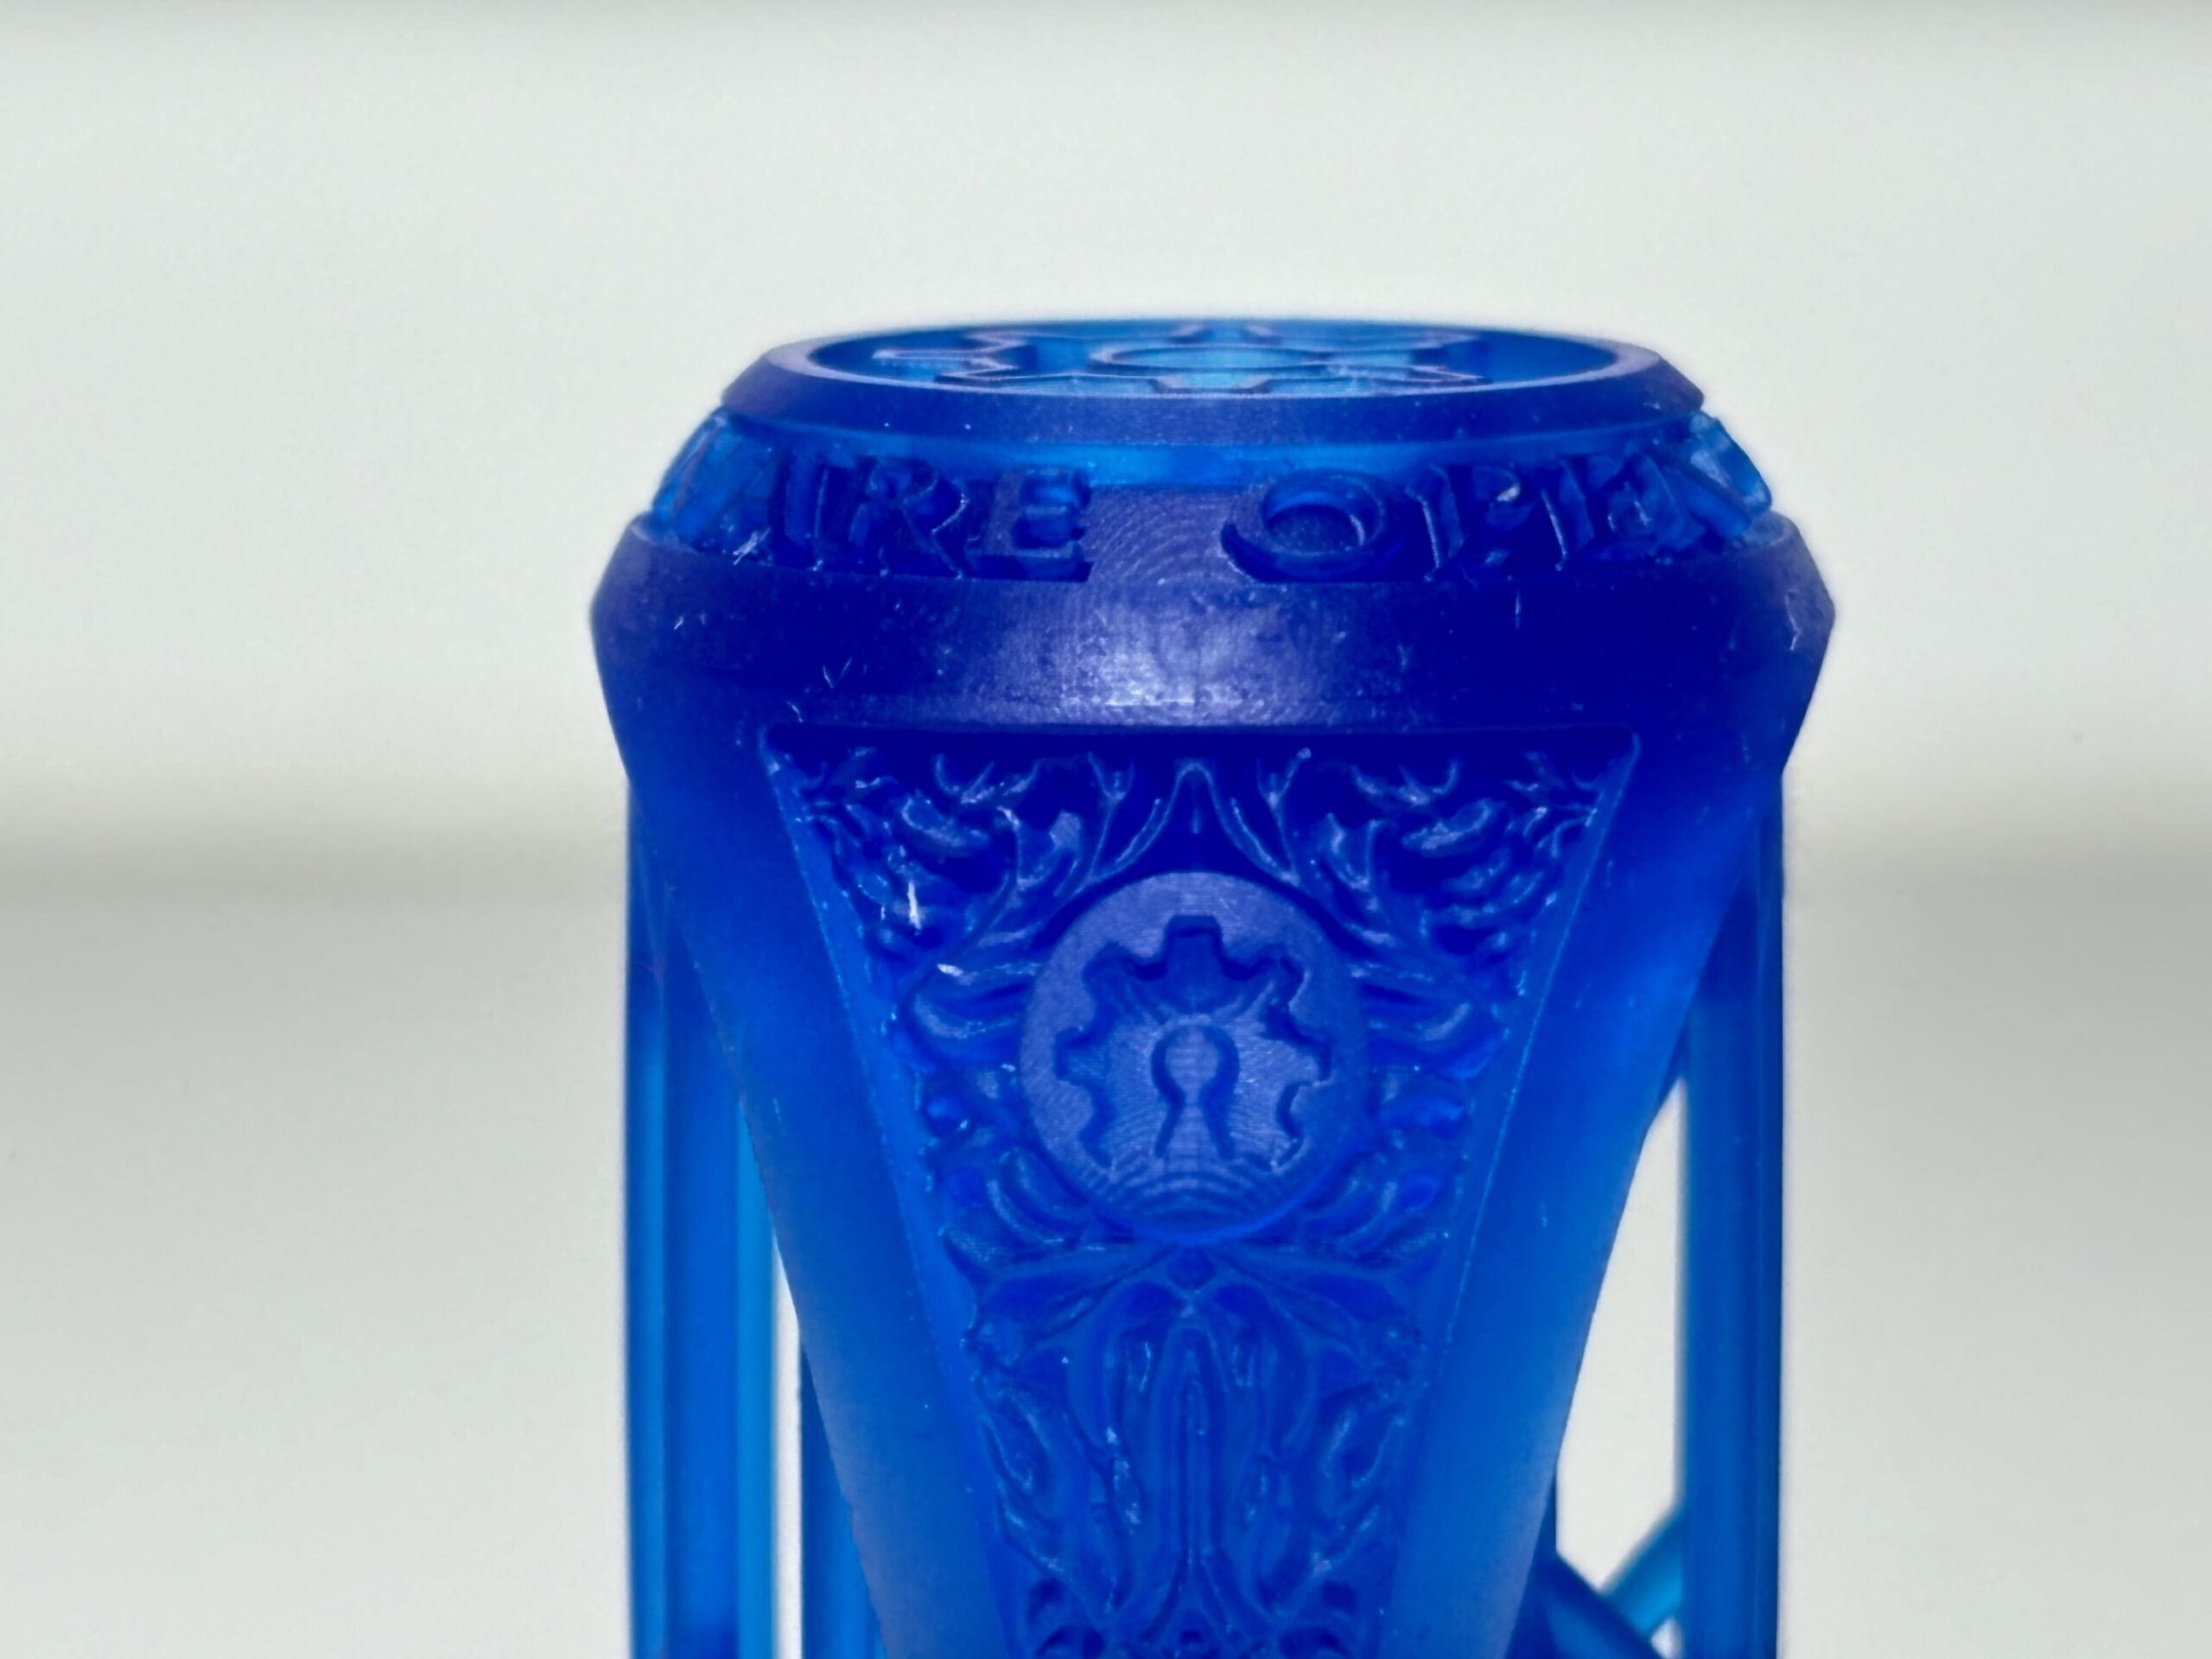
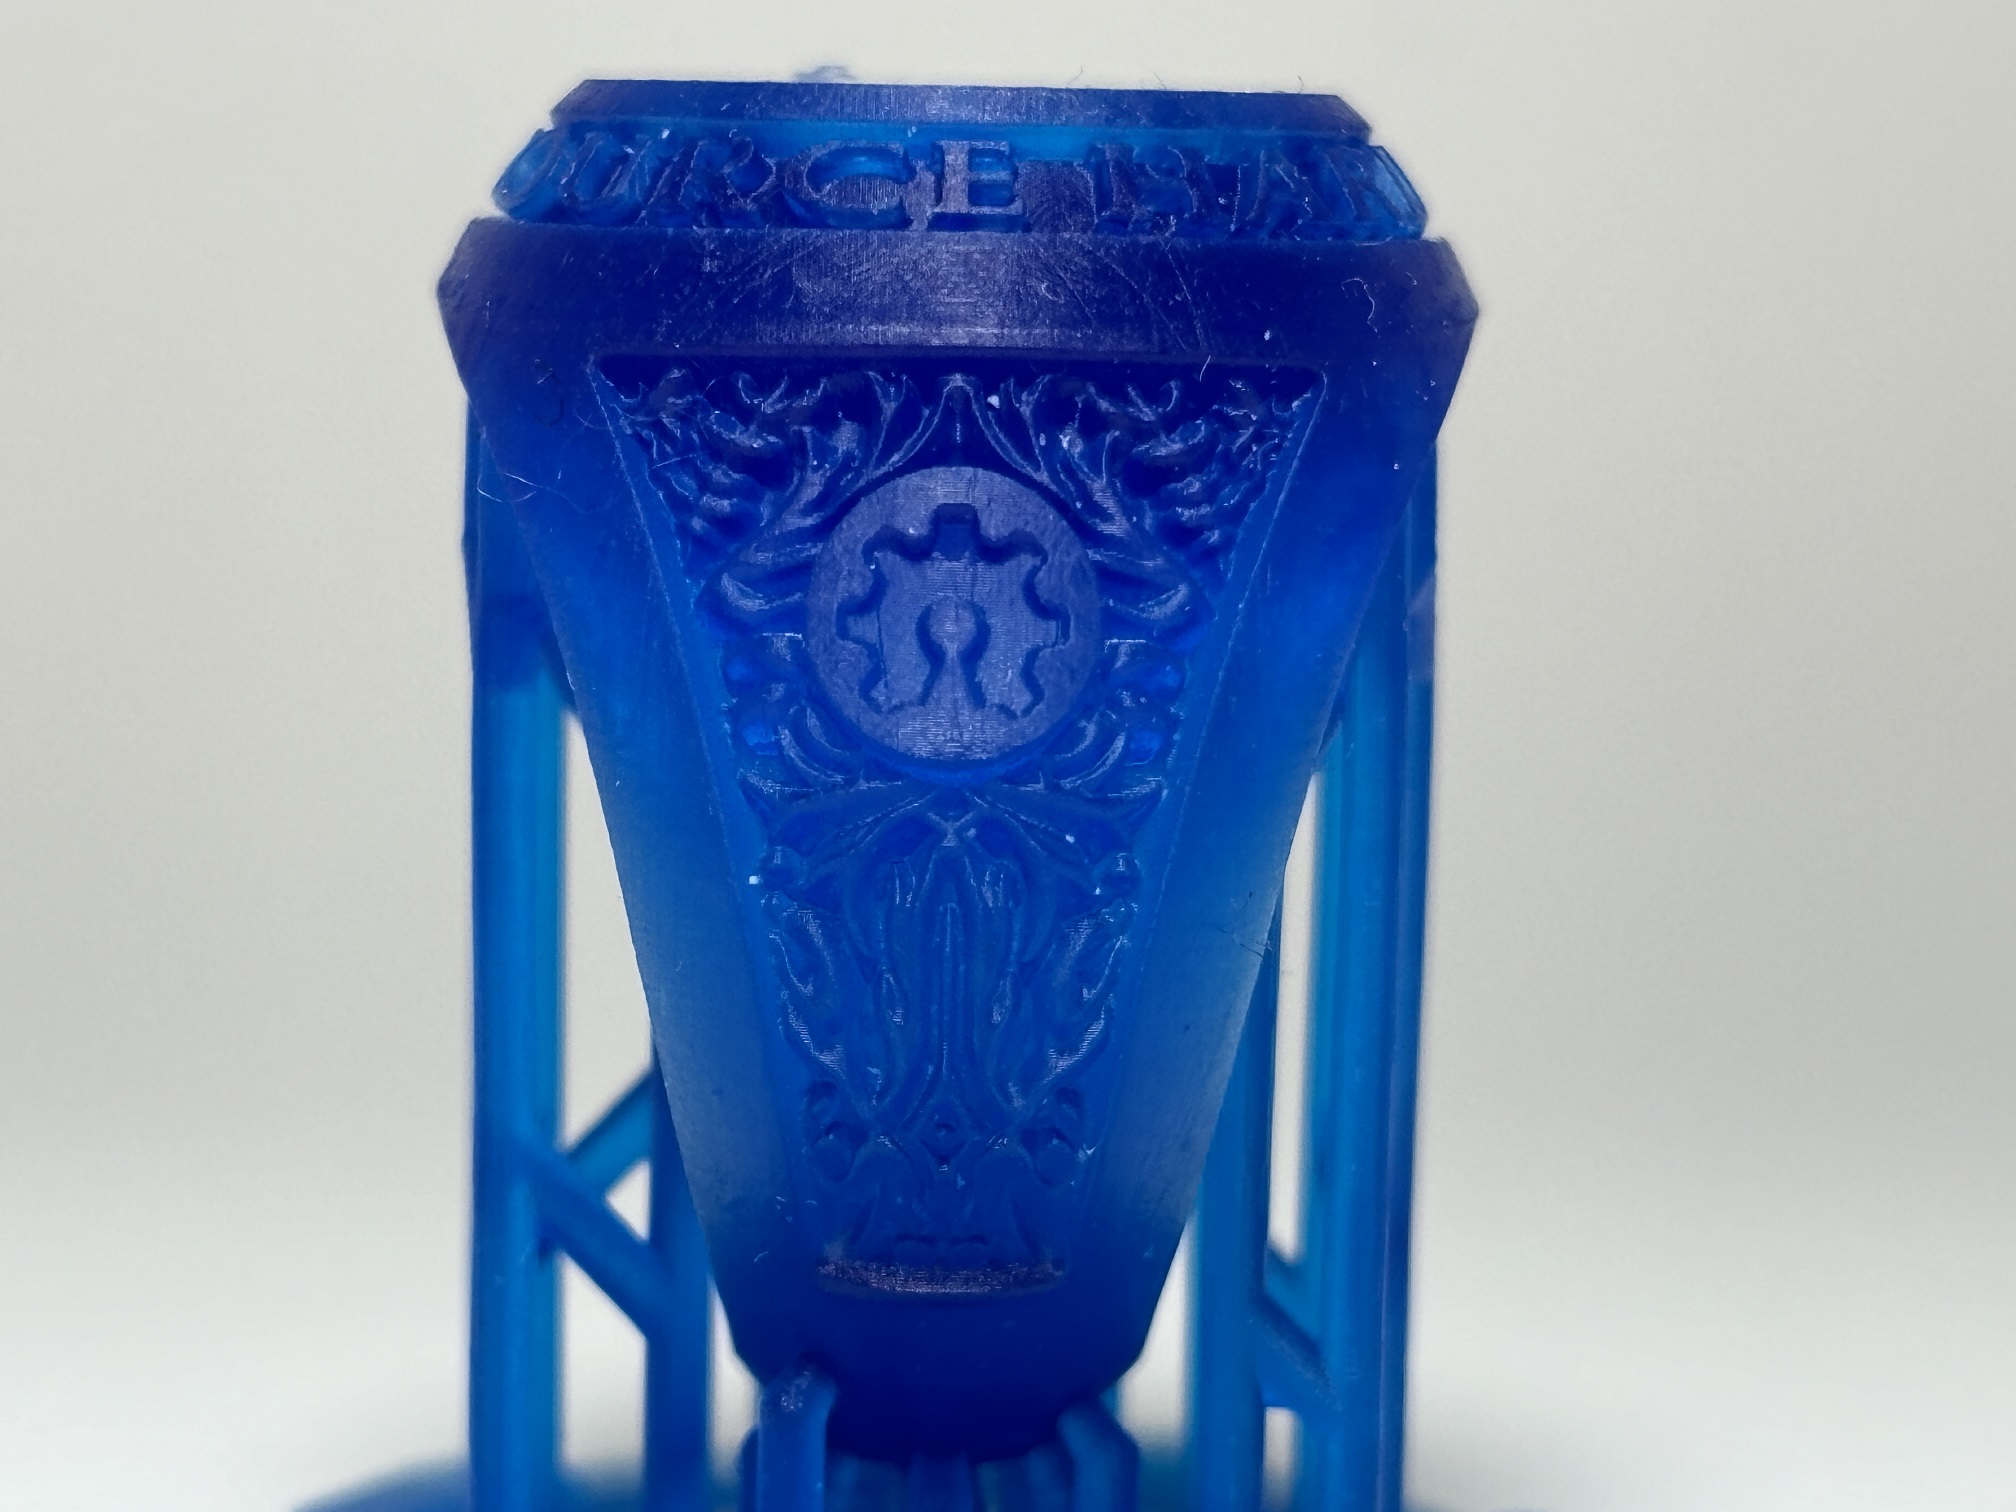
Liqcreate Wax Castable print with Grey 2; Blur off

Liqcreate Wax Castable print with Grey 2; Blur 2
Liqcreate Wax Castable print with Grey 3; Blur off
Liqcreate Wax Castable print with Grey 3; Blur 2
Liqcreate Wax Castable print with Grey 4; Blur off
Liqcreate Wax Castable print with Grey 4; Blur 2
Conclusion smoothing Wax Castable resin 3D-printed parts on the Elegoo Mars 3 with Anti-aliasing and blur settings.
Apologize for the sometimes not too clear pictures. The part gets smoother with higher anti-aliasing and blur levels and there is less contrast which makes it very difficult to capture. From looking at the parts right in from of me. the setting with Grey level 0 and Blur level 2 are very smooth. in some angles the pixels are very fainted, but still visible. you won’t be able to completely erase them. but with this setting it does not look like a lot of detail is lost while most of the pixelated surface is smooth! Lets see how the DLP technology from Anycubic holds-up in this test!
Anti-Aliasing (AA) and blur settings in the Anycubic Photon D2 (DLP)
We wanted to test these two machines. The reason is that with the Mars 3 we knew from experience and previous testing that AA and blur worked well. The LCD technology will already give some natural smoothing as the pixels are not as sharp as DLP. This is due to the focus of the lense and distance to the resin. With a good DLP printer you can focus exactely at the resin surface which makes it more accurate, but the pixels should be more pronounced. With the LCD screen the pixels are sharp at the screen and the sharpness will fade-out further away from the screen. Inbetween the resin and the LCD screen there is some space for the film, so there is a minimal gap of 0,1mm. Besides this technology difference, the pixel size of the Elegoo Mars 3 is 35 microns (0,035mm) while the Anycubic Photon D2 has 51 micron (0,051mm) pixels. this is probably achieved with pixel-shift which also gives a natural blur. Although that last statement has never been officially comunicated by the manufacturer. Let’s see the results:
Anti-Aliasing (AA) switched off
Liqcreate Wax Castable print with Anti-Aliasing level 2, Grey level 0, image blur off (A2G0B0).
Liqcreate Wax Castable print with Anti-Aliasing level 2, Grey level 0, image blur 2 (A2G0B2).
Liqcreate Wax Castable print with Anti-Aliasing level 2, Grey level 1, image blur off (A2G1B0).
Liqcreate Wax Castable print with Anti-Aliasing level 2, Grey level 1, image blur 1 (A2G1B1).

Liqcreate Wax Castable print with Anti-Aliasing level 2, Grey level 2, image blur off (A2G2B0).
Liqcreate Wax Castable print with Anti-Aliasing level 2, Grey level 2, image blur 2 (A2G2B2)
Liqcreate Wax Castable print with Anti-Aliasing level 4 , Grey level 0, image blur off (A4G0B0).
Liqcreate Wax Castable print with Anti-Aliasing level 4, Grey level 1, image blur off (A4G1B0).
Liqcreate Wax Castable print with Anti-Aliasing level 4, Grey level 2, image blur off (A4G2B0).
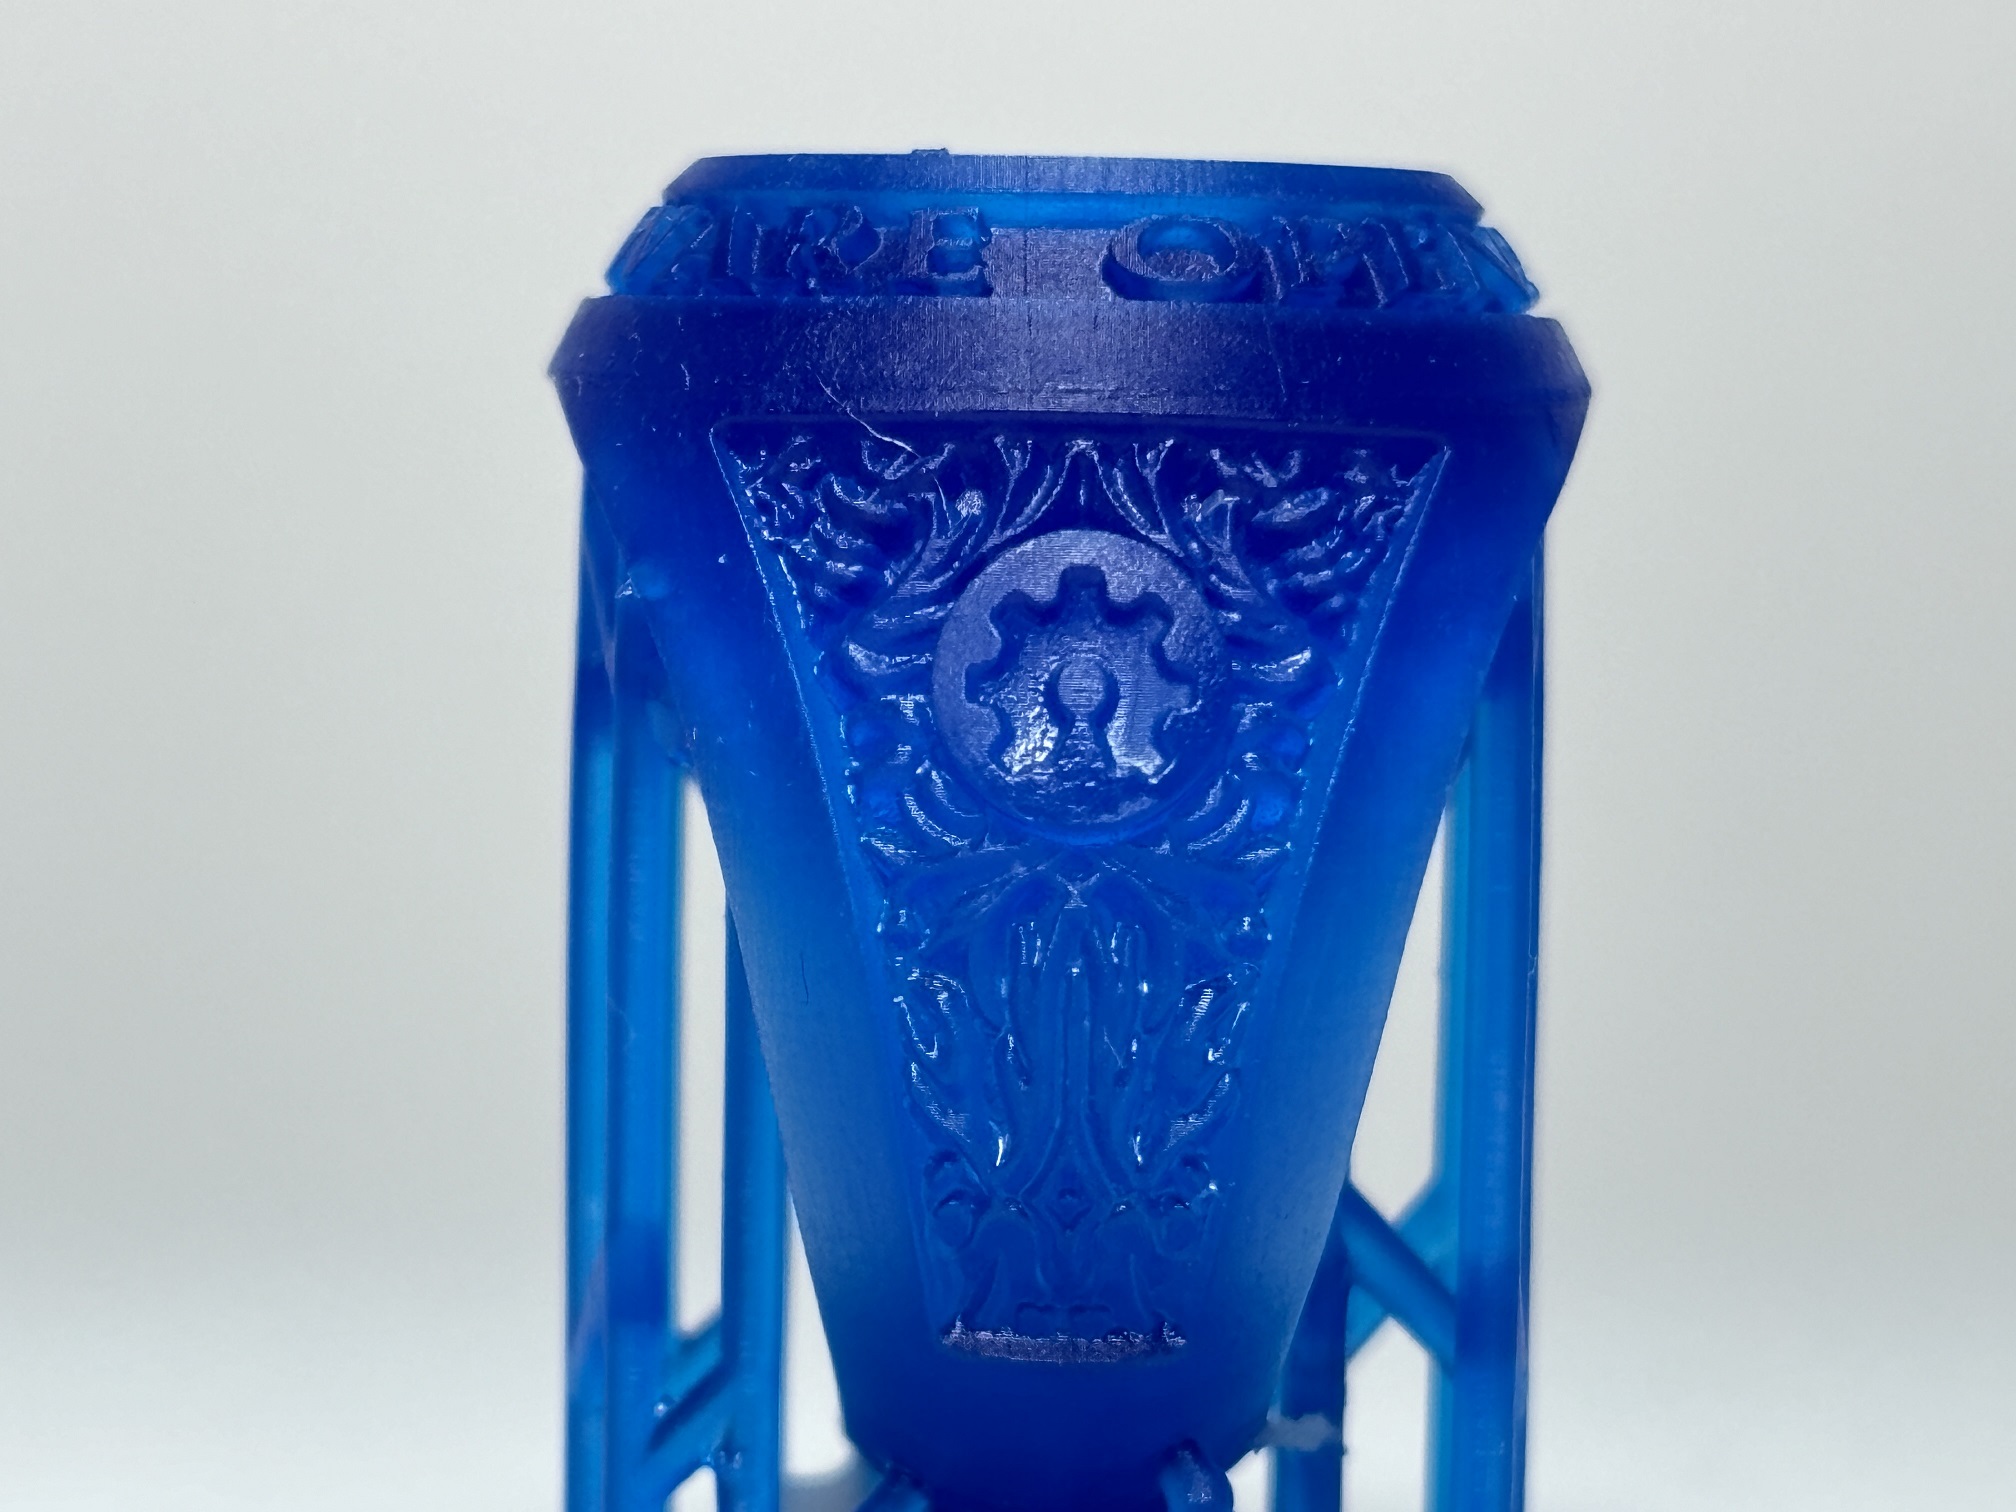
Liqcreate Wax Castable print with Anti-Aliasing level 8, Grey level 0, image blur off (A8G0B0).
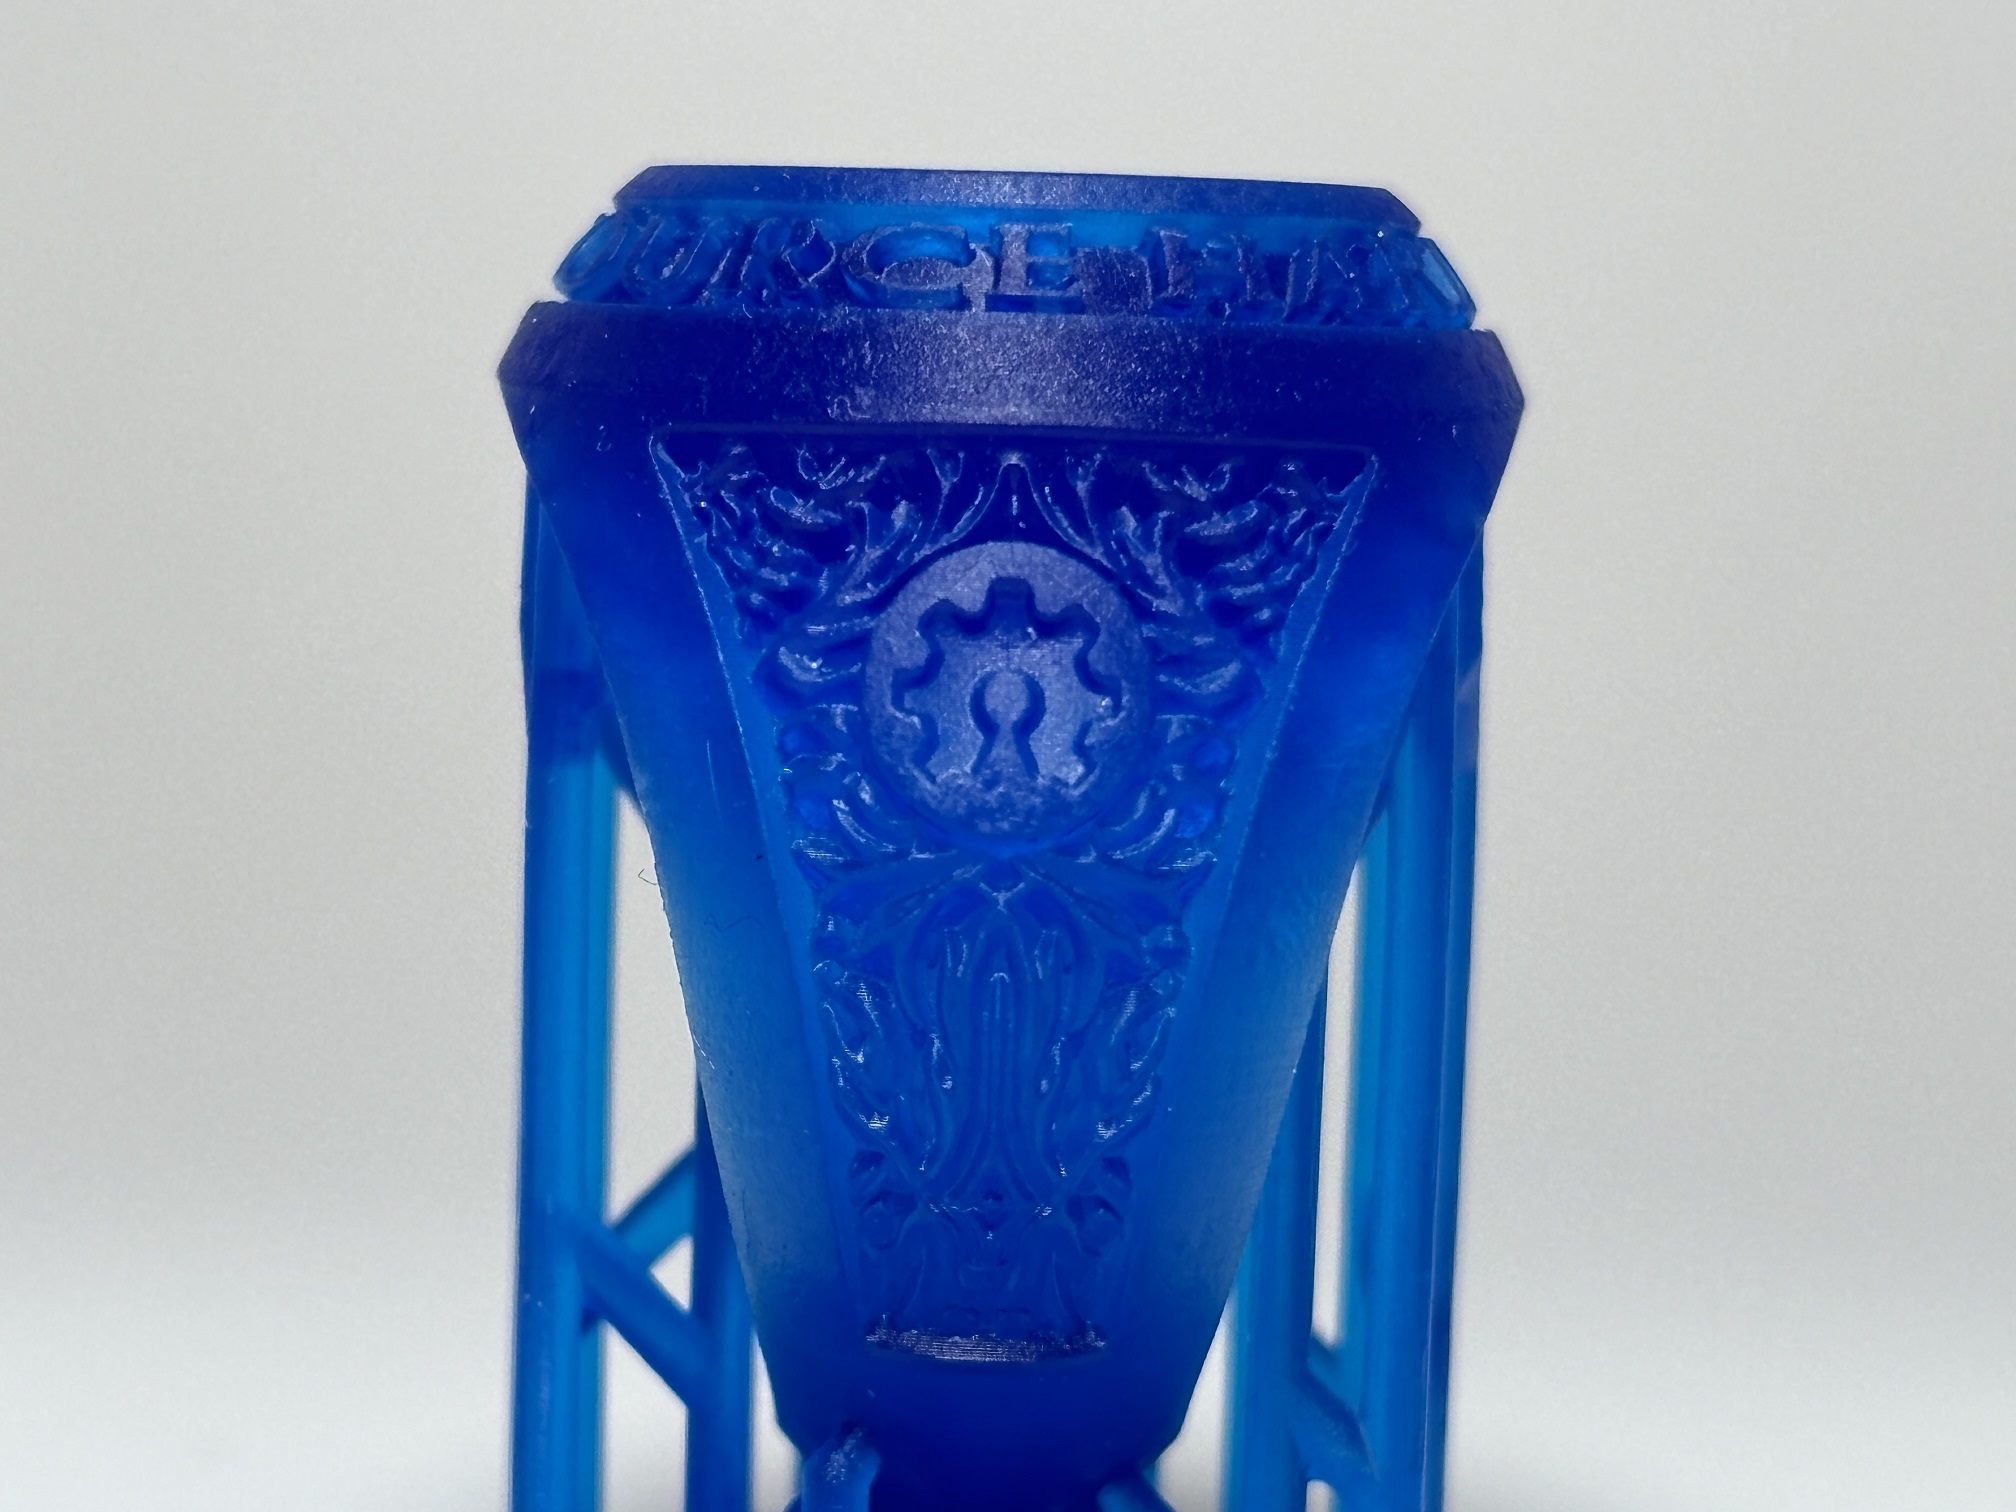
Liqcreate Wax Castable print with Anti-Aliasing level 8, Grey level 1, image blur off (A8G1B0, best one below for the Anycubic Photon D2 below)
Liqcreate Wax Castable print with Anti-Aliasing level 8, Grey level 2, image blur off (A8G2B0).
Conclusion smoothing Wax Castable resin 3D-printed parts on the Anycubic Photon D2 with Anti-aliasing and blur settings.
Again apologize for the sometimes not too clear pictures as the part gets smoother with higher anti-aliasing and blur levels and there is less contrast which makes it difficult to capture. From looking at the parts right in from of me, the image blur pixel setting did not do anything good. After the first test round we stopped using that. What we did see is that Anti-Aliasing level had a big influence. from 2 to 4 the pixels were more blurred and from 4 to 8 it was another improvement. After that we increased the Grey level from off to 1 and 2. here we also saw an decrease in pixel visibility. from Anti-Aliasing 8, Grey level 1 and 2 we did not see a significant difference that is why we choose our best one to be Anti-Aliasing level 8, Grey level 1 and Image Blur switched off.
over-all these settings are quite different from the best Anti-aliasing on the Mars 3. this could be due to the technology different of almost double pixel size that we had to blur. Likely a good starting point other LCD-based printers would be the Mars 3 settings. Hope this information was helpful and you can efficiently smoothen your jewelry wax castable parts!
Support
Do you need any help with 3D printing our SLA, DLP or LCD resins? We can help you! Just look for the question you have below. If you can’t find it, let us know by contacting us!
Technical →
Wax Castable
Liqcreate Wax Castable is a wax-based resin, perfect for manufacturing jewelry, dental and industrial parts using the direct investment casting method. Liqcreate Wax Castable is easy to use on open LCD, MSLA and DLP based 3D-printers in the range of 385 – 420nm. 3D-printed parts from this material captures intricate features and show crisp details. This wax-based material offers smooth surfaces with clean burnout for a reliable casting process. Create custom made elegant organic geometries according to your preferences with excellent casting for positive and negative engravings.
Key benefits |
3D-Printer compatibility |
| · High precision | · Asiga Max and Pro 4K |
| · Wax based | · Phrozen3D series |
| · Clean & ash-free burnout | · Elegoo & Anycubic series |
| · Excellent casting of engravings | · And many more |