After a part is resin 3d-printed it should be removed from the build plate. The resin 3D-printed part does not have its optimal properties and should be post-processed. It is advised to rinse the resin 3dprinted part at least 4 – 5 minutes in Liqcreate Resin Cleaner, IPA or (Bio) Ethanol, preferably ultrasonic or under agitation. After cleaning, gently remove the supports with a model cutter. The last step includes UV post-curing. After UV curing, it is possible to improve the aesthetics or function of the part. This optional post process step included sanding, polishing, priming and painting.
How to post process SLA / DLP / LCD resin 3d-printed parts?
It is necessary to post process resin 3D-printed parts to get the optimal properties out of your prints. If you use a stereolithography (SLA) 3D printer or a digital light processing (DLP) 3D printer, including LCD printers, it’s essential to know how to post-process. Especially if you have a lot of experience with FDM (Fused Deposition Modeling) 3D printing, better known as FFF (Fused Filament Fabrication) 3D printing. You will experience that you need a different workflow with SLA / DLP / LCD resin 3D printers.
When the correct steps are followed, post-processing enables printed parts to reach the optimal material properties. Additionally the end product will have the desired characteristics without a sticky surface. How to post process in a good way to have the perfect results? This document will give advice, based on the use of Liqcreate resin.
Before post process 3D-printed resin: safety first!
All 3D printable resins and green parts and therefore also Liqcreate resin should always be handled with care. Using the advised precautions like gloves, glasses and protective clothing. Regarding gloves, use nitrile gloves or neoprene gloves to protect your hands. Also be aware that printed parts can leave resin drops. A paper towel or sheets can be used to catch any resin drips. Till the last step of post-processing which includes curing in a high-power UV curing box / chamber, the resin is sensitive to UV light. The photopolymer resin will polymerize when exposed to UV light, so avoid this before post curing with UV light.
When working with Liqcreate resin, please be advised with the precautionary statements of the resin. Wash thoroughly after handling. If resin is on your skin, wash with plenty of water and soap. If resin is in your eyes, rinse cautiously with water for several minutes. Remove contact lenses if present and easy to do and continue rinsing. Dispose all safety items that have been in contact with liquid resin as chemical waste. Dispose in accordance with local/regional/national regulation. Avoid release to the environment. When resin is spilled, please know that after curing, the end product is polymer and can be treated as polymer waste. Wash contaminated clothing before reuse.
Unlike various other resins on the market, Liqcreate photopolymer resins are developed to be as user friendly as possible. Therefore, the resins have a manageable hazard classification and uses less hazard statements. Please be aware of the hazard statements, which are also displayed on the bottles of Liqcreate resin. Contact Liqcreate if there is any need for the Safety Data Sheet (SDS) of the resin in question.
Step 1: Remove the resin 3D-printed object from the build plate
When the 3D printer is finished and the object is printed, the un-clean and uncured resin print (the green part) needs to be removed from the build plate using a blade or other sharp tool. Unlike FDM / FFF 3D printing, please remove every print very gently from the platform. Be aware not to damage the 3D printer / the building platform. With this step, it is advised to keep the resin tank inside the machine.
During removing the parts, use nitrile gloves or neoprene gloves to protect your hands and lay out paper towels or sheets to catch any resin drips. When removing of prints will take more force than expected, please be careful not to slip and cut yourself or damage the 3d-printed part. Do not use water or any other cleaner to remove resin from the build platform. A paper towel can be used for cleaning the build plate. To have a better cleaning result, IPA or (Bio) Ethanol can be applied to the paper towel. Be aware not to damage the build platform.
Step 2: Cleaning the resin 3D-printed object
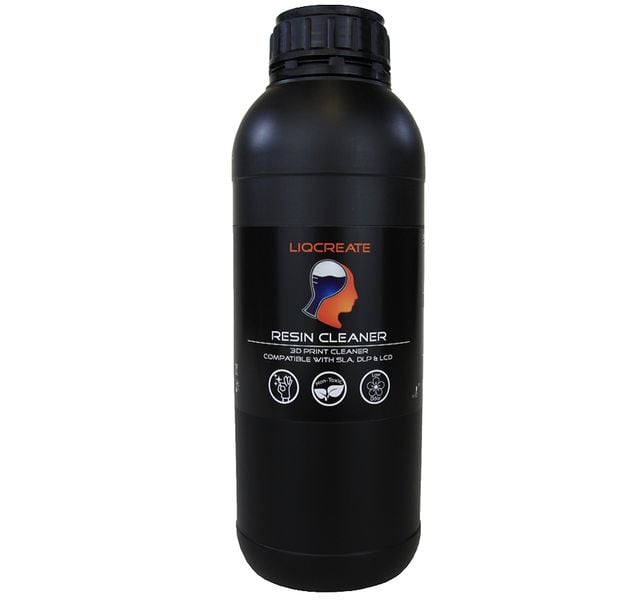
The green part will have some amount of resin on the surface after printing. To have a good end result with you resin print, cleaning is necessary. If the 3D printed object is not cleaned, the resin on the surface can distort the shape of the model. Also cured drips can be found and the part can be sticky at the end. To ensure a correct way of cleaning, the advise is to rinsing at least 4 – 5 minutes in Liqcreate Resin Cleaner, IPA or (Bio) Ethanol, preferably ultrasonic or under agitation.
When Liqcreate resins are used, it is preferable to use two cleaning containers for post-processing. The first will be the bath which can remove the most of the resin. The second, more clean bath, can be used for optimal cleaning of the green part. In this case, the second can be the ultrasonic bath. Make sure that there is enough Liqcreate Resin Cleaner, IPA or (Bio) Ethanol to completely cover the 3d-printed part or change the position of the object and follow the cleaning step again. Green parts could break or crack if they are exposed to cleaning solvents for longer than 20 minutes (resin dependant). After this cleaning step, make sure the parts are dry before post-curing. This can be done by placing the part in a well ventilated area for at least 30 minutes or use pressurized air for 2 minutes.
Please check the cleaning container(s) before cleaning the object. When the cleaning container is very contaminated, this can lead to non-precise surfaces and even surface defects. Also the end result after all steps can be a sticky object, which is not preferred.
Step 3: Remove the supports
Because of the cleaning step, the 3D print should have very little to no stickiness left on the surface. Gently remove the supports with a model cutter. The closer to the tips, the more easier to remove since the supports are pointed. Cutting supports off too close to the model may remove portions of the model, causing surface pitting.
After post curing, it is possible that any remains that are left behind from the supports are eliminated by sanding or polishing. Please do not try to sand or polish the object before post-curing. The surface will not be hardened before this last step and therefore the surface is too soft to sand or polish.
Some sources recommend removing the supports after post-curing. One of the advantages is that the object is clean and that no gloves are needed when touching the object. On the other hand, there are also disadvantages. When the supports are removed after post-curing, it is possible to damage the object or take off small divots of material. The supports are harder to remove, which will result to a lot of remaining of the supports.
Step 4: Post-cure the object
The last step includes curing in a high-power UV curing box / chamber for 15 minutes at 65 degrees Celsius. The preferred wavelength of the curing unit should be between 300 – 420 nanometres (nm). The 3D printer curing range of Liqcreate photopolymer resins is between 385 – 420 nm. If a low-power UV curing unit is used, it will need probably a longer curing time and the end result can lead to inferior part properties. Green parts need to be completely dry before post-curing.
Curing wet and or sticky parts can lead to parts with surface defects like a constant sticky surface. With Liqcreate Resin Cleaner, it is possible to wash with water to remove the resin cleaner. Make sure the object is dry before post-curing in a UV curing box, even when the object is washed with water. After proper post-curing the 3D printed part, it is safe to touch without gloves. When using a UV curing box / chamber especially made for 3D printing, please check the light source and what is possible in terms of temperature control.
Optional post processing
After the four mandatory steps of post-processing, it is possible to improve the aesthetics or function of the part. This optional post process step includes sanding, polishing, priming and painting. Keep in mind that this optional post process steps affects tolerances and details dramatically. Liqcreate resins have different characteristics and because of that, the post process steps like sanding and polishing will have better results on hard materials rather than on more soft materials.
All that remains is to wish you good luck with the post processes of your 3D object. If there are any questions, please contact Liqcreate: info@liqcreate.com.
Support
Do you need any help with 3D printing our SLA, DLP or LCD resins? We can help you! Just look for the question you have below. If you can’t find it, let us know by contacting us!